Aging cheese on your homestead is both an art and a science, requiring patience, precision, and the right environment. While traditional cheese caves offer rustic charm, modern homesteaders are discovering that convertible upright freezer/fridge units provide unparalleled control over the aging process. These versatile appliances bridge the gap between commercial aging rooms and makeshift basement setups, giving you professional-grade temperature manipulation without the professional-grade price tag or space requirements.
The beauty of convertible units lies in their dual-functionality—switching seamlessly between refrigeration and freezing modes while maintaining the upright configuration that makes organization intuitive. Unlike chest freezers that require awkward bending and digging, these units let you monitor your developing cheeses at eye level, reducing disturbance to the delicate microflora working their magic. Whether you’re crafting your first farmhouse cheddar or managing a diverse roster of bloomy rinds and washed rinds, understanding what features truly matter will transform your cheese-making from occasional hobby to consistent homestead production.
Top 10 Convertible Upright Freezer/Fridge Units for Homestead Cheese Aging
Detailed Product Reviews
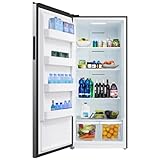
1. BANGSON Upright Freezer, 7.0 Cu.ft Stand Up Freezer, Convertible Upright Freezer/Refrigerator, Single Door for Kitchen,Garage, Office, Apartment, Black

Overview: The BANGSON 7.0 cubic foot upright freezer in black delivers versatile storage solutions for diverse settings. This convertible unit seamlessly transforms between freezer (-7.6°F to 6.8°F) and refrigerator (38°F to 47°F) modes, accommodating changing food storage needs. Measuring 21.5" x 23.3" x 56.0", it fits kitchens, garages, offices, or apartments while providing substantial capacity for bulk purchases and meal prep.
What Makes It Stand Out: Three freshness drawer boxes create dedicated zones for organized storage, while two integrated pulleys enable effortless repositioning. The reversible door adapts to any space configuration, and built-in handles maintain a sleek, uninterrupted facade. A removable door seal simplifies cleaning, and included accessories like an ice tray and defrost tool add immediate utility.
Value for Money: At $499.99, this model occupies the mid-range segment. The convertible functionality and mobility features justify the price, though manual defrosting feels dated. Competitors offer frost-free operation at similar prices, but few match this combination of capacity, conversion capability, and included accessories. The black finish commands a slight premium over lighter colors in the same line.
Strengths and Weaknesses: Strengths include versatile convertible design, compact footprint, organizational drawers, mobility pulleys, reversible door, and comprehensive accessories. Weaknesses involve manual defrost maintenance, basic mechanical controls limiting temperature precision, and the black finish showing fingerprints and dust prominently.
Bottom Line: This BANGSON freezer suits buyers needing flexible storage in climate-controlled spaces. The convertible feature adds real value, but commit to manual defrosting. Choose black only if the aesthetic matches your decor perfectly, as it requires diligent cleaning.
2. BANGSON Upright Freezer, 7.0 Cu.ft Stand Up Freezer, Convertible Upright Freezer/Refrigerator, Single Door for Kitchen,Garage, Office, Apartment, Silver

Overview: The silver variant of BANGSON’s 7.0 cubic foot convertible upright freezer delivers identical functionality to its black counterpart at a more attractive price point. This unit transitions between freezer (-7.6°F to 6.8°F) and refrigerator (38°F to 47°F) modes, serving kitchens, offices, apartments, and garages. Its 21.5" x 23.3" x 56.0" dimensions provide substantial storage while maintaining a modest footprint for space-constrained environments.
What Makes It Stand Out: The smudge-resistant silver finish offers practical maintenance advantages over darker colors while preserving all key features: three freshness drawers for organized storage, dual pulleys for mobility, reversible door for flexible installation, and built-in handles for clean aesthetics. The removable door seal and included ice tray and defrost tool enhance user convenience.
Value for Money: At $479.99, this silver model presents superior value compared to the black version, offering identical capabilities for $20 less. The finish’s practicality adds intangible value. However, the manual defrost requirement remains a competitive disadvantage against frost-free alternatives. For buyers prioritizing function over premium materials, this represents the sweet spot in BANGSON’s lineup.
Strengths and Weaknesses: Strengths mirror the black model: versatile conversion, compact size, organizational drawers, mobility features, reversible door, and useful accessories, plus a more forgiving finish. Weaknesses include manual defrosting, basic mechanical controls, and limited freezer temperature range.
Bottom Line: Select the silver version over black to save money and reduce cleaning efforts. It’s an excellent flexible storage solution for compact spaces, assuming you accept manual defrost maintenance. The finish makes it the practical choice in the BANGSON series.
3. BANGSON Upright Freezer,7.0 Cu.ft Stand Up Freezer,Convertible Upright Freezer/Refrigerator,Single Door for Kitchen,Office,Apartment,White

Overview: The white BANGSON 7.0 cubic foot convertible upright freezer stands as the most economical option in the brand’s lineup. This versatile unit switches between freezer (-7.6°F to 6.8°F) and refrigerator (38°F to 47°F) modes, effectively serving kitchens, offices, and apartments. At 21.5" x 23.3" x 56.0", it offers generous capacity while conserving floor space, with a bright white finish that visually expands smaller rooms.
What Makes It Stand Out: As the budget leader, it delivers the same convertible functionality and three freshness drawer boxes as pricier siblings. Two pulleys enable easy movement, while the reversible door and built-in handle provide installation flexibility and sleek aesthetics. The removable door seal simplifies maintenance, and included accessories add out-of-box value.
Value for Money: At $459.99, this white model undercuts its counterparts by $20-40 while providing identical core features. The savings are substantial for budget-conscious buyers. The manual defrost limitation is easier to accept at this price point. While frost-free units cost significantly more, this represents maximum value within BANGSON’s convertible range.
Strengths and Weaknesses: Strengths include the lowest price in the line, versatile convertible operation, compact footprint, three storage drawers, mobility pulleys, reversible door, and included accessories, plus a space-brightening finish. Weaknesses involve manual defrost, basic mechanical controls, and white surfaces potentially staining over time.
Bottom Line: The white BANGSON offers optimal value among its siblings. Choose this for flexible, compact storage if manual defrosting doesn’t deter you and you want maximum functionality per dollar spent. It’s the smartest BANGSON purchase.
4. KoolMore 7 Cu. Ft. Garage Ready Convertible Upright Manual Defrost Freezer/Refrigerator in Stainless Steel

Overview: The KoolMore 7 cubic foot convertible unit positions itself as a garage-ready workhorse built for extreme conditions. This appliance switches between refrigerator (34-50°F) and freezer (-11-10°F) modes in 180 minutes, offering versatility for varied storage demands. Its stainless steel construction and 0-110°F ambient temperature tolerance make it uniquely suited for garages, basements, and other challenging environments where standard units fail.
What Makes It Stand Out: True garage-ready certification distinguishes this model from pretenders. The durable metal interior and exterior withstand temperature swings and rough handling, while glass shelves provide superior spill containment and cleaning ease compared to wire racks. The reversible door offers placement flexibility, and mechanical controls ensure reliability without electronic vulnerabilities.
Value for Money: At $599.00, the KoolMore commands a premium over basic convertible units. The price is justified entirely by its garage-ready capabilities and stainless steel durability. For climate-controlled indoor use, the value proposition weakens against feature-rich competitors. However, no other unit at this price point reliably operates in uninsulated garages.
Strengths and Weaknesses: Strengths include genuine garage-ready performance, stainless steel construction, glass shelving, reversible door, wide operational temperature range, and mechanical simplicity. Weaknesses involve manual defrost maintenance, slow 180-minute conversion, imprecise temperature control, and limited interior organization features.
Bottom Line: The KoolMore excels as a rugged garage or basement appliance. If you require reliable operation in temperature extremes, this premium is mandatory. For indoor use, consider alternatives with more features. It’s a specialist tool, not an all-rounder.
5. Kenmore 21 Cu. Ft. (600L) Convertible Upright Freezer/Refrigerator | Garage-Ready | Frost-Free | Digital Touch Controls | Quick Freeze | LED Interior Light | White | For Basement Garage Shed Cottage

Overview: The Kenmore 21 cubic foot convertible freezer/refrigerator redefines premium storage with massive capacity and advanced features. This unit stores up to 735 lbs of food, transitioning seamlessly between modes via digital touch controls. Garage-ready construction with premium insulation ensures consistent operation in basements, garages, or cottages. The frost-free design and EnergyStar certification represent the pinnacle of convenience and efficiency.
What Makes It Stand Out: The cavernous 21 cu.ft capacity dwarfs all competitors. Auto-defrost functionality eliminates the chore of manual defrosting forever. Digital controls with LED display enable precise temperature management and instant mode switching. Quick Freeze rapidly chills new items, while door-open and high-temperature alarms protect valuable contents. LED interior lighting provides excellent visibility.
Value for Money: At $1,337.49, this is a substantial investment. The combination of frost-free operation, digital precision, massive capacity, garage-ready design, and EnergyStar efficiency justifies the premium. When valuing time saved from defrosting and the 2-year warranty, long-term value emerges for serious users. For large families, cost-per-cubic-foot is actually competitive.
Strengths and Weaknesses: Strengths include huge capacity, auto-defrost, digital controls, EnergyStar certification, garage-ready performance, LED lighting, safety alarms, Quick Freeze, and comprehensive warranty. Weaknesses involve high upfront cost, large physical footprint, and potential feature overkill for small households.
Bottom Line: For maximum storage with minimal maintenance, the Kenmore is unparalleled. It’s the premium choice for large families, serious bulk buyers, or garage/basement installations. The frost-free convenience alone warrants the upgrade for busy households. Invest if you need serious capacity.
6. KoolMore 7 cu. ft. Convertible Garage Ready Upright Freezer/Refrigerator in White (KM-RUF-7S)

Overview: The KoolMore KM-RUF-7S is a compact 7 cubic foot upright appliance that delivers impressive versatility for space-conscious households. This convertible unit seamlessly transitions between refrigerator (34-50°F) and freezer (-11-10°F) modes in just 180 minutes, making it ideal for garages, basements, or apartments where storage needs fluctuate seasonally.
What Makes It Stand Out: The garage-ready design sets this unit apart, operating efficiently in extreme ambient temperatures from 0-110°F. The reversible door installation provides placement flexibility in tight spaces, while the mechanical temperature control offers straightforward operation without complicated electronics. Adjustable shelves supporting 66 pounds each allow for customizable organization.
Value for Money: At $549, this KoolMore model hits a sweet spot for budget-conscious buyers needing garage-rated performance. While smaller than premium alternatives, it offers the same convertible functionality at roughly half the price of larger units. The robust temperature tolerance eliminates the need for climate-controlled spaces, saving on installation costs.
Strengths and Weaknesses: Strengths include garage-ready durability, reversible door, simple mechanical controls, and compact footprint. The 180-minute conversion time is reasonable for most users. Weaknesses are the smaller 7 cu ft capacity limiting bulk storage, manual temperature monitoring, and basic white finish that may not suit all décor.
Bottom Line: The KoolMore KM-RUF-7S excels as a reliable, no-frills convertible appliance for garages or secondary spaces. Its temperature resilience and affordable price make it perfect for homeowners needing flexible cold storage without premium costs.
7. SMETA Upright Freezer 18 Cu ft Convertible Freezers Refrigerator, Garage Ready Stand Up Frost-Free Freeerless Fridge with Tempered Glass Shelves SS

Overview: SMETA’s 18 cubic foot upright freezer delivers substantial storage capacity with sophisticated convertible functionality. This frost-free unit transitions between freezer (10°F to -11°F) and refrigerator (35-46°F) modes via an intuitive control panel, catering to large families or serious meal preppers who need flexible preservation options.
What Makes It Stand Out: The air-cool circulation system ensures precise temperature distribution and eliminates odors, while tempered glass shelves provide premium aesthetics and durability. The high-tech control panel features Quick Freeze mode, door-open alerts, and auto-lock after 30 seconds of inactivity. Adjustable legs and rolling wheels simplify installation and leveling.
Value for Money: Priced at $1,299, this SMETA model competes aggressively with mainstream brands offering similar capacity and features. The frost-free operation saves hours of manual defrosting annually, while the 12-month warranty provides peace of mind. For 18 cu ft of convertible, garage-ready storage, it represents solid mid-range value.
Strengths and Weaknesses: Strengths include large capacity, frost-free convenience, glass shelving, advanced controls, and garage-ready operation. The 32.8" width fits most spaces comfortably. Weaknesses include the premium price point, potential complexity for users preferring simpler mechanical controls, and stainless steel finish showing fingerprints.
Bottom Line: The SMETA 18 cu ft convertible freezer is an excellent choice for families needing versatile, large-capacity storage. Its advanced features and frost-free operation justify the investment for those prioritizing convenience and organization.
8. SMETA 21 Cu. Ft Freezer Upright, Stand Up Convertible All Refrigerator with Glass Shelves, Frost Free, Energy Saving, Led Light, Deep Tall Freezers Freezerless for Garage, Kitchen, Home, Office
Overview: This SMETA 21 cubic foot upright unit represents the brand’s flagship convertible freezer, offering cavernous storage capacity in a sleek stainless steel package. Designed for versatile placement, it functions as either a freezer (-0.04°F to -11.2°F) or refrigerator (33.8°F to 50°F), accommodating everything from bulk meat purchases to fresh produce overflow.
What Makes It Stand Out: The premium stainless steel exterior provides durability and modern aesthetics that complement any kitchen or garage. Frost-free technology eliminates manual defrosting permanently, while the fan-circulated compressor ensures consistent temperature distribution. Four door racks and adjustable feet maximize storage efficiency in varied locations.
Value for Money: At $1,399, this model commands a premium but delivers proportionate value through its substantial capacity and high-end finish. Comparable name-brand units often exceed $1,500, making this competitively priced for 21 cu ft of convertible storage. The stainless steel construction ensures longevity and adds resale value.
Strengths and Weaknesses: Strengths include massive capacity, attractive stainless finish, frost-free operation, and versatile placement options. The LED lighting enhances visibility. Weaknesses are the higher price point, significant floor footprint (32.8"W x 29.3"D x 76.8"H), and limited mention of advanced digital controls.
Bottom Line: The SMETA 21 cu ft convertible freezer is ideal for large households or bulk shoppers wanting premium aesthetics and maximum storage flexibility. Its frost-free convenience and durable construction justify the investment for serious food storage needs.
9. 21 cu.ft Upright Freezer, Freezer Upright Frost Free Upright Freezers with LED Display,Stainless Steel Convertible Refrigerator Freezer for Garage,Kitchen Use

Overview: This 21 cubic foot upright freezer delivers feature-rich performance for demanding households. The convertible design switches between freezer (-11°F to 10°F) and refrigerator (35°F to 46°F) modes, while unique additions like humidity-controlled crisper drawers and an LED display elevate it beyond basic cold storage solutions.
What Makes It Stand Out: The comprehensive alarm system alerts users to temperature fluctuations and open doors, protecting valuable food investments. Quick-freeze functionality rapidly preserves fresh groceries, and the LED display offers intuitive temperature management. Two rollers and adjustable leveling legs ensure stability on uneven garage or basement floors.
Value for Money: At $1,339, this unit undercuts competitors by $60-100 while offering comparable capacity and superior features like crisper drawers typically found in refrigerators. The alarm system adds security worth the premium alone, making it an excellent value proposition for attentive homeowners.
Strengths and Weaknesses: Strengths include large capacity, crisper drawers, alarm system, quick-freeze function, and LED display. The stainless steel finish resists wear. Weaknesses include ambiguous brand identity, slightly narrower temperature ranges than some competitors, and potential complexity for users wanting simple operation.
Bottom Line: This feature-packed 21 cu ft convertible freezer offers exceptional value for families wanting advanced monitoring and refrigerator-like organization. The alarm system and crisper drawers make it a standout choice for meticulous food preservers.
10. Upstreman 21.2 Cu.Ft. Convertible Upright Freezer, Large Capacity, Energy Star, Frost Free, Digital Touch Control Panel, Stainless-UF212

Overview: The Upstreman 21.2 cubic foot convertible upright freezer combines massive storage capacity with exceptional energy efficiency. This Energy Star certified appliance operates quietly while delivering dual-mode functionality, switching between freezer (-11.2°F to 10.4°F) and refrigerator (30.2°F to 50°F) settings via an advanced digital touch panel.
What Makes It Stand Out: Energy Star certification ensures this unit consumes significantly less electricity than standard models, translating to measurable utility bill savings. The fingerprint-resistant stainless steel door maintains a pristine appearance with minimal cleaning. Additional conveniences include fast freeze mode, door open alarms, and automatic control panel locking to prevent accidental changes.
Value for Money: At $1,399.99, the Upstreman carries a slight premium but recoups costs through energy savings over time. The 21.2 cu ft capacity and digital controls match or exceed competitors at similar price points. Long-term operational efficiency makes it financially savvy for environmentally conscious buyers.
Strengths and Weaknesses: Strengths include Energy Star efficiency, quiet operation, digital touch controls, fingerprint-resistant finish, and reversible door. The wide temperature range provides exceptional flexibility. Weaknesses are the highest price in this category, lesser-known brand recognition, and potential repair costs for complex digital systems.
Bottom Line: The Upstreman 21.2 cu ft freezer is the top choice for energy-conscious consumers wanting premium features and minimal environmental impact. Its quiet operation and efficiency justify the upfront investment for long-term savings.
Why Convertible Upright Units Revolutionize Home Cheese Aging
Convertible upright units fundamentally change the cheese aging game by solving the two biggest challenges homesteaders face: space efficiency and environmental control. Traditional aging solutions often involve repurposing old refrigerators (which lack precision) or building insulated closets with window AC units (which are energy hogs and humidity nightmares). The convertible design gives you a single appliance that adapts as your cheese-making skills evolve—starting as a dedicated aging fridge for soft cheeses, then converting to freezer mode when you need ultra-low temperatures for hard cheese rind development or pest prevention during summer months.
The vertical orientation matters more than you might think. Gravity plays a subtle role in cheese aging, affecting whey drainage and moisture distribution. Upright units allow you to position cheeses on flat, level shelves where they can develop evenly, rather than stacking them in piles that create pressure points and uneven aging. Plus, the ability to see all your wheels and wedges at a glance means you’ll catch problems early—surface mold that needs attention, cracks forming in the rind, or that perfect moment when a cheese reaches its peak.
Understanding the Science of Cheese Aging Requirements
Before diving into features, you need to grasp what your cheese actually needs to transform from fresh curd to complex, flavorful masterpiece. Different cheese families demand specific conditions, and no single environment suits everything simultaneously.
Temperature Precision: The Non-Negotiable Factor
Hard cheeses like Parmesan and aged Gouda thrive in the 50-55°F range, while bloomy rinds such as Brie prefer 45-50°F. Blue cheeses often need cooler temperatures around 40-45°F to control veining development. A variance of just 3-5 degrees can accelerate or stall aging dramatically, turning a 6-month project into a 3-month disappointment or a year-long wait. Convertible units with digital thermostats accurate to ±1°F give you the control that analog dials simply cannot match. Look for units that maintain steady temperatures without the wild swings common in standard refrigerators, which are designed for food preservation, not biological transformation.
Humidity Control: Where Most Home Setups Fail
Target humidity ranges from 75% for hard cheeses to 95% for washed rinds. Standard refrigerators run at a bone-dry 30-40%, designed to pull moisture out of food to prevent spoilage. This dehydration disaster cracks cheese surfaces and halts proper rind development. Convertible units intended for freezer duty typically have better seals and less aggressive air circulation, making them easier to humidify. The key is finding a unit whose fan system doesn’t constantly replace your carefully maintained moisture with dry kitchen air.
Air Circulation: The Overlooked Element
Stagnant air breeds undesirable molds and creates micro-pockets of varying humidity. Gentle, consistent air movement ensures even aging across all surfaces of your cheese. However, too much airflow—like the hurricane-force winds in frost-free freezers—dries surfaces too quickly. The ideal unit circulates air subtly, preventing dead zones without creating a wind tunnel. This is why understanding the internal fan system becomes critical in your selection process.
Key Features to Prioritize in Your Convertible Unit
Not all convertible units are created equal when it comes to cheese aging. Some excel at rapid conversion but sacrifice temperature stability. Others offer beautiful LED lighting but lack the shelving flexibility serious cheese makers need.
Digital Temperature Control Systems
Avoid units with simple “freezer/fridge” toggle switches. You need granular control, ideally in single-degree increments. Advanced units feature microprocessor-controlled systems that learn your usage patterns and adjust compressor cycling accordingly. This prevents the temperature overshoot that occurs when units switch modes—the compressor runs full-blast, potentially dropping your delicate Camembert to freezing before the thermostat catches up. Look for systems with programmable ramps that gradually approach target temperatures over several hours, mimicking the slow seasonal changes of traditional caves.
Rapid Conversion Technology
While slow temperature changes are ideal for aging cheese, sometimes you need to switch modes quickly—perhaps you’re done aging a batch of hard cheese and need freezer space for a meat harvest. The best units can transition from fridge to freezer in under two hours without stressing the compressor. This flexibility means your investment serves multiple homestead functions throughout the year, maximizing utility in small spaces. Check specifications for “fast freeze” or “quick cool” functions that accelerate the conversion process when needed.
Adjustable Shelving Configurations
Standard wire shelves might work for frozen pizzas, but they wreak havoc on cheese aging. Cheese needs solid, non-porous surfaces that won’t harbor bacteria between batches. Look for units with easily removable shelves that you can replace with custom-cut food-grade plastic, stainless steel, or even wooden boards (though wood requires meticulous sanitation). The ability to adjust shelf height in small increments—every inch rather than every three inches—lets you accommodate tall tomme wheels and flat reblochons in the same unit.
Interior LED Lighting Considerations
Ultraviolet light destroys the beneficial molds and bacteria you’re cultivating. Standard refrigerator bulbs emit UV rays that bleach rinds and kill surface flora. If your unit comes with interior lighting, ensure it’s warm-spectrum LED that you can disable entirely. Many cheese makers prefer units with no internal lighting, using a headlamp for inspections instead. The small heat generated by lights also creates temperature gradients, so a dark interior maintains more uniform conditions.
Sizing Your Unit for Current and Future Needs
Homestead cheese production has a way of growing exponentially. That 3.5-cubic-foot unit that perfectly holds your first four-pound cheddar wheel suddenly feels cramped when you’re experimenting with five varieties simultaneously.
Measuring Your Homestead Cheese Production
Calculate your average monthly cheese output in pounds, then multiply by three to account for varying aging timelines. A wheel of hard cheese might occupy space for 6-12 months, while fresh cheeses rotate weekly. Generally, you need about 0.5 cubic feet per pound of aging cheese when properly spaced on shelves. Don’t forget headspace—cheeses shouldn’t touch walls or each other, as this creates moisture traps and uneven rind development. If you’re making 10 pounds of cheese monthly with average 4-month aging, you need roughly 20 cubic feet of capacity.
Spatial Constraints in Your Processing Area
Upright units need proper ventilation clearance—typically 2-3 inches on sides and back, plus 6-12 inches above. Measure your intended location carefully, accounting for door swing. A unit that opens left-to-right might block a hallway or countertop. Some models offer reversible doors, crucial for tight homestead layouts. Consider ceiling height too; units over 70 inches tall can be difficult to access on top shelves without a step stool, increasing the risk of dropping precious aged wheels.
Energy Efficiency for Off-Grid and Sustainable Operations
Every homesteader watches power consumption, whether you’re grid-tied with solar aspirations or already living off-grid. Cheese aging runs 24/7 for months, making efficiency paramount.
Understanding Energy Star Ratings in Convertible Mode
Energy Star ratings are typically calculated in refrigerator mode only. The true test is how efficiently a unit operates when maintaining 50°F—a temperature most refrigerators never see. Compressors work harder when temperature differentials are smaller, ironically using more energy to stay cool-but-not-cold. Look for units with variable-speed compressors that adjust output rather than cycling on/off constantly. These maintain steady temperatures with less energy and reduce the mechanical stress that leads to premature failure.
Solar Compatibility Considerations
If you’re running on solar, inverter capacity matters. Standard compressor motors have high startup surges—sometimes 3-5 times their running wattage. A unit that draws 150 watts continuously might spike to 600 watts when the compressor kicks on. This can trip inverters or drain battery banks unexpectedly. Modern units with “soft start” compressors ramp up gradually, reducing surge loads by up to 70%. For off-grid setups, this feature is worth prioritizing over almost any other specification.
Humidity Management Modifications
Even the best convertible unit will need humidity help. The goal is creating a microenvironment within the larger appliance.
Installing Passive Humidity Controls
Start simple: open containers of water on the bottom shelf add baseline moisture. For more control, saturate terra cotta humidor stones or clean sponges and place them in shallow trays. These release moisture gradually as the air dries. The unit’s own evaporator pan can be leveraged—clean it thoroughly and add water manually to boost humidity. Some cheese makers line the bottom with damp (not wet) salt bricks, which release moisture slowly and add beneficial minerals to the air.
Active Humidification Systems Integration
For serious aging, bypass passive methods. Ultrasonic humidifiers designed for reptile terrariums work brilliantly—they’re compact, adjustable, and run on low voltage. Mount one in a corner, run the power cord through the door seal (it compresses fine), and set it to maintain 85% humidity. Use a remote hygrometer to monitor levels without opening the door. The unit’s compressor cycling will create natural humidity fluctuations; program your humidifier to compensate during cooling cycles when moisture gets pulled from the air.
Drainage Solutions for Excess Moisture
Too much humidity causes slimy rinds and unwanted bacterial growth. Your unit needs a way to remove excess moisture. Most freezers have a drain plug at the bottom—remove it and place a shallow pan underneath. Elevate your cheeses slightly above the bottom shelf using small racks to prevent them from sitting in condensation. Some cheese makers install a small computer fan near the drain to encourage evaporation during high-humidity periods, creating a gentle airflow that mimics natural cave ventilation.
Shelving and Organization Strategies
How you arrange cheeses inside your unit directly impacts their development. Poor organization creates temperature gradients and cross-contamination risks.
Wire vs. Solid Shelving for Cheese Aging
Standard wire shelves allow air circulation but can leave grid marks on soft cheese surfaces. They also drip condensation onto cheeses below. Solid shelves provide stable platforms but can block airflow, creating dead zones. The hybrid solution: solid shelves with drilled 1/4-inch holes every 2 inches, allowing air passage without surface marking. Cover these with food-grade mesh mats for soft cheeses that need extra support. Remove all but essential shelves to maximize vertical space—most units come with too many shelves for cheese aging needs.
Creating Micro-Climates Within Your Unit
Position cheeses strategically based on their needs. The top shelf runs warmest (heat rises), making it ideal for bloomy rinds that prefer 50-55°F. The bottom shelf stays coolest and most humid, perfect for washed rinds. Hard cheeses in the middle shelves benefit from stable, moderate conditions. Use small, open-weave baskets to group similar cheeses, allowing you to move entire batches during inspections without handling each wheel individually. Place a small bowl of water on the top shelf and salt on the bottom to create a natural humidity gradient.
Temperature Zone Creation for Multi-Cheese Operations
Serious homesteaders rarely age just one cheese type. Creating distinct temperature zones within a single unit expands your repertoire without buying multiple appliances.
Upper vs. Lower Shelf Temperature Variations
Even in a well-designed unit, temperature naturally stratifies by 3-5°F from top to bottom. Use this to your advantage. Place thermometers on each shelf and map the temperature profile. You might find the top shelf holds 52°F while the bottom maintains 47°F—perfect for simultaneously aging a tomme (top) and a blue cheese (bottom). During winter, when ambient temperatures drop, the stratification lessens; adjust cheese placement accordingly. Some cheese makers install small, battery-powered circulating fans (like those used in computer cases) to mix air when they need more uniform conditions.
Using External Controllers for Precision
Plug your convertible unit into an external temperature controller for ultimate precision. These devices override the internal thermostat, cycling power to the unit to maintain exact temperatures. Models like the Inkbird or Johnson Controls units offer programmable differentials, preventing the short-cycling that kills compressors. Set the unit to its coldest setting, then let the external controller handle the fine-tuning. This approach also solves the problem of units that won’t maintain temperatures above 35°F in fridge mode—simply disable the internal thermostat entirely.
Defrosting Systems and Their Impact on Cheese
The automatic defrost cycle is the arch-nemesis of consistent cheese aging. Understanding and managing it is crucial.
Frost-Free vs. Manual Defrost: Which is Better?
Frost-free freezers cycle a heating element every 6-12 hours to prevent ice buildup. This temperature spike—sometimes 10-15°F for 20 minutes—can shock developing cheeses and disrupt mold growth. For aging, manual defrost units are superior. Yes, you’ll need to defrost manually every few months, but the temperature stability is worth the hassle. If you must use a frost-free model, time your defrost cycles. Many units run them on a timer; plug the unit into a timer that cuts power during the scheduled defrost, then manually defrost when your cheese inventory is low.
Managing Condensation During Defrost Cycles
When defrosting occurs, moisture releases from the evaporator coils, raising humidity to near 100% temporarily. This can flood cheese surfaces and wash away cultivated molds. Install a temporary drip shield—a piece of angled plastic sheeting above your top shelf—to deflect condensation away from cheeses. Place desiccant packs (food-safe silica gel) in the unit during defrost to absorb excess moisture. Better yet, schedule major cheese inspections during defrost cycles; the temporary humidity spike makes rinds more pliable and easier to clean or patch.
Noise Levels and Location Considerations
That humming appliance becomes part of your homestead’s soundscape for months. Choose wisely, or you’ll hear about it from family members.
Decibel Ratings That Matter
Convertible units typically run 38-45 decibels—about as loud as a library. However, cheap models can hit 50+ decibels with rattling compressors and buzzing fans. This matters if your unit lives in a mudroom adjacent to living spaces. Look for units with “quiet operation” or “low noise” designations. The compressor location affects noise too; bottom-mounted compressors vibrate through floors, while rear-mounted units radiate sound into the room. Place your unit on anti-vibration pads (the kind used for washing machines) to reduce noise transmission through floor joists.
Ventilation Requirements for Optimal Performance
These units need breathing room. The compressor and condenser coils release heat, and restricted airflow forces the unit to work harder, shortening its lifespan. Maintain at least 3 inches of clearance on sides and back, and never enclose the unit in a cabinet without proper venting. In hot climates, consider a small exhaust fan behind the unit to pull away heat, especially during summer when ambient temperatures push the compressor to its limits. Some homesteaders build simple louvered enclosures that hide the unit while ensuring airflow, creating a professional appearance without sacrificing function.
Installation and Setup Best Practices
Proper installation determines whether your cheese aging succeeds or fails before you even add the first wheel.
Proper Clearance for Heat Exchange
Measure twice, install once. The unit’s backside contains condenser coils that need airflow. Pushing it against a wall traps heat, causing temperature instability and compressor failure. In tight spaces, install a small computer fan on a thermostat that activates when temperatures behind the unit exceed 80°F. This simple addition can extend compressor life by years. Leave the top completely uncovered; heat rises from the compressor and needs to dissipate. That decorative cutting board or basket you want to place on top? Don’t.
Electrical Requirements and GFCI Protection
Most units run on standard 120V circuits, but cheese aging demands consistent power. Plug your unit into a dedicated circuit if possible, avoiding the voltage drops that occur when someone runs the microwave on the same line. Install a GFCI outlet if your unit is in a potentially damp location like a basement or root cellar. While GFCIs can nuisance-trip, modern units with clean compressors rarely cause issues. Keep a battery-powered alarm on the unit; if power fails and you’re away, you’ll know before losing months of aging cheese.
Leveling for Optimal Door Seal
An unlevel unit prevents the door gasket from sealing properly, creating air leaks that destroy humidity control and temperature stability. Use a bubble level on the floor of the unit, not the top. Adjust the feet until perfectly level side-to-side and front-to-back. A slight backward tilt (1/4 inch) actually helps door seals by letting gravity pull the door closed, but too much tilt causes door contents to slide. Test the seal by closing the door on a dollar bill; you should feel resistance when pulling it out at all points around the gasket.
Maintenance Protocols for Longevity
Your cheese aging unit runs continuously for months. Neglect maintenance and you’ll contaminate batches or face premature failure.
Cleaning Without Disrupting Aging Cycles
Never empty the entire unit for cleaning. Instead, rotate cheeses shelf by shelf. Move one shelf’s contents to a cooler with ice packs, clean that shelf with a mild vinegar solution (never bleach, which lingers), dry thoroughly, replace cheeses, then move to the next shelf. This maintains stable conditions for the majority of your inventory. Clean door gaskets monthly with a baking soda paste to prevent mold growth in the folds. Vacuum condenser coils every three months; dust buildup reduces efficiency by up to 30% and forces the compressor to run hotter.
Preventing Mold Cross-Contamination
Different cheese molds can wage war inside your unit. Blue cheese spores are particularly aggressive and can colonize your Brie. Use physical barriers: store strong mold cheeses in perforated plastic boxes (like those used for produce) that allow air exchange but contain spores. Label everything with cheese type and start date using waterproof labels. Rotate stock so you’re handling each cheese at least weekly, inspecting for cross-contamination. If you spot unwanted mold colors (black, pink, orange), immediately isolate that cheese and sanitize its storage area with distilled white vinegar.
Filter Replacement Schedules
If your unit has an air filter (common in higher-end models), replace it every six months, not annually as the manual suggests. Cheese aging produces ammonia and other gases as proteins break down; these filters saturate faster than in normal food storage. A clogged filter restricts airflow, creating dead zones. Keep a spare filter on hand; they’re often proprietary and hard to source locally. Mark replacement dates on your calendar alongside cheese flip schedules.
Cost Analysis and Budget Planning
The sticker price is just the beginning. Understanding total cost of ownership prevents budget surprises.
Initial Investment vs. Long-Term Savings
A quality convertible unit costs $400-$800, significantly less than building a dedicated cheese cave ($2,000+). Factor in the cost of external temperature controllers ($50-100), humidity monitoring equipment ($30), and shelving modifications ($40). Compare this to the cost of cheese: at $20+ per pound for artisan cheese, aging just 40 pounds of your own cheese recoups the entire investment. The unit pays for itself within the first year for active cheese makers.
Hidden Costs of DIY Cheese Caves
Many homesteaders balk at appliance costs and consider DIY alternatives. But factor in insulation, vapor barriers, cooling systems, humidity controls, and the inevitable do-overs as you learn. A DIY cave often costs more in materials and time than a convertible unit, with inferior results. The unit’s portability is another savings; if you move or reconfigure your homestead processing area, it moves with you. Built-in caves become permanent fixtures that may not suit future needs.
Common Mistakes Homesteaders Make
Learning from others’ errors saves you months of frustration and pounds of ruined cheese.
Overloading Capacity Limits
Cramming too many cheeses into your unit restricts airflow, creating variable conditions. Follow the 50% rule: fill no more than half the available shelf space. Cheeses need breathing room around each wheel. Overloading also stresses the compressor, which must work harder to cool a dense mass of cheese versus empty air. Your energy consumption increases disproportionately. Better to age less cheese properly than more cheese poorly.
Ignoring Seasonal Ambient Temperature Swings
That unit maintaining perfect 50°F in your 65°F basement will struggle when summer pushes the room to 85°F. Summer heat waves can raise internal temperatures by 5-8°F even with the compressor running constantly. Plan seasonal cheese types: age hard cheeses in winter when ambient cool helps efficiency, and switch to fresh cheeses in summer when you can use the unit’s freezer mode for butter and meat storage. Or install a small vent fan that pulls cool nighttime air into your cheese room during summer, reducing the unit’s workload.
Inadequate Monitoring Systems
Relying on the unit’s built-in thermostat display is like driving by only looking at the speedometer—it’s a lagging indicator. Install remote wireless thermometers/hygrometers with alerts that ping your phone when conditions drift. Place sensors on multiple shelves to catch temperature stratification. Log readings daily for the first month to understand your unit’s personality—how it responds to door openings, defrost cycles, and ambient changes. This data becomes invaluable for diagnosing issues before they ruin cheese.
Frequently Asked Questions
How long does it typically take to convert a freezer to fridge mode for cheese aging?
Most modern convertible units complete the transition in 2-4 hours, but you should wait 24 hours before adding cheese. This allows temperatures to stabilize and lets you monitor for any unexpected fluctuations. The compressor needs several cycles to adapt to the new settings, and humidity levels won’t normalize until the interior surfaces reach equilibrium. Use this waiting period to calibrate your thermometers and set up humidity controls.
Can I age different cheese types in the same unit simultaneously?
Yes, but with strategic planning. Create distinct zones using the natural temperature stratification from top to bottom. Store aggressive blue cheeses in sealed perforated boxes to contain their spores. Never age strong aromatic cheeses like Limburger alongside delicate bloomy rinds—the aromatics can permeate other cheeses. Maintain at least 6 inches of space between different cheese types, and consider wrapping mild cheeses in cheese paper as an additional barrier.
What’s the ideal humidity level for most homestead cheese aging?
For beginners, target 80-85% humidity as a compromise. Hard cheeses tolerate 75-80%, while soft cheeses prefer 90-95%. At 85%, you can successfully age a variety of styles with slight modifications—wrap harder cheeses loosely in cheese paper to retain more moisture, and place soft cheeses near your humidification source. Invest in a reliable hygrometer; analog dial units are often inaccurate by ±10%, while digital units with calibration capabilities provide precision.
How often should I check on my aging cheese?
Inspect cheeses weekly for the first month, then bi-weekly thereafter. Flip wheels each time you inspect to ensure even rind development. Each inspection should be brief—open the door, visually scan, flip what’s needed, and close within 2-3 minutes. Longer openings destabilize conditions. Keep a logbook noting appearance, aroma, and any mold development. This creates a valuable reference for future batches and helps you identify patterns in your aging environment.
Will opening the door frequently ruin my cheese?
Occasional openings cause minor, temporary fluctuations that won’t harm developing cheese if you minimize duration. The real damage comes from leaving the door open while you hunt for a specific wheel. Organize cheeses logically—hard cheeses on middle shelves, soft on top, washed rinds on bottom—so you can grab what you need quickly. Install a door alarm that beeps after 30 seconds open; this trains you to be efficient and alerts you to accidentally ajar doors.
Can I use a regular refrigerator instead of a convertible unit?
Standard refrigerators are designed to remove humidity and maintain temperatures around 35-38°F—too cold for most cheese aging. Their powerful air circulation dries cheese surfaces rapidly. While you can modify a regular fridge with external controllers and humidifiers, convertible units are engineered with better insulation and less aggressive cooling systems, making them inherently more suitable. The price difference is often negligible when you factor in modification costs.
How do I prevent unwanted mold growth in my aging unit?
Maintain proper humidity and airflow to favor desirable cheese molds over random airborne contaminants. Clean all surfaces monthly with diluted vinegar solution. Ensure cheeses aren’t touching each other or the walls. If black or pink mold appears, remove the affected cheese immediately and sanitize the area. Some cheese makers keep a small bowl of white vinegar in the unit at all times; the acetic acid vapors inhibit unwanted molds without affecting cheese development.
What’s the best way to handle power outages during aging?
A full unit of cheese stays cold longer than an empty one. During outages, keep the door closed—temperatures will rise only 2-3°F per hour if unopened. For extended outages, place frozen water bottles inside to act as thermal mass. If you live in an outage-prone area, invest in a small generator or battery backup system. The key is maintaining temperatures below 60°F; most cheeses tolerate brief periods at this temperature without adverse effects.
How long will a convertible unit last when used for cheese aging?
With proper maintenance, expect 10-15 years of service. Cheese aging is less demanding than freezer duty since the compressor cycles less frequently. The biggest wear factor is door openings; minimize these and your unit will outlive its warranty significantly. Keep coils clean and ensure proper ventilation. Many homesteaders report 20+ years from quality units used exclusively for cheese aging. The external temperature controller actually reduces wear by preventing the unit’s thermostat from short-cycling.
Can I convert the unit back to normal freezer use after aging cheese?
Absolutely, and this flexibility is a major advantage. Clean the unit thoroughly with baking soda solution to remove cheese aromas. Remove any humidity modifications and dry completely. Run the unit empty at maximum cold for 24 hours to sanitize. The cheese-aging environment is actually cleaner than normal food storage since you’re maintaining controlled conditions and inspecting regularly. Many homesteaders alternate between cheese aging in fall/winter and bulk meat storage in spring/summer, maximizing their investment year-round.