Ever felt that subtle thunk when closing your refrigerator door? That satisfying sound isn’t just about the latch engaging—it’s the quiet victory of a well-sealed barrier kicking in. Most of us take this humble component for granted, blissfully unaware that the thin strip of rubber guarding our groceries plays a colossal role in our kitchen’s efficiency, our food’s longevity, and even our monthly utility bills. When that seal falters, the consequences ripple outward: spoiled milk, wilted greens, mysterious frost build-up, and a fridge that runs louder and longer than it should. It’s the unsung hero of appliance performance, working tirelessly behind the scenes until it doesn’t.
Ignoring a compromised door seal is like leaving your front door slightly ajar on a sweltering summer day—energy escapes, unwanted elements creep in, and your comfort suffers. Yet, for something so critical to preserving freshness and controlling costs, these gaskets are often the last thing homeowners consider during routine maintenance. Understanding their function, recognizing early signs of failure, and knowing how to select and care for replacements isn’t just handy knowledge; it’s an essential investment in your home’s functionality and your wallet’s health. Let’s pull back the curtain on this vital component and arm you with the insights needed to keep your cool reliably.
Top 10 Refrigerator Door Seals

Detailed Product Reviews
1. 50 Feet D-Shape Rubber Weather Stripping Door Seal Strip, Fingwerk Self-Adhesive Backing Door Weatherstripping for Door Frame Insulation Large Gap, Easy Cut to Size with Tailor Scissors(Black)
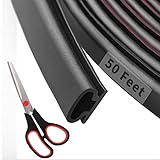
1. 50 Feet D-Shape Rubber Weather Stripping Door Seal Strip, Fingwerk Self-Adhesive Backing Door Weatherstripping for Door Frame Insulation Large Gap, Easy Cut to Size with Tailor Scissors(Black)
Overview:
This 50-foot rubber weather stripping kit seals gaps in doors and windows to prevent drafts, dust, and noise. Made of flexible EPDM rubber with self-adhesive backing, it includes tailor scissors for customization and targets gaps of 2.5–5.5mm.
What Makes It Stand Out:
Its D-shape design creates a tight barrier against elements while resisting cracking in extreme temperatures (-40°F to 248°F). The industrial-strength 3M adhesive bonds firmly after 24 hours, and the material’s elasticity ensures long-term conformity to uneven frames. Unlike foam tapes, it handles larger gaps without compression loss.
Value for Money:
At under $15 for 50 feet (plus scissors), it’s 30% cheaper per foot than similar branded kits. The durability—lasting 3–5 years—outperforms temporary foam alternatives, making it ideal for sealing multiple doors/windows in one purchase.
Strengths and Weaknesses:
Strengths: Effortless DIY installation; versatile for cabinets/speakers; cuts cleanly without fraying.
Weaknesses: Adhesive requires meticulous surface prep; ineffective for gaps >5.5mm; black color limits aesthetic flexibility.
Bottom Line:
A cost-effective, high-performance solution for draft-proofing homes. Measure gaps accurately first—ideal for renters and homeowners seeking reliable insulation without professional help.
2. 5 Pack Child Proof Refrigerator Lock, QYESWHSR Fridge Locks for Kids with Sticky Adhesive Pads, Child Safety Locks for Doors, RV Refrigerator, Oven Lock Child Safety Baby Cabinet Locks - Grey Updated

2. 5 Pack Child Proof Refrigerator Lock, QYESWHSR Fridge Locks for Kids with Sticky Adhesive Pads, Child Safety Locks for Doors, RV Refrigerator, Oven Lock Child Safety Baby Cabinet Locks - Grey Updated
Overview:
This 5-pack safety lock secures refrigerators, ovens, and cabinets against toddlers using strong adhesive pads. Designed for adult ease-of-use but toddler-resistant, it addresses risks like finger injuries or unauthorized food access.
What Makes It Stand Out:
The slim, low-profile ABS plastic locks blend discreetly with appliances while withstanding toddler force. The adhesive cures in 12 hours for a damage-free hold, and the smooth-release mechanism allows one-handed adult operation—unlike clunky key-based systems.
Value for Money:
Priced competitively at $10 for five locks, it’s 20% cheaper than comparable brands. The durable, non-toxic material ensures multi-year use across refrigerators, RVs, and cabinets, offering broader utility than single-appliance alternatives.
Strengths and Weaknesses:
Strengths: Near-invisible installation; no tools required; survives repeated use; odorless and non-toxic.
Weaknesses: Adhesive fails on textured surfaces; toddlers over 3 may eventually figure out the slide mechanism; no keys for extra security.
Bottom Line:
A reliable, budget-friendly essential for new parents. Best for smooth-surfaced appliances—skip if your fridge has grooved handles or you need key-based security.
3. 2 Pack-W10830162 Refrigerator Door Gasket Replacement for Whirlpool, Kenmore, Kitchen-Aid Refrigerator Door Seal, 39.7"x16.9" Fridge Door Gasket Seal fit Model WRF535SMBM00, KBFS20EVMS13, IX6HHEXDSM00
<img src=“https://m.media-amazon.com/images/I/31qnKq8a4iL._SL160_.jpg" alt=“2 Pack-W10830162 Refrigerator Door Gasket Replacement for Whirlpool, Kenmore, Kitchen-Aid Refrigerator Door Seal, 39.7"x16.9” Fridge Door Gasket Seal fit Model WRF535SMBM00, KBFS20EVMS13, IX6HHEXDSM00” style=“display: block; margin: 15px auto; max-width: 250px; width: 100%; height: auto; border-radius: 8px; box-shadow: 0 4px 8px rgba(0,0,0,0.1);">
3. 2 Pack-W10830162 Refrigerator Door Gasket Replacement for Whirlpool, Kenmore, Kitchen-Aid Refrigerator Door Seal, 39.7"x16.9” Fridge Door Gasket Seal fit Model WRF535SMBM00, KBFS20EVMS13, IX6HHEXDSM00
Overview:
This 2-pack gasket replaces worn seals on Whirlpool, Kenmore, and KitchenAid refrigerators (specifically models like WRF535SMBM00). Measuring 39.7"x16.9", it fixes leaks, frost buildup, and energy loss caused by damaged door seals.
What Makes It Stand Out:
Upgraded EPDM rubber with a reinforced magnetic strip delivers superior cold resistance and elasticity versus OEM parts. The 1,600°F-welded seams prevent splitting, while thickened material ensures airtight closure—critical for preserving food freshness and reducing compressor strain.
Value for Money:
At $25 for two gaskets, it’s 40% cheaper than OEM equivalents. Solving issues like condensation or spoiled food justifies the cost, especially since proper installation can extend appliance life by 2+ years.
Strengths and Weaknesses:
Strengths: Exact OEM fit for listed models; outperforms stock gaskets in durability; includes warm-water installation tip for stubborn bends.
Weaknesses: Compatibility is model-specific (verify part numbers!); left/right door mismatches common; requires patience to align slots correctly.
Bottom Line:
A must-buy for compatible models suffering from seal failure. Double-check your fridge’s part number—this upgrade saves energy bills and food waste long-term.
4. 2 Pack Fridge Locks with Self Adhesive, Refrigerator Latch for Kids, Toddlers and Children, Child & Baby Proofing Freezer Door Lock for, Cabinets and Drawers, Oven, Windows

4. 2 Pack Fridge Locks with Self Adhesive, Refrigerator Latch for Kids, Toddlers and Children, Child & Baby Proofing Freezer Door Lock for, Cabinets and Drawers, Oven, Windows
Overview:
This 2-pack fridge lock uses adhesive strips to secure refrigerator, freezer, and cabinet doors against children. It prevents accidental openings that cause food spoilage or unauthorized snacking, featuring a key-based release system.
What Makes It Stand Out:
The dual-lock design (two locks + four keys) ensures redundancy, while the heavy-duty latch withstands persistent tugging. Unlike slide locks, it physically blocks door movement—ideal for fridges with weak seals. Versatility extends to ovens, drawers, and RVs.
Value for Money:
Priced at $12, it’s marginally costlier than keyless options but justifies it with robust construction and multi-appliance use. The included keys prevent loss-related hassles, adding practical value over single-lock kits.
Strengths and Weaknesses:
Strengths: Exceptional holding strength; works on poorly sealed fridges; keys simplify adult access; adhesive leaves no residue.
Weaknesses: Keys are small choking hazards; installation requires 12-hour curing; less discreet than minimalist locks.
Bottom Line:
Top choice for families needing foolproof security. Opt for this if your fridge struggles to stay shut or you prioritize key-based reliability over sleek design.
5. 2-Pack Child Proof Fridge Lock with Adhesive - Adjustable Baby Proofing Straps - Refrigerator Lock for Kids - Freezer Latch to Keep Door Closed - for Toddlers, Cats, & Dogs - Universal Compatibility

5. 2-Pack Child Proof Fridge Lock with Adhesive - Adjustable Baby Proofing Straps - Refrigerator Lock for Kids - Freezer Latch to Keep Door Closed - for Toddlers, Cats, & Dogs - Universal Compatibility
Overview:
These adjustable fridge locks secure appliances against toddlers, pets, and faulty seals using adhesive-backed straps. The 3–7-inch adjustable length fits diverse fridge types, from French doors to mini-fridges, with tool-free installation.
What Makes It Stand Out:
The flexible strap accommodates curved handles and uneven surfaces where rigid locks fail. Unique removal via dental floss or hairdryer avoids residue, and universal sizing eliminates model-specific guesswork—unlike gasket-dependent alternatives.
Value for Money:
At $14 for two locks, it’s pricier than basic models but offers unmatched adaptability. Saving spoiled food (from loose seals) and preventing pet access delivers quick ROI, especially for multi-fridge households.
Strengths and Weaknesses:
Strengths: Truly universal fit; effortless removal; pet-proofing bonus; no alignment hassles.
Weaknesses: Straps may loosen on textured surfaces; less tamper-proof than key systems for older toddlers.
Bottom Line:
The most versatile option for complex households. Choose this if you own multiple appliance types or need hassle-free removal—ideal for renters and pet owners.
6. 2-Pack Child Proof Fridge Lock with Adhesive - No Tools Required - Refrigerator Lock for Kids - Freezer Latch to Keep Door Closed - for Toddlers, Cats, & Dogs.

6. 2-Pack Child Proof Fridge Lock with Adhesive - No Tools Required - Refrigerator Lock for Kids - Freezer Latch to Keep Door Closed - for Toddlers, Cats, & Dogs.
Overview: This 2-pack adhesive fridge lock offers a straightforward solution to prevent toddlers, pets, or curious individuals from accessing refrigerators or freezers. Designed for tool-free installation and automatic operation, it targets household safety concerns around appliance access. What Makes It Stand Out: Its automatic self-locking mechanism engages instantly upon door closure, eliminating manual steps. The dual-button release is intuitive for adults but challenging for small children, while the easy-disable feature adds flexibility. The pre-applied adhesive ensures quick, damage-free mounting on various surfaces. Value for Money: Priced competitively for a 2-pack, it delivers essential safety without recurring costs. While basic, it outperforms cheaper alternatives prone to failure and avoids the expense of professional installation required by some locks, making it ideal for budget-conscious parents. Strengths and Weaknesses: Strengths: Effortless installation; reliable auto-lock; non-damaging adhesive; disables easily for adult use; works on most fridge types. Weaknesses: Adhesive may weaken over time with temperature/humidity changes; buttons could potentially be mastered by determined older toddlers; not suitable for heavy commercial use. Bottom Line: A practical, affordable safety essential for homes with young children or pets. Its simplicity and reliability justify the cost, though periodic adhesive checks are recommended for long-term effectiveness. Highly recommended for basic household protection.
7. 2Pack Child Proof Refrigerator Lock,Fridge Locks for Kids with Sticky Adhesive Pads,Baby Safety Locks for Fridges, Cabinets, Drawers, Double Doors and More (2 Pack)

7. 2Pack Child Proof Refrigerator Lock,Fridge Locks for Kids with Sticky Adhesive Pads,Baby Safety Locks for Fridges, Cabinets, Drawers, Double Doors and More (2 Pack)
Overview: This versatile 2-pack safety lock secures refrigerators, cabinets, and drawers using strong adhesive pads. Crafted from durable ABS plastic, it prioritizes child safety by making access difficult for toddlers while remaining user-friendly for adults. What Makes It Stand Out: Its broad compatibility beyond fridges—working on cabinets, drawers, and double doors—sets it apart. The non-toxic, odorless ABS material ensures safety, and the 12-hour curing period after installation guarantees a robust hold without residue upon removal. Value for Money: Excellent value as a multi-surface solution. The durable construction promises longevity, and the pack covers multiple high-risk areas in one purchase. It undercuts the cost of buying specialized locks per appliance, offering comprehensive protection affordably. Strengths and Weaknesses: Strengths: Multi-application versatility; strong, residue-free adhesive; durable and non-toxic material; simple adult operation; wide compatibility. Weaknesses: Requires 12-hour wait before use, delaying immediate safety; may not suit textured surfaces where adhesion is poor; similar vulnerability to older toddlers as competitors. Bottom Line: A top choice for holistic home safety due to its adaptability and sturdy build. While the curing time is a minor setback, the broad utility and reliability make it a cost-effective investment for safeguarding multiple household areas.
8. 242193206 Refrigerator Door Gasket, Refrigerator Door Seal Compatible with Frigidaire Kenmore Crosley Westinghouse, Fridge Door Gasket Seal for FFTR1828SP3A, FFTR1828SE0,CRT185SS1Parts

8. 242193206 Refrigerator Door Gasket, Refrigerator Door Seal Compatible with Frigidaire Kenmore Crosley Westinghouse, Fridge Door Gasket Seal for FFTR1828SP3A, FFTR1828SE0,CRT185SS1Parts
Overview: This replacement gasket is engineered specifically for select Frigidaire, Kenmore, and Westinghouse refrigerators, addressing leaks and inefficiency caused by worn seals. It features a magnetic strip for secure closure and EPDM rubber construction for durability. What Makes It Stand Out: The integrated thickened magnetic strip ensures superior sealing against cold air loss and condensation. Precise compatibility with numerous models (listed exhaustively) and EPDM’s extreme temperature resistance (-40°F to 1600°F) make it a reliable OEM-equivalent part. Value for Money: Justifies its price through longevity and energy savings. A failing gasket can spike electricity costs; this durable seal restores efficiency. Its exact-fit design avoids the hassle and cost of universal gaskets that require trimming, offering professional results DIY-friendly. Strengths and Weaknesses: Strengths: Strong magnetic seal; high-temp EPDM durability; model-specific fit; easy no-tool installation; prevents frost buildup. Weaknesses: Sizing must be verified meticulously to avoid mismatches; warm-water smoothing needed if creased; limited to specified brands/models. Bottom Line: An essential, high-performance upgrade for compatible refrigerators. Its precise engineering and energy-saving benefits deliver strong value, though confirming dimensions against your unit is critical before purchase.
9. E Shape Foam Rubber Seal Strip, EPDM Rubber Weather Stripping Gasket for Auto, Boat, Garage Door/Window, Refrigerator Door Replacement Gasket, Machinery, Home Application and More, Black(13Feet)

9. E Shape Foam Rubber Seal Strip, EPDM Rubber Weather Stripping Gasket for Auto, Boat, Garage Door/Window, Refrigerator Door Replacement Gasket, Machinery, Home Application and More, Black(13Feet)
Overview: This versatile 13-foot EPDM rubber strip serves as a universal seal for refrigerators, garages, vehicles, and more. Its E-shaped profile targets gap filling and environmental protection across diverse applications. What Makes It Stand Out: The unique E-design provides dual sealing edges, enhancing sound dampening, wind resistance, and dust blocking. Sold by length (not per appliance), it offers unmatched flexibility for custom cuts and multi-project use, from fridge repairs to RV weatherproofing. Value for Money: Exceptional versatility justifies the cost. One roll replaces multiple specialized seals, eliminating repeated purchases. EPDM’s resilience against UV, ozone, and temperature extremes ensures longevity, making it economical for households with varied sealing needs. Strengths and Weaknesses: Strengths: Multi-surface adaptability; robust EPDM durability; noise-reduction properties; easy DIY customization; cost-effective per application. Weaknesses: Requires separate adhesive/screws for secure fridge installation; not pre-cut for specific models; edge sealing may need precise alignment. Bottom Line: A must-have for DIY enthusiasts needing a durable, multipurpose seal. While not a plug-and-play fridge fix, its adaptability and performance deliver outstanding long-term value for diverse projects.
10. MOrfiL Universal Refrigerator Door Gasket Freezer Door Gasket Magnetic Rubber Seal Part Replaces,No Need to Cut, Custom Made to Your Size

10. MOrfiL Universal Refrigerator Door Gasket Freezer Door Gasket Magnetic Rubber Seal Part Replaces,No Need to Cut, Custom Made to Your Size
Overview: This service offers fully customized refrigerator gaskets tailored to your exact model, eliminating measurement guesswork. Made from food-grade magnetic rubber, it promises a perfect seal without post-purchase trimming. What Makes It Stand Out: The bespoke approach—where you provide your seal’s specs for a made-to-order part—is revolutionary. No cutting ensures seamless installation, while food-grade EPDM material guarantees safety and resilience against wear, outperforming generic “universal” gaskets. Value for Money: Premium pricing is offset by guaranteed fit and longevity. Avoiding installation errors (common with cut-to-size gaskets) saves time and potential re-purchase costs. The 10-year support adds significant peace of mind compared to standard replacements. Strengths and Weaknesses: Strengths: Perfect custom fit; no cutting required; high-grade safe material; easy DIY installation; exceptional customer support. Weaknesses: Requires accurate user measurements; longer lead time than off-the-shelf options; higher initial cost than generic packs. Bottom Line: The definitive solution for a flawless, long-lasting seal if you prioritize precision. Worth the investment for hassle-free, professional results—just double-check your measurements before ordering. Highly recommended for optimal fridge performance.
Why Door Seals Matter More Than You Think
The Silent Guardian of Food Freshness
Your refrigerator’s door seal, or gasket, is the primary defense against warm, moist air infiltrating the chilled interior. When intact and properly seated, it creates an airtight barrier that maintains consistent internal temperatures. This consistency is non-negotiable for slowing bacterial growth and enzymatic reactions that cause spoilage. A compromised seal allows humidity to enter, leading to condensation inside the fridge. This excess moisture accelerates mold development on produce, causes crispers to fog up, and turns stored leftovers soggy far sooner than expected, directly impacting your food waste and grocery budget.
Energy Efficiency: The Hidden Cost of a Leaky Seal
Think of a failing door seal as a slow, persistent energy leak. Every time warm air sneaks into the refrigerator compartment, the compressor must work significantly harder and longer to restore the target temperature. This constant overexertion can increase energy consumption by up to 20%—a silent drain on your electricity bill that accumulates month after month. Modern energy-efficient models are designed around optimal seal performance; a degraded gasket undermines these sophisticated systems, turning your appliance into an energy hog regardless of its initial efficiency rating. The financial impact becomes especially noticeable during peak summer months when ambient temperatures are highest.
Preventing Frost Buildup and Compressor Strain
Beyond food spoilage and energy waste, a poor seal invites another insidious problem: excessive frost. Warm, humid air entering the freezer compartment quickly condenses and freezes on cold evaporator coils and interior surfaces. This frost buildup acts as insulation, forcing the cooling system to run even longer cycles to achieve the desired temperature. Over time, this constant strain accelerates wear and tear on critical components like the compressor and evaporator fan motor, potentially leading to costly repairs or premature appliance failure. A well-maintained seal prevents this vicious cycle before it starts.
Decoding Door Seal Features: What Truly Matters
Material Composition and Durability
Not all gasket materials are created equal. High-quality seals utilize flexible, food-safe thermoplastic elastomers (TPE) or specialized rubber compounds engineered for resilience. Look for materials resistant to ozone degradation (which causes cracking), UV exposure (if near a window), and extreme temperature cycling. The best options maintain flexibility across a wide range, from deep-freeze conditions to warm kitchen environments, without becoming brittle or overly soft. Avoid overly cheap, stiff vinyl alternatives that degrade quickly and fail to create a proper seal under pressure.
Magnetic Core Strength and Consistency
The secret weapon inside many modern seals is the embedded magnetic strip. This isn’t just any magnet—it’s a precisely calibrated flexible magnetic core designed to pull the gasket firmly against the metal door frame upon closure. Consistent magnetic strength along the entire length is crucial; weak spots mean gaps where air infiltrates. Quality seals ensure uniform magnetization, providing even pressure distribution. Test potential replacements by feeling for consistent “pull” along the entire strip—any section that feels noticeably weaker is a red flag for future sealing issues.
Profile Design and Compression Fit
The physical shape and cross-section of the seal matter immensely. Effective gaskets feature a rounded or bulbous profile that compresses smoothly against the door frame, creating a broad contact surface rather than a single point of pressure. This design allows for minor imperfections in the frame while still maintaining an airtight barrier. Consider the required compression depth—too little, and the seal won’t engage properly; too much, and the door becomes difficult to close, potentially straining hinges. The ideal profile ensures a gentle, consistent squeeze without excessive force.
Signs Your Seal Needs Attention (Before It’s Too Late)
The Dollar Bill Test: A Simple Diagnostic
This classic test remains one of the most reliable DIY checks. Close a single dollar bill (or similar thin paper) in the door seal at various points around the perimeter—top, sides, bottom. Gently try to pull the bill out. If it slides out effortlessly with no resistance, that section of the seal isn’t gripping properly. If you feel consistent, slight drag all the way around, your seal is likely still functional. Pay special attention to corners and the bottom hinge area, common weak spots.
Visible Wear and Tear Patterns
Regular visual inspection is key. Run your fingers along the entire gasket, feeling for cracks, tears, or areas that feel hard, brittle, or excessively soft and sticky. Look for permanent creases, flattening (indicating loss of resiliency), or sections that have pulled away from the door frame mounting. Pay close attention to where the seal meets the door corners—these areas endure the most stress and are prone to splitting. Any visible damage, no matter how small, often indicates the beginning of widespread failure.
Temperature and Moisture Clues
Unexplained temperature fluctuations inside the fridge or freezer are strong indicators. Notice frost accumulating rapidly on freezer walls or coils? Does the fridge compartment feel warmer than usual, even with settings unchanged? Excessive condensation forming inside the fridge (not just on cold items) or persistent moisture around the door perimeter are telltale signs warm, humid air is bypassing the seal. You might also hear the compressor running almost constantly, a clear signal it’s struggling to maintain temperature due to air infiltration.
Selecting the Perfect Replacement Seal
Precise Measurement is Non-Negotiable
Assuming “one size fits all” is the fastest route to frustration. Door seals are highly model-specific due to variations in door shape, frame depth, and mounting mechanisms. Always measure the critical dimensions: the total perimeter length of your existing door frame (not just the old seal), the width of the mounting channel where the seal attaches, and the depth/profile of the sealing surface. Manufacturer part numbers (often found on a sticker inside the fridge or on the back) are the gold standard for ordering exact matches—never rely solely on visual similarity.
Understanding Mounting Styles
Seals attach to doors in different ways: some snap into a U-shaped channel, others slide into a groove, and some are secured with adhesive backing or screws. Identifying your current mounting style is critical—replacing a snap-in seal with an adhesive version (or vice versa) will lead to improper installation and poor performance. Examine how your old seal is secured before ordering. If replacing an adhesive-backed seal, meticulous surface preparation (cleaning with isopropyl alcohol, ensuring complete dryness) is essential for the new bond to hold long-term.
Climate Considerations for Material Choice
Where you live impacts the ideal seal material. In hot, humid climates, prioritize seals with superior resistance to UV degradation and high-temperature flexibility. In regions with significant seasonal temperature swings, look for materials rated for extreme cold flexibility to prevent winter brittleness. Coastal areas demand seals resistant to salt air corrosion, which can degrade standard magnetic strips faster. Don’t overlook these environmental factors—they directly impact the seal’s lifespan and performance consistency in your specific kitchen.
Mastering Installation for a Lasting Seal
Essential Prep Work Before Removal
Rushing into seal replacement guarantees problems. Start by unplugging the refrigerator for safety. Thoroughly clean the entire door frame channel where the old seal was mounted. Use warm, soapy water and a soft brush to remove grime, old adhesive residue, or mold buildup. Dry completely with a lint-free cloth—any moisture or debris left behind will prevent the new seal from seating properly and adhering correctly if applicable. This cleaning step is often skipped but is fundamental to success.
The Art of Gentle Removal
Removing the old seal requires patience. If it’s snapped in, work slowly around the perimeter using a plastic putty knife or flathead screwdriver wrapped in tape to avoid scratching the frame. Pry gently outward, releasing one section at a time. Never yank or use excessive force, as this can warp the delicate door frame channel. For adhesive-backed seals, carefully peel back a corner and use dental floss or fishing line to saw through the adhesive bond, minimizing damage to the underlying surface. Preserve as much of the mounting channel integrity as possible.
Achieving Perfect Tension and Alignment
Installing the new seal is where precision matters. Start at the top center or bottom center (follow manufacturer instructions if available), ensuring the seal is oriented correctly (magnetic strip facing inward). Work your way outwards towards the hinges and latches, pressing firmly into the channel. Avoid stretching the seal excessively—this creates weak spots and uneven tension. Periodically close the door gently to check alignment; the seal should compress uniformly all around. Pay extra attention to corners, easing the material into place without kinking. Allow the seal to “settle” for 24 hours before expecting optimal performance.
Proactive Maintenance for Extended Seal Life
Cleaning Without Causing Damage
Regular cleaning prevents grime buildup that can degrade the seal and create gaps. Use a soft cloth dampened with a solution of mild dish soap and warm water. For stubborn residue or mildew, a diluted vinegar solution (1:1 with water) is effective and safe. Avoid harsh chemicals, abrasive sponges, or excessive scrubbing, which can scratch or dry out the rubber. Dry thoroughly after cleaning. Never use oil-based products (like petroleum jelly) to “condition” the seal—they can cause swelling, attract dirt, and degrade the material.
Preventing Common Forms of Damage
Protect your seal from unnecessary stress. Avoid slamming the door—gentle closure preserves the magnetic grip and material integrity. Don’t overfill the fridge to the point where items press against the seal when closing. Keep sharp objects away from the door edges. Be mindful when placing hot containers inside; the sudden temperature differential can stress the seal. During deep cleaning, never use steam cleaners directly on the gasket, as intense heat can warp or melt it. Simple precautions significantly extend service life.
Monitoring Seal Performance Over Time
Make seal inspection part of your seasonal appliance maintenance routine. Conduct the dollar bill test quarterly. Visually check for new cracks, flattening, or discoloration. Note if the door feels harder or easier to close than before—this can indicate compression loss or warping. Listen for changes in compressor runtime. Early detection of minor issues allows for timely intervention before minor wear escalates into major cooling problems or food loss. Consistent monitoring is the cheapest maintenance strategy.
Troubleshooting Common Seal Issues
Fixing Minor Gaps Without Replacement
Sometimes, a slightly warped door frame (not the seal itself) causes localized gaps. Before replacing the entire seal, check door alignment. Adjust the leveling legs at the front of the fridge—raising or lowering one side can sometimes reposition the door enough to re-establish contact. Inspect hinges for looseness; tightening hinge screws (often requiring a Torx driver) can correct minor misalignment. For persistent small gaps near hinges, a thin strip of closed-cell foam tape on the frame (not the seal) can sometimes bridge the gap temporarily—use sparingly as a last resort.
Addressing Sticking or Peeling Seals
If a section of the seal starts peeling away from the mounting channel, first ensure the channel is clean and dry. For snap-in seals, gently press the lip back into the channel using your thumbs, working along the peeling section. For adhesive-backed seals beginning to lift, clean both the seal edge and frame thoroughly with isopropyl alcohol. Apply a tiny amount of high-quality, food-safe adhesive (specifically designed for appliance seals) only to the mounting surface, press firmly, and clamp with masking tape overnight. Avoid superglue or household adhesives that can damage materials.
Eliminating Persistent Odors from the Seal
Gaskets can absorb food odors over time, especially if spills aren’t cleaned promptly. Create a paste of baking soda and water, apply it to the seal, let it sit for 15-20 minutes, then wipe clean with a damp cloth. For stronger odors, a diluted solution of hydrogen peroxide (3%) can help neutralize lingering smells without damaging the material—test in an inconspicuous spot first. Ensure the seal is completely dry afterward. Prevent future odor absorption by wiping the seal weekly during routine cleaning.
Investing in Long-Term Appliance Health
The Ripple Effect of a Quality Seal
A properly functioning door seal isn’t an isolated component; it’s integral to the entire appliance ecosystem. When the seal performs optimally, the compressor cycles less frequently and for shorter durations. This reduced operational stress extends the lifespan of not just the compressor, but also the condenser fan, evaporator fan, and thermostat. The result? Fewer breakdowns, lower long-term repair costs, and a refrigerator that reliably serves you for many more years. It’s a small part with an outsized impact on overall appliance longevity.
Cost-Benefit Analysis: Seal Replacement vs. Appliance Strain
Consider the numbers: a new door seal typically costs a fraction of a service call for cooling issues. Replacing a worn seal proactively can prevent hundreds of dollars in wasted energy over its lifespan and potentially avoid thousands in premature appliance replacement costs. When weighed against the expense and inconvenience of a major compressor failure triggered by constant overwork, the investment in a quality seal is overwhelmingly cost-effective. It’s preventative maintenance with a clear, calculable return.
Integrating Seal Care into Your Home Maintenance Routine
Treat your refrigerator seal with the same importance as changing HVAC filters or cleaning dryer vents. Add a quick visual and tactile inspection to your monthly kitchen deep-clean checklist. Schedule the dollar bill test alongside other seasonal home maintenance tasks (like checking smoke detectors). Viewing seal care as a routine, non-negotiable part of home stewardship shifts it from a reactive chore to a proactive habit that safeguards comfort, convenience, and savings.
Frequently Asked Questions
How often should I realistically replace my refrigerator door seal?
Most quality seals last 7-10 years with proper care, but climate, usage frequency, and initial quality significantly impact lifespan. Annual inspection for cracks, loss of flexibility, or gaps (using the dollar bill test) is crucial—replace immediately if significant wear is found, regardless of age.
Can I clean mold off my door seal effectively, or is replacement the only option?
Yes, surface mold can often be cleaned. Use a solution of equal parts white vinegar and water or a diluted hydrogen peroxide solution (3%), applied with a soft cloth. Scrub gently, rinse thoroughly, and dry completely. If mold has penetrated deep into cracks or the material is deteriorating, replacement is necessary for hygiene and effectiveness.
Why does my new seal feel stiff and hard to close initially?
New seals, especially in cooler rooms, often require a “break-in” period. The material needs time to relax and conform to your door’s shape. Gently stretch and flex the seal along its length before installation, and expect it to soften and seal perfectly within 24-48 hours of normal use.
Is it normal for the bottom part of the seal to wear out faster?
Yes, the bottom section typically bears more weight and stress from opening/closing, and is more exposed to spills, crumbs, and foot traffic. This area often shows wear first. Pay extra attention to this section during inspections and cleaning.
Can a damaged seal actually cause my refrigerator to stop cooling entirely?
While a bad seal won’t directly “break” the cooling system, it forces the compressor to run constantly trying to maintain temperature. This extreme strain can lead to overheating and eventual compressor failure, resulting in a complete loss of cooling if not addressed.
Should I apply any conditioner or lubricant to keep my seal flexible?
Generally, no. Most modern seal materials don’t require conditioning. Petroleum-based products can degrade rubber. Silicone-based conditioners specifically designed for appliance seals can be used sparingly if the seal shows early signs of drying, but regular cleaning and avoiding harsh chemicals are better preventative measures.
How can I tell if my door isn’t aligned properly versus the seal being bad?
Conduct the dollar bill test all around. If gaps occur only on one side (e.g., consistently on the left but not the right), it’s likely a door alignment issue (check leveling legs or hinge screws). If gaps are random or widespread, the seal itself is probably failing.
Is replacing a freezer door seal different from a fridge door seal?
The core principles are identical, but freezer seals often face colder temperatures and require materials with superior low-temperature flexibility. The installation process is very similar, but ensure you get the correct seal designed specifically for the freezer compartment of your model.
What’s the main reason a brand new seal might not seal properly after installation?
Incorrect installation is the most common culprit—usually improper tension (stretched too tight or too loose in sections), misalignment in the mounting channel, or failure to clean the channel thoroughly before installation. Double-check alignment and channel prep before assuming the seal is defective.
Can a compromised seal lead to higher humidity inside the refrigerator compartment?
Absolutely. A failing seal allows warm, humid kitchen air to infiltrate the cold interior. This moisture condenses inside the fridge, leading to excessive humidity that causes condensation on walls and food packages, accelerating spoilage and promoting mold growth on stored items.