Transforming a rental into a space that feels unmistakably yours often feels like navigating a minefield of lease restrictions and security deposit anxieties. Every upgrade whispers the same nagging question: “Will my landlord charge me for this?” Traditional hardware installation means drilling, which means permanent damage, which means saying goodbye to your deposit. But what if you could swap out those dated, grimy cabinet handles for sleek, modern hardware that installs in minutes, holds strong for years, and peels away without a trace when your lease ends? Tool-free replacement handles have revolutionized the renter upgrade game, offering a rare trifecta: landlord approval, personal expression, and full deposit protection. These ingenious solutions leverage advanced adhesives, magnetic systems, and clever clamping mechanisms to deliver the aesthetic impact of a full kitchen remodel without a single screw or power tool.
Understanding the landscape of temporary hardware requires more than just picking what looks pretty. The difference between a handle that stays secure for three years and one that surrenders after three weeks lies in material science, surface chemistry, and installation technique. This guide dives deep into the technical and practical considerations that separate disappointing impulse buys from investment-grade temporary hardware that you can confidently install in your current rental—and potentially reuse in the next.
Top 10 Tool-Free Replacement Handles for Renters
Detailed Product Reviews
1. LAIYOHO Tool-Free Adhesive Cabinet Handles - Self Stick Door Pulls, Waterproof Drawer Pulls for Kitchen Cabinets, Sliding Doors, Shower Enclosures & Closets, Damage-Free Peel-and-Stick Handles

Overview: The LAIYOHO adhesive handles offer a damage-free solution for renters and homeowners seeking quick cabinet upgrades. These tool-free pulls stick to any smooth surface without drilling, making them ideal for bathrooms, kitchens, and closets where permanent modifications are undesirable.
What Makes It Stand Out: The 30-second installation uses industrial-grade adhesive that’s fully waterproof, allowing use in humid shower enclosures without deterioration. The ergonomic curved design accommodates all hand sizes, while the minimalist rectangular profile blends with any decor style from contemporary to traditional. The high-strength plastic construction resists daily wear, moisture, and discolouration.
Value for Money: At $4.55, this is exceptionally affordable compared to the cost of drilling, hardware, and potential repair work. Traditional handles cost £5-15 each plus installation time, making these a budget-friendly alternative for temporary or rental situations where you need immediate results without investment in tools.
Strengths and Weaknesses: Strengths include true tool-free application, waterproof construction suitable for UK bathrooms, comfortable ergonomic grip, and renter-friendly design. The smooth, burr-free finish enhances safety. Weaknesses involve adhesive longevity concerns with heavy daily use, unsuitability for textured or porous surfaces, and a potentially less premium feel than metal hardware. Maximum weight capacity isn’t specified.
Bottom Line: Perfect for renters, temporary fixes, or humid environments where drilling isn’t possible. While not a permanent replacement for screwed hardware, these handles deliver impressive functionality and convenience at an unbeatable price point for light to medium use.
2. 4 PCS Molded Webbing Handle with End Caps & 1 PCS Screwdriver, Handle Replacement for Ruffland Kennel, Ergonomic Design, Easy to Install, for Luggage Toolboxes Storage Boxes DIY Projects

Overview: This four-pack of molded webbing handles provides heavy-duty replacement solutions for Ruffland Kennels, luggage, toolboxes, and storage boxes. The complete kit includes all necessary hardware plus a screwdriver for immediate installation without hunting for tools.
What Makes It Stand Out: The integrally molded nylon and rubber construction prevents strap loosening while distributing weight evenly across the mounting points. Unlike basic strap handles, these feature end caps for a finished look and enhanced durability. The included screwdriver eliminates the need for additional tools, making it a true all-in-one solution.
Value for Money: At $9.99 for four handles with hardware and a screwdriver, this kit offers excellent value. Individual replacement handles often cost £3-8 each without mounting accessories, making this set particularly economical for multiple repairs or DIY projects where budget matters.
Strengths and Weaknesses: Strengths include the complete installation kit, durable one-piece construction, non-slip grip, and wide compatibility across applications. The 10.24-inch length suits most standard uses, and the wide woven strap ensures excellent load-bearing capacity. Weaknesses are the requirement for screw mounting (not tool-free), limited aesthetic appeal for visible furniture applications, and potential sizing issues with non-standard hole patterns. The industrial look may not suit all decor.
Bottom Line: An outstanding value for functional handle replacements where durability matters more than appearance. Ideal for pet kennels, garage storage, and utility applications. The included screwdriver and straightforward installation make this a practical choice for quick repairs without professional help or extra tool purchases.
3. 2Pcs Universal Microwave Door Handle Replacement Fits Most Microwave Ovens Replace for Samsung General Electric GE Handle Repair Part Fit with Hotpoint Microwave Replaces (1pcs Clear & 1pcs Black)

Overview: This two-pack provides universal microwave door handle replacements using adhesive backing, eliminating the need for drilling or exact hole alignment. Compatible with major brands including GE, Samsung, and Toshiba models, it solves the common problem of broken appliance handles.
What Makes It Stand Out: The upgraded plastic design solves common metal handle problems: freezing temperatures in winter, rust formation, and grease buildup. The smooth surface wipes clean easily. The combo pack includes both clear and black options for matching different appliances or kitchen styles, providing a spare for future needs.
Value for Money: At $9.97 for two handles ($4.98 each), this is significantly cheaper than manufacturer replacement parts that often cost £15-30 plus shipping. The universal fit eliminates the risk of ordering incorrect model-specific parts, saving both time and money.
Strengths and Weaknesses: Strengths include hassle-free adhesive installation, static-resistant plastic construction, frost-proof design, and the cost-effective two-color combo. The comfortable grip-friendly dimensions (8.9"L x 2.4"W) suit most users. Weaknesses involve adhesive durability concerns near heat sources, potential mismatch with original aesthetics, and the fact that these are aftermarket parts not original manufacturer items. The adhesive may weaken over time with repeated microwave door slams.
Bottom Line: An excellent budget solution for broken microwave handles where drilling isn’t possible or cost-effective. While not identical to original equipment, these handles provide functional, affordable repairs for renters or anyone wanting to avoid expensive brand-name parts. Keep the spare for future needs.
4. 4 Black Peel & Stick Pulls for Mirrored Door, Self-Stick Handles for Drawer, Drill-Free Knobs for Cabinet
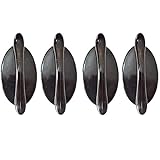
Overview: These four black peel-and-stick handles offer a simple solution for adding grips to mirrored doors, sliding doors, and cabinets without drilling or messy glue applications. They address the common problem of missing handles on furniture and glass surfaces.
What Makes It Stand Out: Specifically designed for mirrored surfaces, these handles feature a generous 7/8-inch height providing ample finger room for comfortable gripping, especially beneficial for larger hands. The ergonomic design ensures better leverage when opening sliding or heavy doors, reducing strain and improving accessibility.
Value for Money: At $8.99 for four handles ($2.25 each), this set provides an affordable way to add functionality to furniture lacking hardware. Professional installation of traditional handles would cost far more than the product itself, making this a budget-conscious choice for quick upgrades.
Strengths and Weaknesses: Strengths include effortless installation taking seconds, strong adhesion on smooth surfaces (glass, metal, ceramic, plastic, painted wood), and ergonomic height for comfortable use. The 24-hour curing recommendation ensures optimal bonding. Weaknesses involve unsuitability for textured surfaces, potential residue upon removal, uncertain long-term durability under heavy use, and limited weight capacity information. The minimalist black design may not suit all decor styles.
Bottom Line: Ideal for renters or anyone needing quick, damage-free handles on mirrored wardrobes or sliding doors. While not a permanent substitute for screwed hardware, these pulls deliver immediate functionality at a fraction of the cost and effort of traditional installation methods.
5. funifiti 5-Pack Black Barn Door Handle Pull 6-Inch Cabinet Drawer Pulls Screen Door Handle Replacement Outdoor Gate Handle Self-Drilling with Backplate Aluminum

Overview: This five-pack of black aluminum barn door handles provides versatile pulling solutions for cabinets, drawers, sliding doors, and even outdoor gates. The set includes backplates and self-drilling screws for flexible installation options.
What Makes It Stand Out: The handles offer dual installation options: peel-and-stick adhesive for quick mounting or self-drilling screws for permanent placement. The 6-inch length and included backplates create a professional, finished appearance suitable for both indoor and outdoor applications. The modern design complements various decor styles.
Value for Money: At $17.80 for five handles ($3.56 each), this pack offers excellent bulk value. Comparable individual handles retail for £5-12 each, making this set economical for coordinating multiple rooms or large furniture projects. The included backplates add professional detail without extra cost.
Strengths and Weaknesses: Strengths include the versatile five-pack quantity, modern sleek design, dual installation methods, and weather-resistant aluminum construction. The 1.5-inch handle height provides comfortable gripping. Weaknesses involve potential quality inconsistencies across bulk packs, uncertainty about adhesive strength for heavy doors, and self-drilling screws may not suit all material types. The black finish could show wear over time with outdoor use.
Bottom Line: A cost-effective choice for anyone upgrading multiple cabinets or doors simultaneously. The installation flexibility and quantity make this particularly valuable for DIY enthusiasts, though professional installation is recommended for heavy barn doors to ensure safety and longevity.
6. Outside Mounted Blinds Curtain Rod Bracket, 1.3-2" Adjustable, No Drilling Curtain Rods Holder for Over Blinds, Easy Install Tool-Free Hand-Twist Screws & Anti-Slip Square Base (Set of 2, Matte Black)

Overview: These matte black curtain rod brackets provide a damage-free solution for renters wanting to layer curtains over existing blinds. Designed specifically for 1.3-2" wide outside-mounted rectangular headrails, this set of two supports rods up to 1" diameter. The package includes a measuring guide to ensure compatibility before purchase, eliminating guesswork and potential returns.
What Makes It Stand Out: The tool-free installation is the star feature—upgraded 2025 hand-twist screws with enlarged grips tighten three times faster than competitor products. The reinforced square base provides superior stability compared to flimsy round alternatives, while thick anti-slip rubber pads distribute weight evenly to prevent pressure marks on your blinds. The scratch-resistant matte black finish resists chipping and rust, backed by an impressive 5-year replacement warranty.
Value for Money: At $9.99 for a set of two, these brackets cost less than a single professional installation or potential wall repair charges when moving out. They eliminate the need for drills, anchors, and patching supplies. Compared to other no-drill options that often fail within months, the durable construction and extensive warranty make this a financially sound investment for temporary or long-term use.
Strengths and Weaknesses: Pros: True damage-free installation preserves rental deposits; ergonomic design enables 60-second setup; square base eliminates wobbling; comprehensive warranty; included measuring guide prevents sizing mistakes. Cons: Only compatible with specific 1.3-2" rectangular headrails; maximum 1" rod diameter limits decorative rod options; two brackets only support windows under 5 feet wide, requiring additional purchases for larger spaces.
Bottom Line: Perfect for renters and DIY-averse homeowners, these brackets deliver on their promise of quick, stable, damage-free curtain installation. Just measure carefully first. For windows under five feet wide, this two-pack provides exceptional value and peace of mind.
7. Outside Mounted Blinds Curtain Rod Bracket, 1.3-2" Adjustable, No Drilling Curtain Rods Holder for Over Blinds, Easy Install Tool-Free Hand-Twist Screws & Anti-Slip Square Base (Set of 4, Matte White)

Overview: This four-pack of matte white brackets provides a seamless solution for hanging curtains over blinds without drilling holes. Engineered for 1.3-2" wide outside-mounted rectangular headrails, these holders support curtain rods up to 1" diameter. The set includes enough brackets for windows up to 8 feet wide, making it ideal for larger openings or sliding doors where additional center support is crucial.
What Makes It Stand Out: The 2025 upgraded hand-twist screws feature enlarged ergonomic grips that install three times faster than competing products—no tools, no wall damage, no hassle. The reinforced square base design offers superior stability over round-base alternatives, while thick anti-slip rubber pads protect your blind headrail from pressure marks and prevent slippage. The scratch-resistant matte white finish maintains its clean appearance without chipping, and the 5-year warranty provides unmatched confidence.
Value for Money: At $18.99 for four brackets ($4.75 each), this set offers better per-unit value than buying two-packs separately. It eliminates the cost of professional installation and prevents expensive wall repairs in rental properties. The included measuring guide ensures you buy the right product the first time, saving return shipping costs. For wider windows requiring three or four brackets, this complete set is more economical than piecing together individual units.
Strengths and Weaknesses: Pros: Damage-free installation perfect for renters; stable square base prevents sagging; ergonomic screws enable 60-second setup; comprehensive 5-year warranty; matte white finish blends with most decor; cost-effective for wide windows. Cons: Limited to specific blind headrail dimensions; 1" rod diameter restriction may not suit all decorative rods; white finish may show dirt more readily than darker colors; overkill for narrow windows under 5 feet.
Bottom Line: This four-pack is the smart choice for wider windows or sliding doors, providing all necessary supports in one purchase. Renters and homeowners alike will appreciate the blend of stability, aesthetics, and warranty protection—just verify your blind measurements before ordering.
8. Outside Mounted Blinds Curtain Rod Bracket 1.3-2" Adjustable, No Drilling Curtain Rods Holder for Over Blinds, Easy Install Tool-Free Hand-Twist Screws & Anti-Slip Square Base (Set of 4, Matte Silver)

Overview: This set of four matte silver brackets offers a modern metallic finish for damage-free curtain installation over existing blinds. Compatible exclusively with 1.3-2" wide outside-mounted rectangular headrails, these holders accommodate curtain rods up to 1" diameter. The four-bracket configuration provides adequate support for windows up to 8 feet wide, with the sleek silver finish complementing contemporary decor and metal blind hardware.
What Makes It Stand Out: Featuring 2025 upgraded hand-twist screws with enlarged ergonomic grips, installation takes under 60 seconds per bracket—no drilling, no tools, no wall damage. The reinforced square base delivers superior stability compared to round-base designs, while thick anti-slip rubber pads distribute weight evenly to prevent pressure marks on blinds. The scratch-resistant matte silver coating resists corrosion and chipping, backed by a robust 5-year warranty that covers any quality defects.
Value for Money: Priced at $18.99 for four units, the cost per bracket is $4.75—significantly cheaper than professional installation or the cumulative cost of wall repair supplies. This complete set for wider windows eliminates the need to purchase additional brackets separately. The durable metal construction and extensive warranty ensure years of reliable performance, making it more economical than replacing cheaper alternatives annually.
Strengths and Weaknesses: Pros: Contemporary silver finish matches modern hardware; true no-drill installation preserves walls; stable square base prevents rod sag; ergonomic screws enable quick setup; comprehensive 5-year warranty; cost-effective for windows 5-8 feet wide. Cons: Restricted to specific blind headrail sizes; 1" maximum rod diameter limits options; silver finish may clash with warmer decor; unnecessary for narrow windows under 5 feet; plastic components in screw mechanism may wear over time.
Bottom Line: Ideal for modern interiors and wider windows, this four-pack combines functionality with contemporary aesthetics. Renters and homeowners seeking a metallic finish will find excellent value, provided their blinds fall within the specified dimensions. Measure twice, buy once.
9. Xuanqiu Gas Cooktop Control Knob 10pcs Alloy Gas Stove Rotary Switch Knob Set Kitchen Burner Oven Parts Handle Replacement Button Cooker

Overview: This set of ten alloy gas stove knobs provides a durable replacement solution for worn or broken burner controls. Crafted from high-quality metal with a protective finish, these knobs resist high temperatures and daily wear. Designed for universal compatibility with select major appliance brands, they restore precise heat control without the expense of professional repairs or OEM parts.
What Makes It Stand Out: The premium alloy construction offers superior heat resistance and durability compared to standard plastic knobs, preventing the cracking and fading common in high-temperature environments. Tool-free installation takes mere minutes—simply align and press onto the stove shaft. The ergonomic design ensures smooth rotation for accurate temperature adjustments, while the reinforced structure withstands years of daily cooking use.
Value for Money: At $20.32 for ten knobs ($2.03 each), this set costs significantly less than manufacturer replacements that often run $5-15 per knob. It eliminates service call fees that can exceed $100. Having ten knobs covers most four-to-five burner stoves with spares left for future replacements, making it a cost-effective long-term solution for rental properties or aging appliances.
Strengths and Weaknesses: Pros: Durable alloy construction resists heat damage; tool-free installation saves time and money; ten-piece set provides ample spares; ergonomic design offers precise control; costs far less than OEM parts. Cons: Compatibility verification required—may not fit all models; alloy material gets hotter than plastic; limited aesthetic options; some users may prefer the feel of original knobs; no included adapter for different shaft types.
Bottom Line: An excellent value for anyone with multiple worn stove knobs, particularly in rental units or older appliances. Verify your stove’s shaft specifications before purchasing. For those seeking durability over aesthetics, these alloy knobs deliver professional-grade performance at a fraction of the cost.
10. Xuanqiu Gas Cooktop Control Knob 12pcs General Gas Stove Cooker Control Knob Plastic Handle Replacement Switch Button Range Oven for Benchtop Burner

Overview: This twelve-pack of plastic gas stove knobs offers an affordable, practical solution for replacing damaged or missing burner controls. Constructed from heavy-duty, heat-resistant plastic with a protective finish, these knobs are engineered to withstand daily cooking temperatures without fading or cracking. The set provides enough replacements for most standard stoves plus spare units for future needs.
What Makes It Stand Out: The tool-free installation is remarkably simple—just align the knob with the stove’s control shaft and snap it into place within seconds. Designed for broad compatibility with popular appliance brands, these knobs replace multiple OEM part numbers. The ergonomic shape allows for smooth, intuitive temperature adjustments, while the reinforced design ensures reliable performance through years of regular use.
Value for Money: At $20.02 for twelve knobs ($1.67 each), this represents exceptional value compared to manufacturer replacements costing $5-15 each. The twelve-piece quantity ensures you have spares for future breakdowns or for outfitting multiple stoves in rental properties. By eliminating the need for professional installation, you save $100+ in service fees while restoring full functionality in minutes.
Strengths and Weaknesses: Pros: Extremely cost-effective per-unit price; twelve knobs cover most stoves with spares; tool-free installation requires no expertise; heat-resistant plastic stays cool to touch; wide compatibility with major brands. Cons: Plastic may degrade faster than metal alternatives; compatibility must be verified before purchase; limited to specific shaft designs; basic appearance may not match premium stove aesthetics; some users report looser fit over time.
Bottom Line: Perfect for budget-conscious homeowners and landlords managing multiple properties. This twelve-pack provides unbeatable value and convenience, assuming compatibility with your appliance. For everyday cooking needs where function trumps form, these knobs solve the problem efficiently and economically.
Why Tool-Free Handles Transform Rental Living
The psychological impact of hardware on your daily experience is vastly underestimated. That flimsy plastic knob on your bathroom vanity doesn’t just look cheap; it creates micro-frustrations every time it sticks or wobbles. Tool-free handles address the core renter paradox: the desire to improve your environment without jeopardizing your financial security. Unlike peel-and-stick wallpaper or command hooks that serve pure function, handles must withstand constant mechanical stress while maintaining flawless aesthetics. Modern temporary hardware achieves this through engineering that rivals permanent installations—pressure-sensitive acrylic foam tapes that bond at the molecular level, neodymium magnets rated for industrial applications, and tension systems that distribute load across surfaces rather than concentrating it. The result is hardware that feels permanent to the user but remains completely reversible to the property owner.
The Security Deposit Protection Advantage
Your security deposit isn’t just a lump sum—it’s leverage. Every modification you make either preserves or erodes that leverage. Landlords scrutinize cabinets and drawers during move-out inspections because they’re high-touch surfaces that show damage clearly. A single stripped screw hole can trigger a $50-per-cabinet deduction, while adhesive residue might cost you a professional cleaning fee. Tool-free handles eliminate these specific risks entirely. Most quality systems use clean-removal adhesives that activate with heat or a specific solvent, leaving surfaces pristine. Documenting your installation with timestamped photos creates a paper trail that demonstrates due diligence. Some renters even keep a small “restoration kit” with the original hardware and surface cleaning supplies, presenting it during the final walkthrough as proof of responsible tenancy. This proactive approach transforms the landlord conversation from defensive to collaborative.
Lease Compliance Made Simple
Lease agreements typically contain vague language about “alterations” or “modifications,” leaving room for interpretation. A tool-free handle technically qualifies as a “removable fixture” rather than a permanent alteration, similar to hanging a picture frame. However, the smart approach involves understanding your specific lease’s intent. Leases that prohibit “nail holes” are clearly focused on permanent damage, while those banning “any changes to cabinetry” might require a conversation. The beauty of adhesive-based systems is their invisibility—unlike a wall-mounted TV bracket that leaves obvious holes, a removed handle leaves no evidence it was ever there. This positions you within both the letter and spirit of most rental agreements, giving you ethical and legal footing for your upgrades.
Understanding the Three Core Mechanisms
Not all tool-free handles are created equal, and the mechanism determines everything from installation difficulty to weight capacity. The market has consolidated around three distinct technologies, each with specific use cases and performance characteristics. Understanding these differences prevents the common renter mistake of buying adhesive handles for heavy pantry doors or magnetic systems for wooden cabinets.
Adhesive-Based Systems: The Versatile Standard
Adhesive handles represent the broadest category, utilizing pressure-sensitive tapes or liquid adhesives that cure to form a mechanical bond. The critical differentiator is the adhesive type: foam acrylic tapes offer the best balance of strength and removability, while liquid epoxies provide maximum hold at the cost of potential surface damage. High-performance foam tapes, originally developed for automotive trim applications, can support 10-20 pounds per square inch when properly applied. They conform to microscopic surface irregularities and distribute shear forces across the entire contact area. For renters, the key specification is “closed-cell” foam, which resists moisture infiltration and maintains bond strength in humid bathroom environments. The installation window is also crucial—premium systems allow repositioning for 30-60 seconds before the initial tack sets, giving you time to achieve perfect alignment.
Magnetic Mounting: For Metal Surfaces
Magnetic handles exclusively work on ferrous metal cabinets, making them ideal for industrial-style apartments or older homes with metal kitchen cabinetry. The system consists of a decorative handle with embedded neodymium magnets and a separate metal strike plate that adheres to the cabinet surface. The strike plate provides a consistent, flat mounting surface while protecting the cabinet finish. Weight capacity scales directly with magnet size and quantity—a four-magnet system can reliably support 15-25 pounds of pulling force. The major advantage is infinite reusability; magnets don’t degrade like adhesives. The downside is limited applicability—attempting to use magnetic handles on wood or laminate requires installing a metal base plate, which defeats the tool-free purpose. For renters in modern constructions, this mechanism is often a non-starter, but for those in converted lofts or mid-century buildings, it’s a game-changer.
Tension and Clamp Designs: Niche Solutions
Tension-based handles use spring-loaded mechanisms or adjustable clamps to grip the edges of drawers or doors, requiring no surface adhesion at all. These excel on frameless cabinetry where traditional handles would mount through the drawer front. Clamp systems typically support 5-10 pounds and install in seconds, making them perfect for renters who prioritize speed over heavy-duty performance. The trade-off is aesthetic—clamp mechanisms are visible and have an industrial look that doesn’t suit every style. They’re also vulnerable to loosening over time as cabinet materials compress slightly under constant pressure. For bathroom vanities or light-use drawers, however, they represent the ultimate in reversibility.
Material Selection for Renter-Grade Durability
The material composition of your handles affects not just aesthetics but also the integrity of the temporary bond. Heavy materials require more robust mounting systems, while certain finishes can interfere with adhesive performance. Understanding material science helps you match the handle to the mechanism and the application.
Metal Finishes That Fool the Eye
Solid brass and stainless steel handles offer authentic weight and temperature feel but demand industrial-strength adhesives. For most renters, zinc alloy handles with PVD (Physical Vapor Deposition) finishes provide 90% of the premium experience at half the weight. PVD creates a molecular bond between the finish and base metal, producing a finish 10x more durable than traditional plating. This matters because cheap plated handles can develop micro-fractures at stress points, creating sharp edges that catch on clothing and compromise the adhesive bond. When selecting metal handles, check the mounting base—quality systems use a separate, flat mounting plate that maximizes adhesive contact area rather than adhering the curved handle directly to the surface.
High-Quality Plastics and Composites
Advanced polymer handles have evolved far beyond the flimsy plastic of decades past. Glass-filled nylon and polycarbonate blends offer metal-like rigidity at a fraction of the weight, reducing the stress on adhesive bonds. These materials also resist temperature fluctuations better than metal, which expands and contracts, potentially weakening the adhesive over seasonal cycles. For humid environments like bathrooms, look for UV-stabilized polymers that won’t yellow or become brittle. The best polymer handles use over-molding techniques where a softer, grippable material surrounds a rigid core, providing both comfort and structural integrity. This dual-material approach also allows for creative color combinations that metal handles can’t achieve.
The Critical Role of Surface Compatibility
The strongest adhesive in the world will fail if applied to the wrong surface. Cabinet and drawer materials vary dramatically in their surface energy—a measure of how well substances stick to them. High-energy surfaces like glass, glazed ceramic, and powder-coated metals bond readily. Low-energy surfaces like polyethylene, oil-painted wood, and some laminates resist adhesion entirely. This isn’t about cleanliness; it’s about molecular structure.
Identifying Your Cabinet and Drawer Materials
Before purchasing any tool-free handle, perform a simple surface test: press a piece of masking tape firmly to an inconspicuous area and peel it back. If it removes cleanly with strong resistance, you have a high-energy surface suitable for adhesive mounting. If it lifts easily or leaves residue, you’re dealing with a low-energy surface that requires specialized adhesives or alternative mechanisms. For wood cabinets, determine whether the finish is lacquer, polyurethane, or oil-based. Lacquer and polyurethane are adhesive-friendly; oil finishes are not. Laminate cabinets present a wildcard—some have melamine surfaces that bond well, while others use low-pressure laminates that repel adhesives. When in doubt, choose handles with mechanical backup systems like edge-clamping designs.
Texture and Finish Considerations
Smooth, non-porous surfaces provide the ideal canvas for adhesive handles. Textured surfaces, popular in mid-century and rustic designs, reduce contact area by up to 70%, dramatically weakening the bond. For lightly textured surfaces, you can sometimes bridge the gaps using thicker foam tapes that conform to the texture. Deeply textured or distressed surfaces are fundamentally incompatible with adhesive systems—here, tension-based or clamp designs are your only reliable option. Glossy finishes also require caution: while they bond well initially, some adhesives can cause “crazing”—microscopic cracks in the finish—especially on lower-quality lacquers. Test in a hidden spot first, and consider using a protective barrier film between the adhesive and the surface for high-gloss applications.
Installation Mastery: Techniques for Maximum Hold
Proper installation determines 90% of your success with tool-free handles. Rushing the process or skipping critical steps transforms a premium product into a failure waiting to happen. The difference between a handle that lasts three months and three years often comes down to surface temperature, pressure application, and curing time.
Surface Prep: The 90% Success Factor
Even brand-new cabinets harbor invisible contaminants. Manufacturing oils, fingerprint residues, and airborne pollutants create molecular barriers between the adhesive and the surface. The prep protocol is non-negotiable: first, clean with isopropyl alcohol (not household cleaners that leave residues), then abrade gently with a fine Scotch-Brite pad to increase surface area, then clean again. For kitchen cabinets near cooking areas, a degreasing step with a mild dish soap solution is essential. The surface must be completely dry—adhesives cure through chemical reaction with the surface, and moisture interferes with this process. In humid climates, wait 24 hours after cleaning or use a hair dryer on low heat to ensure deep dryness. Temperature matters too; apply adhesives when the surface is between 65-85°F. Colder surfaces prevent proper flow, while hotter surfaces cause the adhesive to set before full contact is made.
Application Timing and Curing
The “30-second rule” is a dangerous myth. While many adhesives achieve handling strength quickly, full cure times range from 24-72 hours depending on the formulation. During this period, avoid using the handles or subjecting them to stress. Mark the curing time on your calendar and treat the handles as decorative only. When applying pressure, use a J-roller or the smooth side of a spoon to apply firm, even pressure across the entire mounting base. This activates the adhesive’s pressure-sensitive properties and eliminates air pockets that become failure points. For larger handles, apply pressure from the center outward in a star pattern, similar to tightening lug nuts on a car wheel. This ensures uniform distribution and prevents edge lifting.
Weight Capacity and Realistic Expectations
Understanding the physics of temporary hardware prevents catastrophic failures. Adhesive strength is measured in shear force (parallel to the surface) and peel force (perpendicular). Handles experience both simultaneously when you pull on them. Manufacturers’ weight ratings are optimistic laboratory figures; real-world capacity is typically 50-70% of stated limits.
Kitchen Cabinetry vs. Bathroom Vanities
Kitchen cabinet doors, typically weighing 5-15 pounds empty, experience dynamic loads when opened—especially if they contain heavy items like dishes. Add the weight of the contents, and a single adhesive handle might need to manage 20-30 pounds of effective load. For upper cabinets, choose handles rated for at least 40 pounds to maintain a safety factor. Bathroom vanity drawers, holding lighter items like toiletries, can function reliably with 15-20 pound ratings. However, consider the “jerk load”—the sudden force applied when yanking open a stuck drawer. This momentary force can exceed static weight by 3-5x, which is why quality handles use shock-absorbing foam adhesives that dissipate energy rather than transferring it directly to the bond line.
Heavy-Duty Alternatives for Demanding Applications
For pantry doors or pot drawers that see extreme use, consider hybrid systems. Some manufacturers offer handles that combine adhesive mounting with a lightweight tension rod that braces against the cabinet interior. Others provide “redundancy kits”—secondary adhesive strips that you can add after initial installation if you notice any flexing. Another strategy is distributing load across multiple smaller handles rather than one large pull. Two handles rated at 15 pounds each provide more reliable performance than one rated at 30 pounds, because they create two separate bond areas and reduce the mechanical advantage that leverage creates on a single mounting point.
Style Without Commitment: Design Trends in Temporary Hardware
The aesthetic flexibility of tool-free handles is perhaps their most underrated feature. Because you’re not committing to permanent holes, you can experiment with bold styles that would be risky in a purchased home. This freedom has spawned a micro-trend of “seasonal hardware”—renters who change handles to match holidays or their evolving taste.
Matching Your Rental’s Era and Architecture
Successful hardware upgrades respect the underlying architecture. In a 1920s apartment with original cabinetry, sleek minimalist handles create jarring anachronism. Instead, seek temporary versions of period-appropriate styles—bin pulls for kitchens, glass knobs for bathrooms. Many manufacturers now produce “heritage collections” specifically for renters in vintage buildings, using adhesives hidden behind historically accurate designs. For generic 1990s builder-grade oak cabinets, modern bar pulls in matte black or brushed brass can drag the aesthetic into the current decade without looking out of place. The key is scale: oversized handles on small drawers look cartoonish, while diminutive pulls on large pantry doors appear lost. Follow the “rule of thirds”—handle length should be roughly one-third the width of the drawer front for visual harmony.
Mixing Metals and Finishes Strategically
The old rule of matching all hardware metals is fading, but mixing requires intentionality. Choose a dominant metal (typically the most prominent handles, like those on upper cabinets) and an accent metal for secondary points like appliance pulls or bathroom accessories. The two metals should have contrasting tones—warm brass with cool chrome, or black with polished nickel—to look deliberate rather than mismatched. For tool-free handles, consider using different mechanisms as a design feature: magnetic handles on metal uppers, adhesive on wooden lowers, creating a subtle visual distinction that explains the material difference. This approach turns a limitation into a curated design choice.
Budget Navigation: From Big-Box to Boutique
The tool-free handle market spans from $5 impulse buys to $50 designer pieces, with quality and longevity scaling accordingly. Understanding where to invest and where to save prevents both overspending and false economy.
Price Tiers and What You Actually Get
Budget handles ($5-$12) typically use lower-grade adhesives with shorter lifespans—ideal for short leases under 12 months but risky for longer tenancies. Mid-range options ($15-$25) offer the sweet spot: automotive-grade adhesives, solid metal construction, and clean-removal guarantees. Premium handles ($30+) provide designer aesthetics, lifetime warranties, and often include restoration kits with specialized removal tools and surface cleaners. For a standard kitchen with 20 handles, the difference between budget and premium is $400 versus $1,000. Spread over a three-year lease, the premium option costs $0.91 per day for hardware that looks custom and removes flawlessly. The budget option might cost $0 in a perfect scenario, but one failed handle damaging a cabinet door could cost your entire $1,500 deposit.
The Hidden Costs of Cheap Alternatives
The true cost of budget handles includes potential damage from adhesive failure. When a cheap adhesive gives way, the handle often takes a chunk of cabinet finish with it, or leaves a sticky residue that requires aggressive solvents to remove—solvents that can damage the underlying surface. Additionally, replacing failed handles mid-lease means buying twice, erasing any initial savings. Factor in the time cost of reinstallation and the frustration of unpredictable performance. Quality handles also retain resale value; a set of premium temporary handles can be cleaned and reused in your next rental, while cheap ones become disposable after one use.
The Landlord Conversation: Navigating Approvals and Lease Language
Proactive communication about temporary upgrades can build trust with your landlord and potentially increase your lease renewal chances. Landlords appreciate tenants who care for the property, and documenting your improvements positions you as an asset rather than a liability.
Lease Language Decoding
Most leases prohibit “permanent alterations” or “structural modifications.” Tool-free handles fit squarely into the category of “removable fixtures,” similar to curtain rods or shower caddies. However, some leases contain catch-all phrases like “no changes to cabinetry.” In these cases, a brief, confident email can clarify: “I’m planning to install removable adhesive handles that leave no damage. I can provide before/after photos and will restore the original hardware upon move-out.” This demonstrates transparency and responsibility. Keep the email chain as documentation. If your landlord expresses concern, offer to purchase a small sample handle for them to inspect the removal process on an inconspicuous cabinet.
Documentation Strategies
Create a “rental improvement log” with dated photos of original hardware, installation photos showing the temporary nature of the upgrade, and product specifications highlighting the clean-removal feature. This portfolio serves multiple purposes: it protects you during move-out inspections, it can be transferred to the landlord as a value-add if they decide to sell, and it becomes a selling point for future tenants who might appreciate the upgraded handles. Some savvy renters even negotiate a small rent credit by presenting their improvements as property enhancements that the landlord benefits from after they leave.
Removal and Restoration: The Exit Strategy
The final moments of your lease determine whether your upgrade adventure ends in deposit recovery or deposit deduction. Proper removal is as technical as installation, requiring patience and the right technique.
Step-by-Step Damage-Free Removal
Never yank or pry handles off. The correct technique involves applying heat to soften the adhesive—use a hair dryer on high for 2-3 minutes, moving constantly to avoid scorching. Then, slide dental floss or fishing line behind the mounting plate in a sawing motion to separate the adhesive from the surface. For stubborn residues, use a plastic razor blade and an adhesive remover specifically formulated for the surface type (wood, laminate, metal). Avoid citrus-based removers on wood; they can penetrate the finish and cause swelling. Instead, use a mild mineral spirit on a microfiber cloth, working in small circles. The goal is to dissolve the adhesive without dissolving the cabinet finish.
Surface Cleaning and Deposit Recovery
After removal, the cabinet surface may appear dull where the handle was mounted. This is often adhesive residue rather than damage. A polishing compound designed for automotive finishes can restore the sheen on lacquered wood. For laminate, a baking soda paste (1:1 with water) buffed gently with a soft cloth removes haze without scratching. Metal surfaces respond well to a light application of stainless steel polish. Document the restoration with photos immediately after cleaning, then again 24 hours later after the surface has fully dried and any remaining haze has evaporated. Present these photos during your final walkthrough before the landlord has a chance to notice the change, framing it as proactive restoration.
Common Renter Mistakes to Avoid
Even intelligent renters fall prey to predictable errors when selecting and installing tool-free handles. These mistakes stem from assuming temporary hardware behaves like permanent hardware, or from underestimating environmental factors.
Skipping the Weight Test
The most dangerous mistake is installing handles on fully-loaded cabinets without testing. Always perform a “stress test” after the full cure period: gradually load the cabinet with weight while gently pulling on the handle, feeling for any flex or give. This reveals problems before they become emergencies. Another critical error is installing handles on cabinet doors that aren’t properly aligned. A door that rubs against its frame creates constant vibration that weakens adhesives over months. Fix the alignment first, even if it means adjusting hinges (a reversible tweak that landlords typically appreciate).
Ignoring Temperature and Humidity
Installing adhesive handles in winter when cabinets are cold, then expecting them to hold when summer humidity arrives, is a recipe for failure. Adhesives cure best at moderate temperatures and low humidity. If you must install in extreme conditions, use a space heater and dehumidifier to create a micro-environment around the installation area for 72 hours. Conversely, removing handles in cold weather makes adhesives brittle and more likely to tear surfaces. Always remove with heat, regardless of season. Another overlooked factor is cabinet contents: storing cleaning chemicals with harsh solvents underneath a sink can off-gas vapors that degrade adhesives over time. Ensure adequate ventilation in enclosed cabinet spaces.
Maintenance for Long-Term Temporary Use
Temporary hardware requires different maintenance than permanent fixtures. The goal is preserving the temporary bond while keeping the handles functional and attractive.
Cleaning Without Compromising Adhesion
Avoid spraying cleaners directly on or around the handle base. Liquids can seep behind the mounting plate and degrade the adhesive from the edges inward. Instead, spray cleaner on a cloth and wipe the handle only. For deep cleaning, remove the handle completely (if the design allows) and clean the exposed area, then reapply using fresh adhesive strips if necessary. Check handle tightness monthly by gently wiggling them. A handle that has developed slight movement needs immediate attention—either re-pressing to reactivate the adhesive or adding a supplementary support. Don’t wait for complete failure.
When to Replace vs. Refresh
Adhesives age, even without use. After two years, the bond strength of most pressure-sensitive adhesives begins to decline due to plasticizer migration and environmental exposure. If you’re renewing your lease, consider proactively replacing the adhesive mounts rather than waiting for failure. Many premium handle manufacturers sell replacement adhesive kits separately. For magnetic systems, check magnet strength annually with a simple pull test; neodymium magnets can lose 1-2% of their strength per year due to thermal cycling and corrosion. If you notice weakening, the strike plate may need cleaning or the magnets might require replacement.
Creative Applications Beyond Kitchens and Baths
The utility of tool-free handles extends far beyond their traditional domains. Savvy renters have adapted these systems for furniture makeovers, closet organization, and even temporary accessibility modifications.
Furniture Makeovers and Closet Systems
Transform a basic IKEA dresser by adding decorative handles to drawer fronts using adhesive mounts—this creates the look of high-end case goods without drilling into veneered particleboard, which is prone to chipping. In closets, install temporary handles on sliding doors that lack grips, or add pull-out handles to deep storage bins that are difficult to reach. For renters with mobility limitations, tool-free handles can be installed at custom heights on any surface, creating ergonomic solutions that don’t require landlord approval or permanent modification. Some renters even use large adhesive pulls as towel hooks on bathroom doors, leveraging their weight capacity for alternative functions.
Renter-Friendly Landlord Improvements
Paradoxically, installing quality temporary handles can be positioned as a property improvement that benefits the landlord. If the existing hardware is genuinely outdated or broken, offering to upgrade it at your own expense (with the understanding that you’ll remove it at move-out) solves a problem for the landlord while giving you the aesthetic you want. Document the original hardware’s condition with photos first. This approach works especially well when renewing a lease—it demonstrates investment in the property and can be leveraged in rent negotiations. Some landlords may even offer to reimburse you for the hardware if they decide to keep it, effectively splitting the cost of a permanent upgrade.
Future-Proofing: From Rental to Ownership
The transition from renter to homeowner doesn’t negate the value of your tool-free handle collection. These systems offer unique advantages during the home-buying process itself and can evolve with your changing needs.
Transitioning to Permanent Installation
Many tool-free handles are designed with dual mounting options—the same handle can be used adhesively for rental applications and then converted to screw-mounting for permanent installation in a purchased home. Check for “convertible” or “dual-mount” specifications when buying. This means your $25-per-handle investment serves you through multiple life stages. For handles that aren’t convertible, the adhesive mounting plates often leave no trace, allowing you to drill mounting holes in the exact same positions without evidence of the temporary phase. This is particularly valuable if you’ve developed muscle memory for handle placement and want to maintain ergonomics.
Repurposing Your Tool-Free Investment
Quality temporary handles retain significant resale value in online marketplaces dedicated to renter improvements. A set of 20 premium handles purchased for $500 can resell for $300-$350 after three years of use, effectively costing you $5 per month for the upgrade. Alternatively, keep them as a “rental emergency kit” for future moves. Having a set of handles that you know work with your installation style saves time and decision fatigue in your next rental. Some renters even gift their handles to incoming tenants, creating goodwill and potentially negotiating an earlier move-in date or other concessions from landlords eager to keep improvements in place.
Frequently Asked Questions
Will tool-free handles really hold up to daily use for my entire lease?
Yes, when properly selected and installed. Premium adhesive handles using automotive-grade foam tapes can maintain 90% of their initial bond strength for 3-5 years under normal conditions. The key is matching the handle’s weight rating to your actual use, performing proper surface prep, and allowing full cure time. Heavy-use applications like pantry doors benefit from supplementary support or hybrid mounting systems.
Can I install these handles on textured or uneven cabinet surfaces?
Light textures can be accommodated with thicker foam adhesives that conform to surface irregularities. However, deep textures, distressed finishes, or heavily grained wood reduce contact area too much for reliable adhesion. In these cases, tension-based or clamp-style handles are your best option as they don’t rely on surface contact. Always perform the masking tape test first to assess surface energy.
How do bathroom humidity and temperature fluctuations affect adhesive performance?
Quality tool-free handles use closed-cell foam adhesives that are specifically engineered to resist moisture infiltration. For bathroom applications, choose handles rated for “wet environments” or “high humidity.” Avoid installing during peak humidity periods, and ensure the surface is completely dry before application. Some renters add a thin bead of clear silicone caulk around the handle base after installation for extra moisture protection, though this complicates removal.
What weight capacity should I look for when choosing handles for heavy drawers?
Select handles rated for at least double the static weight of the loaded drawer. For a drawer holding 20 pounds of contents, choose a handle rated for 40 pounds minimum. This accounts for dynamic loading, “jerk force” when opening, and the safety factor needed for long-term reliability. For exceptionally heavy applications like pot drawers, consider using two smaller handles instead of one large one to distribute the load.
Will removing the handles damage my cabinets or leave permanent marks?
Properly installed quality handles remove without damage using heat and the correct technique. The key is using handles with “clean-removal” adhesives and avoiding cheap products that use aggressive, permanent glues. Always remove with heat (hair dryer) and use fishing line or dental floss to separate the adhesive. Any remaining residue can be removed with surface-appropriate cleaners. Document the original condition with photos to differentiate between pre-existing wear and any potential installation effects.
Can I reuse the same handles in my next rental, or are they single-use?
Most premium handles are designed for reuse. Magnetic systems are infinitely reusable. Adhesive handles require replacement mounting strips, which most manufacturers sell separately. After removal, clean the handle’s mounting base with alcohol to remove old adhesive residue, then apply new strips. The handle itself remains functional for many cycles. Budget handles often use integrated adhesive that can’t be replaced, making them effectively disposable.
Are tool-free handles more expensive than traditional screw-mounted hardware?
Per-piece cost is 20-40% higher than comparable traditional handles due to the specialized mounting systems. However, the total cost of ownership is lower when you factor in the avoided risk to your security deposit. A $500 set of temporary handles is cheaper than losing a $1,500 deposit over drilled holes. Additionally, the reusability factor spreads the cost across multiple residences, making them more economical over time for serial renters.
Do I need to inform my landlord before installing tool-free handles?
While not legally required for true temporary fixtures, proactive communication builds trust. A brief email stating your intention to install “removable, non-damaging hardware” positions you as a responsible tenant. If your lease has ambiguous language about modifications, getting written approval (even informal) creates a paper trail. Some landlords may actually appreciate the upgrade if the existing hardware is dated, potentially offering to split costs or reimburse you if they decide to keep the handles.
What happens if an adhesive handle fails and something breaks?
Quality manufacturers offer damage warranties that cover both the handle and the surface it was mounted on. Read the fine print before purchasing. If a handle fails due to manufacturing defect, document the failure with photos and contact the company immediately. For renter protection, some brands provide “deposit insurance”—if their product causes damage, they cover repair costs up to a certain amount. This is rare but worth seeking out. Always keep original packaging and receipts for warranty claims.
How do I choose between adhesive, magnetic, and tension-based systems for my specific cabinets?
Start by identifying your cabinet material and usage level. For wood or laminate cabinets in standard applications, adhesive systems offer the best versatility and aesthetics. For metal cabinets, magnetic systems provide superior strength and reusability. For textured surfaces or situations requiring absolute non-damaging installation, tension/clamp systems are safest. Consider your lease length—adhesives are best for 1-3 year stays, while magnetic systems excel for shorter leases or situations requiring frequent removal. When in doubt, purchase a single handle in each type and test them on an inconspicuous cabinet for one week before committing to a full set.