Transforming a cramped kitchen into a functional, stylish space often hinges on those subtle finishing touches that make everything feel intentional and complete. For many renovators working with limited square footage, refrigerator side panels represent a surprisingly powerful upgrade—they bridge the gap between your appliance and cabinetry, creating seamless visual flow that tricks the eye into perceiving more space. Forget the misconception that this is merely cosmetic; in compact layouts, cohesive integration minimizes visual clutter, making your kitchen feel larger and more thoughtfully designed without requiring major structural changes. And the best part? Achieving this polished look doesn’t demand a hefty budget, especially when you know where to focus your dollars wisely.
The year 2026 brings renewed focus on maximizing every inch of our homes, with small kitchen renovations prioritizing smart, affordable solutions over extravagant overhauls. Side panels, often overlooked, are stepping into the spotlight as a budget-friendly hero for DIYers and pros alike. They offer remarkable versatility, allowing you to customize the look of your refrigerator to match existing cabinets or introduce a fresh accent without replacing the entire appliance. This guide cuts through the noise, focusing squarely on what truly matters when selecting panels under $100: understanding your specific spatial constraints, deciphering material options that deliver durability without breaking the bank, and mastering the installation nuances that ensure a pro-level finish. Let’s unlock how these unassuming pieces can elevate your entire kitchen aesthetic affordably.
Top 10 Refrigerator Side Panels
Detailed Product Reviews
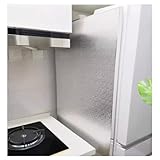
1. Stainless Steel Contact Paper 24" x 118" Self Adhesive Fridge Wallpaper Peel and Stick Backsplash Waterproof Vinyl Refrigerator Wrap Metallic Contact Paper for Dishwasher RV Countertop Audio Covers

Overview:
This 24" x 118" LIKILIKI roll offers a budget-friendly metallic finish for home surfaces. Designed to mimic brushed stainless steel, it’s a peel-and-stick vinyl solution for refreshing appliances, countertops, and walls without permanent renovation. Ideal for renters or quick DIY projects seeking an industrial aesthetic.
What Makes It Stand Out:
Its extensive 19.38 sq. ft. coverage accommodates large areas like full fridge fronts or backsplashes. The waterproof, oil-resistant vinyl is versatile across kitchens, bathrooms, and RVs, while the non-magnetic disclaimer prevents user frustration. Grid-lined backing aids precise cutting, enhancing DIY accessibility.
Value for Money:
Priced competitively for its size, it outperforms paint or real metal sheets in cost and ease. Though not a permanent upgrade, it delivers high visual impact for minimal investment—especially valuable for temporary fixes or testing design ideas before committing to pricier materials.
Strengths and Weaknesses:
Strengths: Large coverage area; waterproof and easy to apply; multi-scene usability; grid lines simplify trimming.
Weaknesses: Non-magnetic (misleading for fridge use); color variance if batches differ; requires immaculately smooth, clean surfaces; not heat-resistant for stovetop areas.
Bottom Line:
A practical, affordable cosmetic solution for non-heat surfaces. Best for quick refreshes on fridges or cabinets, but verify surface compatibility first. Avoid for high-heat zones.
2. Livelynine Brushed Nickel Peel and Stick Wallpaper Silver Stainless Steel Contact Paper for Appliances Dishwasher Fridge Refrigerator Wrap Cover Adhesive Decorative Vinyl Film 15.8x78.8 in

Overview:
Livelynine’s 15.8"x78.8" contact paper provides a brushed nickel finish for small-scale appliance makeovers. This aluminum vinyl wrap targets heat-prone areas like near stoves, emphasizing functionality alongside its metallic aesthetic for kitchens and bathrooms.
What Makes It Stand Out:
Its standout feature is heat resistance up to 170°F—rare among contact papers—making it suitable for backsplashes and countertop edges near stoves. The grid-lined backing ensures precise cuts, while oil/water resistance and removability enhance practicality for high-moisture zones.
Value for Money:
Though smaller (8.65 sq. ft.) than competitors, the heat tolerance justifies the price for targeted use. It’s a cost-effective shield against grease and spills where premium stainless steel would be overkill, especially for renters needing reversible upgrades.
Strengths and Weaknesses:
Strengths: Heat-resistant up to 170°F; oil/waterproof; grid lines for accuracy; wide application range (appliances, cabinets, RVs).
Weaknesses: Limited coverage area; surface must be impeccably clean for adhesion; not suitable for very high-heat surfaces like ovens; aluminum vinyl may show seams.
Bottom Line:
An excellent niche pick for heat-vulnerable spots like stove surrounds. Prioritize meticulous surface prep, and it’s a smart, durable investment for kitchen refreshes.
3. Taogift Self Adhsesive Vinyl Film Black Brushed Metal Stainless Steel Contact Paper for Dishwasher Fridge Refrigerator Stove Appliances Kitchen Cabinets Countertops Walls Backplash 15.7x117 Inches

Overview:
Taogift’s 15.7"x117" black contact paper delivers a matte brushed metal look for modernizing appliances. Targeted at sleek, contemporary spaces, this bubble-free vinyl covers fridges, cabinets, or walls with a non-reflective metallic finish that hides fingerprints well.
What Makes It Stand Out:
The distinctive black brushed metal aesthetic sets it apart from typical silver options, catering to bold design schemes. Its grid-lined backing and bubble-free claim simplify installation, while water resistance supports use in humid areas like near sinks or dishwashers.
Value for Money:
Offering 12.25 sq. ft. at a mid-range price, it’s ideal for accent projects (e.g., single cabinet fronts or dishwasher panels). While not heat-resistant, it provides significant visual transformation for the cost—especially valuable for creating cohesive black-appliance looks affordably.
Strengths and Weaknesses:
Strengths: Unique black finish; grid lines for easy cutting; water-resistant; versatile for smooth surfaces; hides smudges better than silver.
Weaknesses: Not heat-resistant (avoid stoves); requires perfectly smooth surfaces; black may highlight dust; limited to 12.25 sq. ft. per roll.
Bottom Line:
A stylish choice for dark, modern accents where heat isn’t a concern. Best for fridge doors or cabinets—apply carefully on flaw-free surfaces for seamless results.
4. Refrigerator Insulation Board, Stovetop Protector, Heat and Fire Resistant Aluminum Foil Splatter Guard Heat Shield for Side of Fridge(Magnetic Type,30x40cm)
Overview:
This magnetic 30x40cm heat shield protects refrigerators from stove-side heat and grease splatter. Made with double-layer aluminum and polyurethane, it’s engineered for direct placement between gas stoves and adjacent appliances, prioritizing safety over aesthetics.
What Makes It Stand Out:
Its 300°C heat resistance and flame-retardant properties are exceptional. The magnetic backing allows tool-free installation and removal, while lightweight construction ensures easy repositioning—a critical safety feature absent in adhesive alternatives.
Value for Money:
Priced modestly for its specialized function, it prevents costly appliance damage or fire hazards. Cheaper than stove-repositioning or custom shielding, it’s indispensable in compact kitchens where appliances sit close together.
Strengths and Weaknesses:
Strengths: Withstands 300°C heat; magnetic for instant install; easy wipe-clean maintenance; flame-retardant; versatile for ovens/microwaves.
Weaknesses: purely functional (ugly); magnets weaken over time; size may not fit all gaps; not adhesive (slips if uneven).
Bottom Line:
A non-negotiable safety upgrade for tight kitchen layouts. Skip decorative alternatives—this is the pragmatic, life-extending shield your appliances need.
5. AOHMPT Self-Adhesive Refrigerator Wrap Set - Removable Vinyl Fridge Stickers, Peel & Stick Door Mural Decor for Kitchen, Bar, Office 32.3x78.7

Overview:
AOHMPT’s 32.3"x78.7" vinyl wrap transforms fridge doors with decorative patterns. Designed for full-coverage murals, it merges aesthetic appeal with practicality, targeting kitchens, bars, or offices seeking personalized, non-permanent style updates.
What Makes It Stand Out:
The extra-large size ensures seamless full-door coverage without seams. Repositionable adhesive allows error correction during application, while waterproof, heat-resistant material supports longevity—uncommon in decorative wraps. Residue-free removal preserves surfaces.
Value for Money:
Competitively priced for its generous dimensions, it outperforms smaller decals or paint. The reusability (if stored properly) and durability justify costs, especially for commercial spaces wanting frequent refreshes without damage.
Strengths and Weaknesses:
Strengths: Massive coverage for seamless looks; repositionable adhesive; durable and waterproof; residue-free removal; modern designs.
Weaknesses: Requires meticulous surface prep; air bubbles risk if rushed; decorative only (no protection); patterns may limit resale appeal.
Bottom Line:
The top choice for striking, renter-friendly fridge makeovers. Prioritize patience during application, and it delivers flawless, long-lasting artistry.
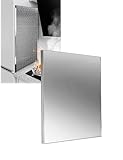
6. GFLPSQIA Magnetic Refrigerator Side Panel, Heat Shield for Wall Behind Wood Stove for Cooking Areas/Gas Pipe, Stove Top Refrigerator Splash Guard(L 24in x W 24in)

Overview:
This versatile stainless steel panel serves as a magnetic refrigerator side shield, stove splash guard, and wall heat protector. Designed for kitchens where appliances sit close together, it minimizes heat transfer and splatter damage while offering flexible sizing options.
What Makes It Stand Out:
Its standout feature is the customizable sizing (8–48in lengths), accommodating diverse kitchen layouts. The smooth, non-porous stainless steel surface resists grease and simplifies cleaning, while strong magnetism ensures tool-free installation on metal surfaces. Unlike rigid alternatives, it doubles as a gas pipe insulator or wood stove shield.
Value for Money:
Priced competitively for stainless steel construction, it outperforms cheaper plastic shields in durability and heat resistance. The multi-scenario utility—protecting fridges, stoves, and walls—justifies its cost versus single-use products, though budget options exist for basic splash guarding.
Strengths and Weaknesses:
Strengths: Customizable dimensions; easy wipe-clean surface; effective heat reflection; versatile for fridges, stoves, or walls.
Weaknesses: Magnets may not adhere to non-metal surfaces; thinner than some insulated alternatives; limited color options.
Bottom Line:
An excellent investment for kitchens needing adaptable heat and splash protection. Ideal for renters or homeowners prioritizing easy installation and durability, though verify surface compatibility before purchasing.
7. THOUSAND SUNNY Aluminum Heat Shield Board, 23.6" x 23.6" Magnetic Heat Shield for Side of Fridge Fireplace and Kitchen Protection

Overview:
This compact aluminum heat shield combines magnetic and adhesive mounting to protect refrigerators from stove heat. Its double-sided aluminum frame with polyurethane foam targets kitchens where appliances are adjacent, offering focused thermal insulation.
What Makes It Stand Out:
The 392°F heat resistance exceeds many competitors, while the dual mounting (magnets + adhesive) ensures stability on varied surfaces. The oil-resistant aluminum surface simplifies maintenance in greasy environments, and its lightweight design allows effortless repositioning.
Value for Money:
Slightly pricier than basic shields, but the high-temperature tolerance and corrosion-resistant build deliver long-term value. Outperforms thinner stainless steel options in sustained heat scenarios, though smaller standard size may require multiple units for larger gaps.
Strengths and Weaknesses:
Strengths: Exceptional heat resistance (392°F); dual-mount flexibility; easy oil cleanup; no warping or fading.
Weaknesses: Fixed 23.6" size limits customization; foam core less durable than solid metal; adhesive may weaken over time.
Bottom Line:
Highly recommended for gas stove users needing robust, high-heat protection. Its specialized build justifies the cost for safety-focused kitchens, but measure your space carefully due to non-adjustable sizing.
8. Americana II/Americana II Plus Refrigerator Door Panels, Black, Fits DM 2872/2882

Overview:
These replacement door panels upgrade the aesthetic of compatible Americana II refrigerators (models DM 2872/2882). Sold as a set for freezer and fridge doors, they slide into existing frame grooves without tools for a seamless refresh.
What Makes It Stand Out:
The tool-free, slide-in installation is uniquely straightforward—no adhesives or screws required. The sleek black finish modernizes older units, and precise sizing ensures OEM-level compatibility, avoiding the guesswork of universal panels.
Value for Money:
Cost-effective for targeted model refreshes compared to full appliance replacement. While limited to specific Americana II units, the exact fit eliminates waste from trimming or returns, making it a smart value for owners of these discontinued models.
Strengths and Weaknesses:
Strengths: Effortless installation; model-specific precision; enhances visual appeal; durable finish.
Weaknesses: Zero heat/splash protection; only fits two discontinued models; purely cosmetic with no functional benefits.
Bottom Line:
A niche but essential solution for Americana II owners seeking affordable aesthetic renewal. Only purchase if you own DM 2872/2882 models—otherwise, it serves no purpose.
9. Single-Sided Stainless Steel Refrigerator and Stove Insulation Board, Refrigerator Side Panel, Kitchen Gas Stove Insulation Board(Magnetic,80x60cm)
Overview:
This magnetic stainless steel panel (80x60cm) shields refrigerators from stove heat and sunlight. Designed for direct attachment to fridge sides, it prevents discoloration while offering fire-retardant safety in compact kitchen setups.
What Makes It Stand Out:
Fire-retardant properties and dual functionality (heat shield + sunblock) distinguish it. The single-sided stainless steel provides superior corrosion resistance, and strong magnets ensure secure placement without adhesives. The 80x60cm size fits standard gaps between appliances.
Value for Money:
Mid-range pricing reflects its premium materials. It outperforms cheaper plastic shields in longevity and safety, though larger kitchens may need multiple units. The sun-protection feature adds unexpected value for sun-exposed kitchens.
Strengths and Weaknesses:
Strengths: Fire-retardant; effective sunblock; easy magnetic install; scratch-resistant; simple wipe-clean surface.
Weaknesses: Fixed size (80x60cm) may not cover wider gaps; stainless steel shows fingerprints; no insulation for non-metal surfaces.
Bottom Line:
A top choice for safety-conscious users needing reliable heat and sun protection. Best for standard-sized appliance gaps—verify measurements before buying.
10. Refrigerator and Stove Insulation Board,Magnetic Refrigerator Side Panel, Kitchen Gas Stove Insulation Board(120x60cm)

Overview:
This extra-long (120x60cm) magnetic shield combines aluminum alloy, polyurethane, and stainless steel to protect refrigerators from stove heat and sunlight. Its generous size suits wider appliance gaps in modern kitchens.
What Makes It Stand Out:
The 120cm length is ideal for spacious layouts where standard shields fall short. Triple-material construction (aluminum/stainless steel/polyurethane) enhances insulation, while powerful magnets and flame-retardant properties ensure safety and stability on metal surfaces.
Value for Money:
Priced higher due to premium materials and large size, but eliminates the need for multiple smaller panels. Superior to single-material shields in heat reflection, justifying the cost for kitchens with significant stove-fridge proximity.
Strengths and Weaknesses:
Strengths: Extra-wide coverage (120x60cm); multi-material insulation; strong magnetic hold; sun-protection feature; sleek modern finish.
Weaknesses: Heavyweight may strain fridge sides; overkill for narrow gaps; polyurethane core less heat-resistant than solid metal.
Bottom Line:
Perfect for large kitchens needing extended protection. Invest if your appliance gap exceeds 24 inches—otherwise, opt for smaller, more cost-effective models.
Understanding the Role of Refrigerator Side Panels in Small Kitchens
Why Integration Matters for Compact Spaces
In tight kitchen layouts, every visual element competes for attention. Side panels eliminate the jarring gap between your refrigerator and adjacent cabinetry, creating a unified wall of storage that minimizes visual fragmentation. This seamless transition is crucial for small spaces, as it tricks the eye into perceiving a more expansive, less cluttered environment. Without panels, the exposed metal sides of the fridge become a focal point for emptiness, undermining the cohesive feel essential for compact comfort.
Beyond Aesthetics: Functional Benefits You Might Overlook
While the visual upgrade is immediate, side panels offer practical perks often underestimated. They provide a subtle buffer zone, protecting cabinet edges from accidental bumps as the fridge door opens and closes—a common issue in narrow walkways. Additionally, they help conceal minor installation imperfections or uneven gaps between the appliance and walls, acting as a forgiving finishing touch that saves you from costly cabinet adjustments or shimming nightmares.
The Budget Imperative: Why $100 is a Smart Ceiling
Setting a realistic budget cap like $100 prevents overspending on an element that, while impactful, shouldn’t rival major appliance costs. This price point forces smart prioritization: focusing on essential features like precise fit and durable finishes rather than premium materials or complex mechanisms. It aligns perfectly with the 2026 trend of strategic, high-impact micro-upgrades that collectively transform a space without draining your renovation fund.
Critical Measurement Considerations Before You Buy
Decoding Your Refrigerator’s Unique Requirements
Not all refrigerators play by the same rules. Begin by meticulously measuring the exact height and width of the space between your fridge and the adjacent cabinet or wall. Crucially, account for the fridge’s operational swing—pull the door fully open and measure the space at its widest point during movement. Ignoring this dynamic clearance is a top reason panels end up warped or damaged post-installation.
The Hidden Factor: Appliance Projection and Countertop Overhang
Your fridge likely sits slightly behind the front plane of your cabinets, especially if countertops extend beyond the cabinetry. Measure this depth difference carefully. Panels must accommodate this recess without protruding awkwardly. Similarly, note if your countertop overhangs the cabinet front; panels need to sit flush within this profile to avoid creating a trip hazard or visual snag under the counter edge.
Accounting for Imperfect Walls and Floors
Older homes rarely boast perfectly plumb walls or level floors—common culprits behind frustrating installation gaps. Take multiple vertical measurements (top, middle, bottom) on both sides where the panel will sit. If discrepancies exceed 1/8 inch, factor in shimming solutions or prioritize panels with adjustable mounting systems. This pre-check saves hours of frustration and prevents warped, unstable panels that won’t lie flat.
Material Options That Deliver Value Under $100
Engineered Wood: The Durability Sweet Spot
High-quality plywood or MDF (Medium-Density Fiberboard) core panels strike the best balance for budget-conscious renovators. They resist warping better than solid wood in humid kitchen environments and provide a stable, smooth surface for painting or veneering. Look for panels with a minimum 3/4-inch thickness for rigidity; thinner options may flex and rattle when the fridge door slams.
The Veneer Versatility Advantage
Real wood veneers over engineered cores offer the authentic look of pricier solid wood at a fraction of the cost. In 2026, sustainable bamboo and recycled wood veneers are particularly popular for their eco-credentials and surprising resilience. Ensure the veneer is sealed with a durable, moisture-resistant finish—essential for kitchen proximity where spills and humidity are inevitable.
When Thermofoil Makes Sense (and When to Avoid It)
Thermofoil (a vinyl laminate fused to MDF) provides a seamless, wipe-clean surface ideal for high-moisture zones. It’s excellent for achieving a modern, painted-cabinet look without DIY painting skills. However, avoid cheap thermofoil in areas exposed to direct heat (like near oven vents) or intense sunlight, as it can peel or bubble over time. Stick with reputable brands known for heat-resistant formulations within your budget.
Design Harmony: Matching Panels to Your Kitchen Aesthetic
Decoding Your Existing Cabinet Style
Your panels must speak the same design language as your cabinetry. Is your kitchen modern with flat-panel doors and minimal hardware? Opt for panels with a clean, slab-style profile. Traditional shaker cabinets call for panels with a subtle recessed center or a simple bead detail. Skipping this stylistic alignment creates dissonance, making the panels look like an afterthought rather than an integrated element.
The Color and Finish Matching Challenge
Achieving a perfect match requires more than just grabbing a paint swatch. Bring an actual cabinet door sample to the store if possible—lighting affects color perception dramatically. For painted finishes, match the sheen (satin, semi-gloss) as closely as the hue; mismatched sheens create visible contrast. With wood grains, prioritize matching the pattern and scale of the grain over exact color, as natural wood variations make perfect matches impossible.
Strategic Contrast: When Panels Should Stand Out
Sometimes, a deliberate contrast elevates the design. In an all-white kitchen, a panel in a warm walnut veneer can add rich focal points flanking the fridge. Ensure the contrasting element complements other accents in your space (like hardware or open shelving). Keep the contrast subtle—varying the wood tone by one shade darker, not switching to a bold black—maintains cohesion while adding depth.
Installation Know-How for Flawless Results
Essential Tools Beyond the Basic Screwdriver
Success hinges on having the right gear. A high-quality stud finder prevents panels from mounting solely into drywall (a common failure point). A laser level ensures absolute vertical alignment across the panel’s height, critical for avoiding visible gaps. Invest in plastic shims designed for cabinetry—they slide easily behind panels to compensate for uneven walls without cracking the material.
The Mounting Method That Prevents Warping
Never rely solely on adhesive or double-sided tape, especially for taller panels. The gold standard is a combination: use heavy-duty mounting brackets secured to cabinet frames or wall studs at top and bottom, supplemented by discreet L-brackets at the sides. This distributes weight and stress evenly, preventing the panel from bowing outward over time due to the fridge’s vibrations.
Concealing Hardware Like a Pro
Visible screws ruin the seamless illusion. Drill pilot holes slightly smaller than your screw diameter to prevent splitting, then countersink them just deep enough to bury the screw head. Fill the holes with matching wood putty (for painted panels) or a wax stick (for wood finishes) before final finishing. For thermofoil panels, use specialty trim head screws designed to sit flush under the vinyl surface.
Navigating Common Budget Panel Pitfalls
The “One Size Fits All” Myth Debunked
Manufacturers often list “standard” sizes, but refrigerator cutouts vary wildly between brands and models. Assuming a panel will fit based on your fridge’s general size (e.g., “36-inch fridge”) is a recipe for returns. Always measure your specific gap, accounting for door swing and cabinet projection, as outlined in the measurement section. Custom-sizing within budget is possible—many retailers offer minor trims for a small fee.
Ignoring Thermal Expansion in Material Choice
Kitchens experience significant temperature and humidity swings. Materials like solid wood or low-grade MDF can swell or shrink, causing panels to bind against the fridge or cabinet. Prioritize engineered wood cores with stable veneers or thermofoil, which handle expansion better. Always leave a hairline gap (about 1/16 inch) at the top and sides during installation to allow for seasonal movement—this invisible space prevents buckling.
Underestimating the Impact of Poor Edges
Cheap panels often have thin, fragile veneer edges or rough MDF borders that chip easily during handling or installation. Inspect edge quality closely; look for panels with tape-wrapped edges or those finished with a durable edge banding. For DIY-painted MDF, apply multiple coats of primer and paint to the edges—this simple step prevents moisture ingress and extends the panel’s life significantly.
Maximizing Value Through Smart Preparation
Surface Prep: The Non-Negotiable First Step
Skipping surface prep guarantees a subpar finish. For painted panels, sand the surface lightly with 220-grit paper to create “tooth” for paint adhesion, then wipe clean with a tack cloth. For wood veneers, ensure the surface is dust-free and free of factory oils using a mild detergent solution. Proper prep prevents peeling, bubbling, and uneven finishes that make budget panels look cheap.
The Primer Principle for Longevity
Never apply paint directly to raw MDF or porous veneers. A dedicated primer (oil-based for MDF, water-based for wood) seals the surface, blocks stains, and creates a uniform base. This single step, costing mere dollars, dramatically improves paint durability and reduces the number of topcoats needed—saving time and money while yielding a professional result.
Strategic Painting Techniques for Cabinet-Qopy Results
Use a high-quality mini-roller (4-inch, 3/16-inch nap) for large, flat panel areas to avoid brush strokes. For edges and details, opt for a small foam brush to prevent drips. Apply thin, even coats—forcing thick paint leads to sags and extended drying times. Allow full cure time (24-48 hours) between coats; rushing this step traps solvents, causing future wrinkling or soft spots vulnerable to kitchen wear.
Future-Proofing Your Small Kitchen Investment
Considering Appliance Lifespan in Your Design
Refrigerators typically last 10-15 years. Choose panels that can adapt if you replace the fridge later—opt for neutral finishes or easily repaintable surfaces. Avoid ultra-trendy colors or patterns on your panels that might clash with a future appliance purchase. Thinking ahead ensures your renovation investment stays relevant longer.
The Modularity Advantage for Evolving Spaces
Design your panel installation with potential future changes in mind. Use mounting systems that allow panels to be removed cleanly without damaging cabinets (like French cleats or removable brackets). This modularity lets you swap panels if you repaint cabinets, change hardware, or even slightly reconfigure the kitchen layout down the line—maximizing the long-term utility of your initial spend.
Sustainability as a Value Multiplier
In 2026, sustainable materials aren’t just eco-friendly; they often translate to better durability and resale appeal. Prioritize panels made with recycled content (like MDF containing post-industrial wood fibers) or rapidly renewable resources (such as bamboo veneers). These choices often hold up better over time and align with growing buyer preferences, subtly boosting your home’s perceived value.
Frequently Asked Questions
How do I measure for refrigerator side panels if my cabinets aren’t perfectly aligned?
Take measurements at the top, middle, and bottom of the gap. Use the smallest width measurement to ensure the panel fits everywhere, then use shims during installation to fill larger gaps at other points.
Can I install side panels on my own without professional tools?
Yes, but invest in a basic stud finder and laser level—they’re affordable and prevent critical alignment errors. A drill/driver, level, and tape measure are essential minimum tools for a secure, straight install.
What’s the thinnest panel I can safely use under $100?
Aim for at least 1/2-inch thickness for stability, though 3/4-inch is ideal. Panels thinner than 1/2-inch risk flexing, vibrating, or cracking, especially on taller refrigerators, negating any cost savings through premature replacement.
Will painting inexpensive MDF panels make them look cheap?
Not if you prep correctly! Seal raw MDF with primer first, then use cabinet-grade paint applied in thin, even coats. High-quality paint and proper prep create a durable, smooth finish indistinguishable from pricier options.
Do side panels work with stainless steel refrigerators?
Absolutely. Choose panels finished to match adjacent cabinets. The key is ensuring the panel surface and sheen complement—not clash with—the metallic appliance finish for a cohesive transition.
How do I prevent gaps between the panel and my countertop?
Measure the countertop overhang precisely. The panel should stop just short of the underside of the countertop (about 1/8 inch), allowing for a small, consistent gap that’s hidden by the counter’s edge.
Are adhesive mounting strips reliable for side panels?
They’re suitable only for very small, lightweight panels (under 12 inches tall). For full-height panels, rely on mechanical mounting (brackets/screws) into studs or cabinet frames to handle weight and vibration safely.
Can I use the same panel material for my fridge and dishwasher?
Yes, and it’s recommended for visual flow. Match the material, color, and finish precisely between both appliance panels to create a unified built-in look across your kitchen run.
What finish is most resistant to kitchen splatters and grease?
Thermofoil or high-gloss painted finishes are easiest to wipe clean. Avoid open-pore wood finishes or matte paints in high-splash zones near the sink or stove, as they absorb stains more readily.
How much should I expect to pay for basic installation if I hire help?
For a straightforward single-panel install using your purchased materials, expect $75-$150 from a handyman. Complex fits (uneven walls, custom trimming) may reach $200, but this is often still economical compared to full cabinet replacement.