Staring down a silent ice maker when guests are due can trigger genuine panic. That familiar hum you rely on for chilled drinks and cold compresses has vanished, leaving you scrambling for solutions. While calling a professional feels like the safe bet, many common ice maker issues are surprisingly simple fixes – especially for beginners armed with the right knowledge and tools. The good news? Repair kits designed specifically for DIYers have evolved dramatically, transforming what once seemed like a complex appliance nightmare into a manageable weekend project. You don’t need an engineering degree; you just need a clear understanding of what makes a beginner-friendly kit successful.
Diving into ice maker repair might seem intimidating at first glance, but it’s often far less complicated than you imagine. Most breakdowns stem from a handful of recurring culprits: worn seals, clogged components, or simple electrical disconnects – problems well within the reach of someone willing to learn. The key to avoiding frustration and potential damage lies not in brute force, but in selecting a repair solution tailored to your skill level and the specific appliance. A well-chosen kit acts as your roadmap, providing not just parts, but the confidence and clarity needed to restore that essential chill to your kitchen. Let’s demystify the process and equip you with the insights to find your perfect repair match.
Top 10 Ice Maker Repair Kits
Detailed Product Reviews
1. Ben’s Appliances Icemaker Repair Kit for Samsung DA97-19898A, DA82-02367A

Overview:
This specialized kit targets Samsung refrigerator ice maker freezing issues caused by moisture buildup. Designed as a DIY solution, it replaces problematic components with upgraded parts to restore reliable ice production without full unit replacement.
What Makes It Stand Out:
It uniquely combines an OEM-style DA97-19898A drain tube pre-sealed with 3M sealant, a 2.3W DC heater, and a DA82-02367B Y-clip set. The U.S.-made components outperform Samsung’s original design based on teardown analysis, specifically addressing the brand’s chronic icing flaw. The included detailed guide simplifies installation.
Value for Money:
Priced significantly below professional repair costs or full icemaker replacements, it offers exceptional value for preventing recurring icing. While not a fix for mechanically broken parts, it extends appliance life affordably. Comparable kits often lack the heater-tube integration or premium sealant.
Strengths and Weaknesses:
Strengths: Comprehensive icing solution; superior heater/drain design; easy DIY installation; U.S. components. Weaknesses: Only addresses moisture-related freezing (not motor/electrical failures); requires basic technical confidence; model-specific (Samsung only).
Bottom Line:
A highly effective, budget-friendly fix for Samsung’s notorious ice maker icing problem. Ideal for DIYers seeking to avoid costly service calls, though it won’t resolve unrelated mechanical failures. Strong recommendation for affected Samsung owners.
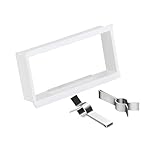
2. HPUY DA82-02367A Y-Clip Assembly Kit Compatible with Samsung Refrigerator Icemaker Replacement AP6261443 PS12115467 EA12115467
Overview:
This kit replaces the critical Y-clip component in Samsung refrigerator ice makers, which secures the drain tube and prevents moisture leakage. It’s a targeted solution for when the original clip erodes or fails, leading to icing and drainage issues.
What Makes It Stand Out:
Crafted from durable PP material, it resists water/air erosion better than factory clips, enhancing longevity. Its precise engineering matches OEM specifications for seamless installation into the original housing, and it covers numerous Samsung model numbers (including RF22K, RF28H, and RF28M series).
Value for Money:
An ultra-affordable single-component fix that prevents expensive secondary damage (like water leaks or ice jams). While basic, it’s significantly cheaper than full repair kits or service fees, making it ideal for this specific failure point.
Strengths and Weaknesses:
Strengths: Cost-effective; erosion-resistant PP material; exact OEM fit; broad Samsung compatibility. Weaknesses: Only replaces the Y-clip (doesn’t address heaters, tubes, or motors); requires precise model verification; minimal added features.
Bottom Line:
A reliable, no-frills solution for replacing a failed or degraded Y-clip in compatible Samsung models. Excellent value for this narrow repair, but insufficient for comprehensive ice maker issues. Best purchased only when the clip itself is confirmed faulty.
3. Water Line Kit, Lifevant 1/4” O.D. Water Tubing 32.8FT for R.O. System and ice Maker with 12-PCS Quick Connect and Tubing Cutter

Overview:
This versatile kit provides 32.8 feet of 1/4-inch water tubing and 12 essential connectors for refrigerator, R.O. systems, and ice makers. It simplifies water line installations or replacements with user-friendly components.
What Makes It Stand Out:
The generous 32.8-foot tubing length accommodates complex routing, while the included cutter and diverse connectors (T-joint, elbow, shut-off valve) enable custom setups without professional tools. BPA-free, odorless tubing ensures safe drinking water compliance.
Value for Money:
Offers exceptional versatility across appliances (refrigerators, R.O. filters, coffee machines) at a fraction of individual part costs. The comprehensive set eliminates piecemeal purchases, and the durable tubing reduces long-term replacement needs.
Strengths and Weaknesses:
Strengths: High-value complete set; ample tubing length; safe food-grade material; easy DIY installation; broad appliance compatibility. Weaknesses: Tubing may kink if improperly handled; connectors lack brass reinforcement for high-pressure lines; overkill for simple fridge swaps.
Bottom Line:
A practical, all-in-one solution for home water line projects. Its flexibility and included tools make it ideal for both beginners and experienced users tackling multiple appliances. Highly recommended for R.O. systems or complex fridge installations.
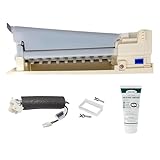
4. Frigidaire IM116000 Ice Maker Assembly Kit for Refrigerators, White

Overview:
This genuine Frigidaire kit replaces the entire ice maker assembly in compatible refrigerators. Engineered to OEM specifications, it ensures seamless integration and performance matching the original appliance design.
What Makes It Stand Out:
As a factory-authorized part, it guarantees optimal compatibility and reliability, avoiding the pitfalls of third-party imitations. Frigidaire’s quality control ensures precise ice production cycles and durability, critical for integrated appliance function.
Value for Money:
Priced higher than generic alternatives, it justifies cost through assured performance and longevity. While not the cheapest option, it prevents repeat repairs caused by inferior aftermarket parts, saving long-term hassle and expense.
Strengths and Weaknesses:
Strengths: Genuine OEM reliability; perfect fit for compatible models; maintains factory performance standards; trusted brand support. Weaknesses: Requires professional-level installation skills; limited to Frigidaire models; no included tools; higher upfront cost.
Bottom Line:
The definitive choice for Frigidaire owners prioritizing reliability over cost savings. Essential for maintaining appliance efficiency, but strictly for experienced DIYers or technicians due to complex installation. Mandatory model verification before purchase.
5. Complete OEM Ice Maker Kit DA97-15217D for Samsung – Includes DA97-19898A Auger Motor Drain Tube & Heater Assembly DA82-02367A Y-Clip & Silicon – Fixes Ice Maker Freeze-Up & No Ice Issues
Overview:
This all-in-one Samsung ice maker repair kit replaces the entire assembly (DA97-15217D) plus critical subcomponents like the auger motor, drain tube, and heater. It resolves common issues including no ice, slow production, and freeze-ups.
What Makes It Stand Out:
It uniquely bundles the ice maker unit, upgraded DA97-19898A drain tube/heater assembly, Y-clip, and silicon sealant—addressing Samsung’s systemic icing flaws comprehensively. The 1-year warranty and U.S. customer support add significant peace of mind.
Value for Money:
Despite a higher price than partial kits, it delivers exceptional value by covering all failure points (mechanical and icing-related) in one purchase. Avoids multiple part orders and ensures compatibility, undercutting professional repair costs.
Strengths and Weaknesses:
Strengths: Complete repair solution; fixes both icing and mechanical failures; includes upgraded heater/tube; strong warranty; U.S. support. Weaknesses: Overkill for simple Y-clip replacements; complex installation; Samsung-specific only.
Bottom Line:
The most thorough DIY solution for Samsung ice maker failures, especially chronic icing issues. Worth the investment for persistent problems, though simpler fixes may suffice for minor faults. Highly recommended for comprehensive, lasting repairs.
6. Ice Maker Supply Line and Humidifier Installation Kit for Refrigerators & Freezers, 1/4” x 25’ Poly Tubing, Includes Quick Connect Saddle Valve, Compression Fittings and Adapters

Overview: This comprehensive kit simplifies connecting refrigerators with ice/water dispensers or installing whole-house humidifiers using durable polyethylene tubing. It includes 25 feet of lead-free 1/4” potable water tubing, a self-piercing saddle valve, and essential metal fittings for secure connections, targeting DIYers seeking hassle-free installation without professional help.
What Makes It Stand Out: The standout feature is the no-water-shutoff saddle valve, enabling installation without disrupting household water flow—a rare convenience. The 25-foot tubing length accommodates complex routing in tight spaces, while lead-free poly construction ensures water purity. Its dual-purpose design (for both ice makers and humidifiers) and metal fittings (unlike cheaper plastic alternatives) enhance versatility and reliability.
Value for Money: Priced competitively, it eliminates the need for multiple purchases, bundling all critical components. While generic tubing alone costs less, the included valve and fittings justify the premium, especially compared to calling a plumber for a simple hookup. The lifetime warranty further solidifies its cost-effectiveness for infrequent users.
Strengths and Weaknesses:
Strengths: No-water-shutoff installation; ample 25’ tubing; durable metal fittings; potable-water-safe; humidifier/ice maker dual-use.
Weaknesses: Saddle valves can leak long-term if improperly installed; poly tubing may kink during tight bends; not ideal for high-water-pressure areas.
Bottom Line: An excellent DIY solution for straightforward ice maker or humidifier setups, offering unmatched convenience with its no-shutoff valve. Recommended for homeowners prioritizing ease of installation, though professional plumbers might prefer soldered copper for permanent fixes.
7. WISINY DA82-02367A Y-Clip Assembly Kit Compatible for Samsung Refrigerator Icemaker Replacement Parts,Replace AP6261443 PS12115467 EA12115467

Overview: This replacement kit addresses a common Samsung refrigerator failure point: the Y-clip assembly that secures the ice maker’s cooling loop. Designed as a direct OEM-equivalent part (replacing AP6261443/PS12115467), it targets owners experiencing frost buildup or water leaks due to degraded clips, with compatibility spanning 30+ Samsung models.
What Makes It Stand Out: Its precise OEM-matching design ensures seamless installation without modifications, while the durable plastic construction resists moisture-induced degradation better than worn originals. The included compatibility checklist prevents mismatches—a critical differentiator given Samsung’s model complexity—and the focus on solving specific frost/leak issues streamlines repairs.
Value for Money: At a fraction of a technician’s service call ($100+), this $10–$15 kit delivers exceptional value for a targeted fix. It outperforms generic clips with model-specific engineering, though its single-use nature limits broader utility.
Strengths and Weaknesses:
Strengths: Exact OEM fit; solves frost/leak issues; model-specific compatibility guide; affordable; durable plastic.
Weaknesses: Only fixes one symptom (not root causes like defrost failures); limited to listed Samsung models; no hardware beyond clips.
Bottom Line: A must-buy for Samsung owners with ice maker compartment frost or leaks. Its pinpoint accuracy and low cost make it a no-brainer repair—just verify model compatibility first. Skip if the issue stems from compressor or defrost system faults.
8. 20PCS 1/4" Ice Maker & Refrigerator Water Line Kit - Complete Installation Solution for Ice Makers & Fridges (20FT Water Line with 19 Quick Fittings) Compatible with Reverse Osmosis Systems

Overview: This all-in-one kit provides everything needed to install or repair refrigerator water lines, featuring 20 feet of flexible 1/4” tubing and 19 fittings—including tees, elbows, and compression sets—to connect ice makers, water dispensers, or RO systems. It targets DIYers and pros needing a versatile, ready-to-deploy solution.
What Makes It Stand Out: The inclusion of both compression fittings and push-connect-style adapters (like 3/8”–1/4” tees) ensures compatibility with older fridges and modern RO systems. The tubing’s flexibility simplifies routing in cramped spaces, while the 20-foot length exceeds standard kits (typically 10–15’), reducing splice risks.
Value for Money: Exceptional value—the bundled fittings would cost more if purchased individually. At $15–$20, it’s cheaper than plumber visits for simple hookups and outperforms basic tubing-only kits. The RO compatibility broadens its utility beyond refrigerators.
Strengths and Weaknesses:
Strengths: Comprehensive 19-fitting assortment; RO/water filter compatible; flexible kink-resistant tubing; ideal for complex setups; DIY-friendly.
Weaknesses: No saddle valve (unlike Product 6); compression fittings require tools for secure tightening; lacks storage case.
Bottom Line: The top choice for versatile fridge/RO installations, especially where multiple connections are needed. Its flexibility and fitting variety justify the price—skip only if you solely need a basic ice maker line with a saddle valve.
9. Sweezwon 1/4" Quick Connect Push-to-Connect Water Line Fittings Kit for RO/DI Water Filter, Refrigerator, Ice Maker (Ball Valve + T + L + Y + I + Professional Tubing Cutter, 24 Pcs)

Overview: This innovative kit focuses on tool-free convenience with 24 BPA-free push-to-connect fittings, including valves, tees, and a professional tubing cutter. Designed for RO systems, refrigerators, and hydroponics, it eliminates clamps and tools for rapid installations or repairs.
What Makes It Stand Out: The true push-to-connect design (no clips or crimping) sets it apart, allowing instant, secure connections. The included precision tubing cutter ensures clean cuts critical for leak-free joints—a rarity in budget kits. Its BPA-free food-grade plastic and multi-scenario use (from aquariums to coffee dispensers) broaden appeal beyond typical fridge repairs.
Value for Money: At $20–$25, it’s pricier than basic kits but pays off in time savings and reusability. The cutter alone ($5–$10 value) and reusable fittings justify the cost for frequent DIYers, though casual users may find it excessive.
Strengths and Weaknesses:
Strengths: True tool-free installation; BPA-free safety; professional-grade cutter; reusable fittings; storage box doubles as toolbox.
Weaknesses: Less secure than compression fittings under high pressure; limited tubing length (kit is fittings-only); ball valves may leak if overtightened.
Bottom Line: Ideal for RO enthusiasts or frequent repairers valuing speed and reusability. Not for high-pressure fridge lines, but unmatched for quick RO or appliance tweaks. Skip if you prioritize ultra-secure permanent connections.
10. ARYEIELLSOW DA82-02367A Refrigerator Y-Clip Assembly Kit Fits for Refrigerator Icemaker Replacement Parts Replace AP6261443,PS12115467,4922147,EA12115467,DA61-12775A(1 Pack)

Overview: This kit replaces the critical Y-clip and cooling loop retainer in Samsung refrigerators (models matching DA82-02367A), targeting ice maker compartment frost buildup or water leaks caused by degraded clips. It includes two Y-clips and one retainer, positioning itself as a precise, affordable fix for a recurring Samsung issue.
What Makes It Stand Out: The inclusion of the cooling loop retainer (absent in Product 7’s description) addresses the full assembly, potentially improving longevity. Explicit part-number cross-referencing (AP6261443, 4922147, etc.) simplifies identification, while the emphasis on mitigating water/air erosion highlights durability beyond generic alternatives.
Value for Money: Nearly identical pricing to Product 7, but the added retainer offers marginal extra value. Still unbeatable versus service calls, though functionality aligns closely with OEM expectations—no premium features.
Strengths and Weaknesses:
Strengths: Includes cooling loop retainer; precise part-number matching; solves frost/leak symptoms; durable construction; responsive customer support.
Weaknesses: Only treats symptoms (not root defrost failures); identical core function to Product 7; limited to specific Samsung models.
Bottom Line: A reliable, budget-friendly fix for Samsung frost issues—choose over Product 7 only if your model requires the retainer. Otherwise, it’s functionally equivalent; prioritize compatibility verification above brand.
Understanding Your Ice Maker Type and Common Issues
Before purchasing any repair components, identifying your ice maker’s specific model and common failure points is non-negotiable. This foundational step prevents wasted time, money, and potential damage from incompatible parts. Different mechanisms – whether under-counter units, compact countertop models, or integrated refrigerator systems – have unique architectures and vulnerable components. Recognizing the symptoms you’re experiencing is the first diagnostic tool.
Identifying Model and Mechanism Type
Locate the manufacturer’s label, typically found on the back, side, or inside the unit. Note the brand, model number, and serial number. Crucially, determine if it’s a modular unit (often found in refrigerators) or a standalone system. Modular units frequently share common failure points like the water inlet valve or mold thermostat, while standalone units might have more accessible components like the pump assembly or float switch. This identification dictates the entire repair path.
Recognizing Frequent Beginner-Friendly Failures
Several issues are particularly common and well-suited for novice repair attempts. A complete lack of ice production often points to a faulty water inlet valve or a frozen fill tube. If the unit runs but produces little or no ice, suspect the evaporator thermistor or a malfunctioning mold thermostat. Odd noises during the harvest cycle frequently indicate worn gear assemblies or a failing motor coupling. Recognizing these patterns helps you focus your kit search effectively.
The Importance of Symptom Diagnosis
Don’t jump to conclusions based solely on the end result (no ice). Observe the machine’s behavior: Does it attempt to cycle? Is water flowing into the mold? Are there unusual sounds during specific phases? Documenting these details is critical. A repair kit designed for a frozen fill tube won’t help a failed motor. Accurate symptom diagnosis ensures you acquire the right components for your specific problem, not just a generic assortment.
Essential Components of a Beginner-Friendly Repair Kit
Not all repair kits are created equal, especially when considering the needs of someone new to appliance repair. A truly beginner-oriented kit goes beyond just including parts; it provides the necessary tools, clear guidance, and components designed for ease of installation. Look for kits that prioritize simplicity and reduce the risk of errors during the repair process.
Must-Have Replacement Parts
The core of any effective kit includes high-quality, precisely engineered seals and gaskets. These are the most common failure points and require exact dimensional matching. Kits should also contain critical electrical components like thermistors or thermostats if targeting specific issues. For water-related problems, a compatible inlet valve or tubing is essential. Avoid kits with overly generic parts; specificity for your model type is paramount for success.
Included Tools and Installation Aids
Beginner kits shine by including specialized tools often required for the job but not found in a standard toolbox. Think small nut drivers, specific socket sizes for evaporator plate screws, or tube cutters designed for precise water line work. Look for kits that also provide installation aids like clear tubing lubricant, thread seal tape, or even small zip ties for securing components. These seemingly minor inclusions significantly reduce frustration and the chance of damaging parts during assembly.
Quality of Instructional Materials
This is arguably the most critical element for beginners. Vague, photocopied instructions are a red flag. Seek kits with detailed, step-by-step guides featuring clear, high-resolution photographs or diagrams showing each disassembly and reassembly stage specific to common model types. Video links demonstrating the process are a major bonus. The instructions should anticipate common pitfalls for newcomers and explain why certain steps are necessary, fostering understanding beyond rote following.
Matching Kit Complexity to Your Skill Level
Honest self-assessment of your mechanical aptitude is crucial before selecting a kit. Jumping into a complex repair beyond your current skills leads to frustration, potential damage, and wasted resources. Beginner kits are deliberately designed to address the most straightforward failures with minimal disassembly required. Recognizing the scope of work involved prevents overwhelm.
Simple Fixes vs. Major Overhauls
Truly beginner-friendly kits target single-component replacements with minimal system disassembly. Examples include replacing the water inlet valve, swapping out the mold thermostat, or installing a new evaporator plate seal. These typically involve 5-10 clear steps. Kits requiring complete disassembly of the gear case, motor replacement, or electrical board troubleshooting are generally not suitable for first-time repairers and should be approached with caution or professional help.
Evaluating Required Tools and Workspace
Be realistic about the tools you own and your workspace. Beginner kits should ideally require only basic hand tools (screwdrivers, wrenches) plus any specialized items included in the kit itself. If a kit lists requirements like a multimeter, soldering iron, or specialized pullers you don’t have (and aren’t included), it’s likely too advanced. Ensure you have adequate clean, well-lit space to lay out parts without losing small components.
Time Commitment and Patience Factor
Estimate the time realistically. A beginner-friendly repair should typically take 30-90 minutes for someone following instructions carefully. Kits involving complex calibration, intricate wiring, or hard-to-access components will take significantly longer and demand greater patience. If the estimated time seems daunting or requires working in cramped, uncomfortable spaces, reconsider your readiness or seek alternative solutions.
Safety First: Non-Negotiable Practices for DIY Repairs
Safety must override the desire for a quick fix. Ice makers involve electricity, moving parts, and water – a combination that demands respect. Cutting corners on safety protocols risks personal injury, further appliance damage, or even electrical/fire hazards. These steps are mandatory, not optional.
Power Disconnection Protocol
This is the absolute first step, every single time, without exception. Locate the correct circuit breaker for the appliance (or unplug it directly) and verify power is off using a non-contact voltage tester at the unit itself. Simply turning off the fridge or ice maker controls is insufficient. Leaving power connected while working risks severe electrical shock, especially when handling water lines or internal components.
Water Line Safety Measures
Before disconnecting any water lines, shut off the dedicated water supply valve (usually under the sink or behind the fridge). Place towels and a shallow container under connections to catch residual water. Be prepared for a small drip even after shutting off the main valve. Never force connections; if a fitting is stuck, reassess your technique or tools to avoid cracking plastic components and causing leaks.
Handling Sharp Edges and Moving Parts
Internal components, especially within the harvest mechanism, can have sharp metal edges from manufacturing or wear. Wear cut-resistant gloves during disassembly. Be acutely aware of moving parts; even with power off, springs or levers under tension can snap unexpectedly. Release tension slowly and deliberately as instructed. Keep fingers clear of gear paths during testing phases.
Evaluating Cost vs. Long-Term Value
While the upfront price tag is visible, the true value of a repair kit lies in its longevity, reliability, and the quality of support provided. A slightly more expensive kit that solves the problem permanently and includes excellent instructions is vastly more valuable than a cheap kit requiring repeat purchases or leading to further damage. Consider the investment holistically.
Beyond the Initial Purchase Price
Factor in the potential cost of not having the right parts. A cheap kit missing one critical gasket might force you to halt the repair, order another part, and restart days later – doubling your time investment. Kits with comprehensive contents specific to your diagnosed issue, even at a higher initial cost, often prove cheaper overall by resolving the problem in one go. Consider the cost of potential mistakes caused by poor instructions or low-quality parts.
Durability of Replacement Components
Investigate the materials used in the kit’s parts. High-quality rubber or silicone seals resist drying, cracking, and chemical degradation far better than cheap, brittle alternatives. Metal components should be corrosion-resistant. Look for kits that specify material quality or come from reputable suppliers known for appliance parts. Durability directly impacts how long your repair lasts before needing another fix.
Warranty Coverage and Support Accessibility
Reputable kit manufacturers stand behind their products. Look for clear warranty terms covering defective parts. Equally important is accessible customer support – can you easily get help via phone, email, or online if you hit a snag during the repair? Kits backed by responsive technical support significantly increase your chances of success, especially as a beginner. Poor support turns a minor confusion into a failed repair.
The Critical Role of Compatibility and Fit
A repair kit is useless if its components don’t fit your specific ice maker model perfectly. Generic “fits most” claims are often misleading and a major source of beginner frustration. Precise compatibility is non-negotiable for a successful, leak-free, and functional repair. Never assume parts are interchangeable across brands or even different models within the same brand.
Decoding Model Number Requirements
Your ice maker’s specific model number (not just the appliance brand) is the golden key. Reputable kit suppliers require this number to guarantee compatibility. Cross-referencing this number against the kit’s specified compatible models is essential. Be wary of kits that only ask for the appliance brand (e.g., “Fits Whirlpool”) without requiring the exact ice maker model – this is a red flag for potential fit issues.
Understanding Component-Specific Fitments
Even within compatible models, subtle variations exist. Pay attention to details like seal diameter, thread pitch on valves, or connector types on electrical components. Quality kits will specify these nuances (e.g., “1/4” compression inlet valve," “M4 screw thread”). If the description lacks these specifics, contact the seller with your model number before purchasing to confirm. A mismatched seal by even 1mm can cause leaks.
Leveraging Compatibility Charts and Filters
Use online retailer filters diligently. Select your appliance brand first, then drill down to the specific ice maker model number if possible. Reputable parts websites have detailed compatibility charts showing exactly which kits work with your model. Print or save this chart before starting your repair. If a chart isn’t available, or the fit seems ambiguous, it’s safer to seek clarification than risk a mismatch.
Step-by-Step Installation Tips for New Repairers
Approaching the physical repair with a methodical plan drastically increases success rates. Rushing or skipping steps is the fastest route to mistakes. Treat the repair like a puzzle where order and orientation matter. Patience and organization are your most valuable tools alongside the kit itself.
Preparation: Workspace and Part Organization
Clear a large, clean, well-lit workspace near the ice maker. Lay down a towel or mat to protect surfaces and catch small parts. Before disassembly, take clear photos of the component area from multiple angles. Organize replacement parts before starting; lay them out in the order they’ll be installed. Use small containers or labeled bags for screws and tiny components removed during disassembly. This prevents loss and confusion during reassembly.
Methodical Disassembly and Documentation
Work slowly. Remove one component at a time. Note how parts connect – take more photos if needed. Pay close attention to the orientation of seals, gaskets, and electrical connectors (which way they plug in). If a part is stubborn, don’t force it; check for hidden screws or clips. Gently twisting while applying even pressure is often better than brute force. Keep the instruction manual open and cross-reference each step as you go.
Critical Reassembly Checks
During reassembly, double-check every connection. Ensure seals are seated perfectly in their grooves without pinching or twisting. Verify electrical connectors are fully clicked into place. Hand-tighten fittings first to avoid cross-threading, then give a slight additional turn with a tool – over-tightening is a common cause of cracked plastic fittings. Before restoring power or water, do a final visual sweep: Are all screws accounted for? Are tubes kink-free? Are wires clear of moving parts?
Troubleshooting Common Kit Installation Hurdles
Even with the best kit and instructions, beginners often encounter minor snags. Knowing how to diagnose and resolve these common roadblocks prevents panic and keeps the repair on track. Most issues have simple solutions if you pause, assess, and apply logical troubleshooting.
Dealing with Stubborn Connections
Stuck nuts, bolts, or plastic fittings are frequent headaches. First, ensure you’re using the correct size tool to avoid stripping. Apply penetrating oil (like PB Blaster) sparingly to metal threads and wait 10-15 minutes. For plastic, use gentle heat from a hairdryer to make it slightly more pliable. Tap gently with a soft mallet around the connection point. If it’s a water line fitting, try compressing the release collar fully while pulling straight out – wiggling can damage the line.
Addressing Minor Leaks Post-Installation
A small drip after reassembly is common but fixable. First, confirm power and water are off. Check if seals or gaskets are perfectly seated and undamaged – a tiny fold or twist causes leaks. Ensure all compression fittings are hand-tightened evenly (don’t overtighten!). Verify the water line is fully inserted into the valve fitting until it clicks (if applicable). If using thread seal tape on valves, ensure it’s applied clockwise in 2-3 wraps only, not covering the valve inlet.
Verifying Electrical Component Function
If replacing a thermostat or thermistor and the unit still doesn’t function, don’t assume the part is bad. Double-check the orientation of electrical connectors – they often only fit one way. Use your multimeter (if you have one and are comfortable) to test continuity on the new part before installation, following basic safety protocols. Ensure no wires were pinched during reassembly that could cause a short. Sometimes, the issue was misdiagnosed initially – recheck your symptom analysis.
Integrating Maintenance with Your Repair
A repair is the perfect opportunity to implement simple preventative maintenance that extends the life of your ice maker and reduces future breakdowns. Taking an extra 10-15 minutes during your repair to clean key areas pays significant dividends. Think of it as giving your appliance a tune-up while it’s open for business.
Cleaning the Evaporator Plate and Mold
While the unit is disassembled, use a soft brush (an old toothbrush works well) and a vinegar-water solution (1:1) to gently clean mineral deposits and biofilm from the evaporator plate and ice mold cavity. Avoid abrasive cleaners or scouring pads that scratch surfaces. Rinse thoroughly with clean water and allow to dry completely before reassembly. This improves heat transfer efficiency and ice clarity.
Flushing the Water Supply Line
Disconnect the water line inlet at the valve (with water supply shut off!). Blow compressed air through the line back towards the supply valve to clear sediment, or flush it with distilled white vinegar for 10 minutes (then flush thoroughly with clean water). This prevents future clogs in the inlet valve or fill tube, a very common cause of “no ice” scenarios. Reconnect securely.
Checking and Replacing the Water Filter
If your ice maker uses the refrigerator’s water filtration system, check the filter’s expiration date. A clogged or expired filter drastically reduces water pressure, leading to thin ice or no ice production. Replace the filter according to the manufacturer’s schedule, ideally coinciding with your repair. This simple step is often overlooked but critical for consistent performance.
Knowing When to Call a Professional
While many repairs are beginner-friendly, recognizing the limits of DIY is crucial for safety and appliance longevity. Pushing beyond your skill level or the scope of a simple kit repair can escalate minor issues into major, costly problems. Knowing when to step back and call a qualified technician is a sign of wisdom, not failure.
Signs of Complex Electrical Issues
If your troubleshooting points towards the main control board, involves complex wiring harnesses with multiple connections, or requires component-level soldering, this is professional territory. Symptoms include the unit showing no signs of life whatsoever (after verifying power), erratic behavior not tied to a single sensor, or visible burn marks on circuit boards. Misdiagnosing or mishandling electrical components risks fire or electrocution.
Refrigerant System Concerns
Ice makers that use a sealed refrigerant system (common in commercial or high-end residential units) to freeze the water never belong in DIY hands for repairs involving leaks, low charge, or compressor issues. Handling refrigerants requires EPA certification and specialized equipment. Symptoms include the unit running constantly but not freezing ice, oil residue around seams, or hissing sounds. Attempting repairs here is illegal in many areas and extremely dangerous.
Persistent Problems After Repair
If you’ve meticulously followed a high-quality kit’s instructions, used compatible parts, and the core issue (e.g., no ice production) remains unresolved, or a new problem emerges (like constant overfilling), it’s time for professional diagnosis. This often indicates an underlying issue not addressed by the initial repair (e.g., a failing pump affecting water flow even with a new inlet valve) or a misdiagnosis from the start. Further DIY attempts risk compounding the problem.
Frequently Asked Questions
Can I realistically fix my ice maker myself as a complete beginner?
Yes, many common ice maker problems like faulty inlet valves, worn seals, or malfunctioning thermostats are well within reach for beginners using the right repair kit. Success hinges on choosing a kit specifically designed for simple, single-component replacements with excellent instructions and ensuring it matches your exact model.
How do I know which specific repair kit I actually need?
You must identify your ice maker’s exact model number (found on a label) and diagnose the specific symptom (e.g., “no water filling,” “ice not harvesting”). Reputable kit suppliers require your model number to guarantee compatibility. Match the kit’s description to your diagnosed issue – don’t guess based solely on the symptom.
What are the absolute essential tools I need beyond the kit?
Most beginner kits include necessary specialized tools. You’ll typically need basic household items: Phillips and flathead screwdrivers, adjustable wrench, nut drivers, needle-nose pliers, and a towel/basin for water. A multimeter is helpful but not always essential for the simplest kits; check the kit requirements.
How long should a beginner expect a typical repair to take?
A straightforward repair using a well-matched kit (like replacing an inlet valve or thermostat) usually takes a careful beginner 45-90 minutes, including preparation and cleanup. Allow extra time for your first repair to read instructions thoroughly and work methodically. Rushing causes mistakes.
Will using a repair kit void my appliance warranty?
Generally, no. Warranties are typically voided only if damage is caused during the repair. Performing a repair correctly with compatible parts shouldn’t void coverage for unrelated future issues. However, always check your specific warranty terms; some labor warranties might exclude DIY repairs.
What’s the most common mistake beginners make during ice maker repair?
The top mistake is failing to disconnect power and water supply properly before starting. Other frequent errors include forcing parts (causing breaks), not taking photos during disassembly (leading to reassembly confusion), and overlooking tiny but critical orientation details on seals or connectors.
How can I prevent leaks after installing new seals or valves?
Ensure seals are perfectly seated in their grooves without pinching or twisting. Hand-tighten plastic fittings snugly but do not overtighten – this cracks fittings. For compression fittings, ensure the water line is fully inserted until it clicks. Double-check all connections before restoring water supply and watch closely for drips initially.
Are the parts in repair kits as good as OEM (Original Equipment Manufacturer) parts?
Quality varies significantly. Reputable kit suppliers often source high-quality aftermarket parts that meet or exceed OEM specifications, especially for common wear items like seals. Avoid extremely cheap kits; look for suppliers known for appliance parts who specify material quality (e.g., “food-grade silicone seals”).
What should I do if the repair kit doesn’t fix the problem?
First, meticulously recheck your work against the instructions – a missed step or misconnected part is common. Verify your initial diagnosis was correct. If the issue persists, the problem might be more complex than initially thought (e.g., a pump issue causing low water flow despite a new inlet valve). It’s time to consult a professional technician.
How often should I perform maintenance on my ice maker to prevent needing repairs?
Basic preventative maintenance is key. Clean the ice mold and evaporator plate with vinegar solution every 3-6 months. Replace the water filter (if applicable) every 6 months. Flush the water supply line annually. Wipe down the exterior and ensure vents are unobstructed. Consistent upkeep drastically reduces common failure points.