Few things are more frustrating than reaching for ice on a sweltering day only to find your trusty appliance has gone silent. That reliable hum replaced by an eerie quiet, or worse, the ominous sound of water dripping where ice should be. Whether it’s a weekend gathering, a family dinner, or just your morning smoothie routine, a malfunctioning ice maker throws a wrench into everyday life. The panic sets in: Is it a major repair? Will I need a costly service call? Before you resign yourself to store-bought ice bags or expensive technicians, consider a smarter, often overlooked solution sitting quietly in your toolbox – or ready to be added to it.
The truth is, many common ice maker failures stem from simple, wear-and-tear issues perfectly suited for a DIY fix with the right tools. Forget scouring the web for elusive “top 10” lists that quickly become outdated or push specific brands. This guide cuts through the noise, focusing solely on empowering you with the knowledge to navigate the world of ice maker repair kits effectively. We’ll explore exactly what makes a kit genuinely useful, the critical components you absolutely need to look for, and how to match a kit’s contents to your specific ice maker’s anatomy – all without mentioning a single product name or ranking. Understanding the principles behind effective repair is far more valuable than chasing the “hottest” kit of the moment.
Top 10 Ice Maker Repair Kits
Detailed Product Reviews
1. Ben’s Appliances Icemaker Repair Kit for Samsung DA97-19898A, DA82-02367A

Overview:
This kit targets the pervasive Samsung refrigerator issue of ice maker freezing due to moisture buildup. Designed as a DIY solution, it replaces critical components to restore reliable ice production without necessitating a full icemaker replacement or expensive service calls.
What Makes It Stand Out:
It excels with an upgraded DA97-19898A drain tube pre-sealed using 3M sealant and a 2.3W DC heater, directly addressing Samsung’s flawed original design. The inclusion of a DA82-02367B Y-clip set, food-grade RTV sealant, and a detailed guide ensures a comprehensive fix. Its U.S.-made components and focus on moisture prevention—validated through teardown analysis—set it apart from generic kits.
Value for Money:
Priced significantly below professional repair costs (often $200+), it offers exceptional value by extending your icemaker’s lifespan. While not a fix for mechanically broken parts, it proactively prevents recurring icing issues, making it a cost-effective investment compared to repeated service visits or inferior single-component kits.
Strengths and Weaknesses:
Strengths: Complete, purpose-built solution; superior heater/insulation; easy DIY installation; high-quality U.S. materials. Weaknesses: Only resolves icing/moisture issues, not electrical or motor failures; requires basic handy skills; sealant curing time adds installation duration.
Bottom Line:
Highly recommended for Samsung owners battling ice buildup. It’s the most thorough, well-engineered DIY icing solution available, delivering professional-grade results at a fraction of the cost.
2. HPUY DA82-02367A Y-Clip Assembly Kit Compatible with Samsung Refrigerator Icemaker Replacement AP6261443 PS12115467 EA12115467
Overview:
This specialized kit replaces the worn or missing Y-clip assembly (part DA82-02367A) critical for securing Samsung refrigerator icemakers. It’s a targeted fix for models where clip failure causes erratic ice production or water leakage.
What Makes It Stand Out:
HPUY focuses solely on the Y-clip with an upgraded PP material design resistant to water/air erosion and enhanced hardness. Its precise compatibility with numerous Samsung models (RF22K, RF28H, RF28K series, etc.) and direct replacement of OEM part numbers (AP6261443, PS12115467) ensures a factory-like fit without extras.
Value for Money:
As a single-component solution, it’s very affordable—ideal if only the Y-clip is damaged. However, it lacks heaters or sealants, so it’s less cost-effective for full icing issues. It shines as a budget fix for clip-specific failures but offers minimal value if broader repairs are needed.
Strengths and Weaknesses:
Strengths: Durable PP construction; exact OEM replacement; simple installation; strong model compatibility list. Weaknesses: Only addresses Y-clip failure (not icing/moisture); no supplemental parts (heater, sealant); requires precise model verification pre-purchase.
Bottom Line:
A solid, economical choice only if your Y-clip is broken. For recurring ice buildup, opt for a comprehensive kit. Verify your model first to avoid mismatched parts.
3. Water Line Kit, Lifevant 1/4” O.D. Water Tubing 32.8FT for R.O. System and ice Maker with 12-PCS Quick Connect and Tubing Cutter

Overview:
This versatile kit provides 32.8 feet of 1/4” O.D. BPA-free tubing and 12 essential fittings (including T-connector, shut-off valve, and cutter) for connecting refrigerators, ice makers, RO systems, and beverage dispensers to water lines.
What Makes It Stand Out:
Its all-in-one nature eliminates piecemeal purchases, while the included professional tubing cutter and diverse connectors (elbow, straight-through, turning joints) simplify complex installations. The food-grade, odorless tubing ensures safety for drinking water applications over years of use.
Value for Money:
The extensive 32.8ft length and comprehensive hardware suite offer tremendous value for $20–$30, far cheaper than buying components separately. It’s reusable across multiple appliances, making it indispensable for homeowners tackling RO systems, fridge hookups, or coffee machine installations.
Strengths and Weaknesses:
Strengths: Complete, ready-to-install kit; high-quality non-toxic tubing; exceptional versatility; cutter included; robust customer support. Weaknesses: Tubing can kink if bent tightly; shut-off valve quality is functional but not premium; overkill for simple single-appliance setups.
Bottom Line:
An outstanding, budget-friendly solution for any water line project. Ideal for DIYers seeking a reliable, all-in-one upgrade for ice makers, RO systems, or general plumbing.
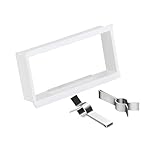
4. Frigidaire IM116000 Ice Maker Assembly Kit for Refrigerators, White

Overview:
This genuine Frigidaire kit replaces the entire ice maker assembly (model IM116000) for compatible Frigidaire, Electrolux, and certain GE refrigerators. It’s engineered for seamless integration with proprietary appliance systems.
What Makes It Stand Out:
As an OEM (Original Equipment Manufacturer) part, it guarantees precise compatibility and performance matching the original unit—unlike third-party alternatives that risk fit or function issues. Frigidaire’s quality control ensures reliability, critical for complex ice-making mechanisms.
Value for Money:
Priced higher than generic kits, it justifies cost through guaranteed compatibility and longevity. However, its value diminishes if your skill level is low; professional installation (recommended) adds significant expense, potentially negating savings versus a service call.
Strengths and Weaknesses:
Strengths: Authentic OEM reliability; optimal performance; white finish matches appliances; Frigidaire’s quality assurance. Weaknesses: Requires advanced repair skills; mandates specific tools (nut driver, wrench); no included hardware/sealants; compatibility must be meticulously verified.
Bottom Line:
Only choose this if you’re an experienced DIYer or using a technician. For novices, the installation complexity and cost make professional repair a wiser investment despite the kit’s authenticity.
5. Complete OEM Ice Maker Kit DA97-15217D for Samsung – Includes DA97-19898A Auger Motor Drain Tube & Heater Assembly DA82-02367A Y-Clip & Silicon – Fixes Ice Maker Freeze-Up & No Ice Issues
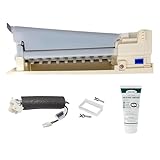
Overview:
This all-in-one Samsung kit replaces the entire icemaker assembly (DA97-15217D) and critical subcomponents (drain tube, heater, Y-clip) to resolve no-ice, slow-ice, and freeze-up issues stemming from moisture blockage or motor failure.
What Makes It Stand Out:
It uniquely bundles the full icemaker and the upgraded DA97-19898A heater/drain tube assembly to combat Samsung’s notorious icing flaw. The inclusion of Y-clip, silicon sealant, and auger motor creates a true “no extra parts needed” solution, backed by a 1-year warranty and U.S. support.
Value for Money:
At a mid-range price, it delivers exceptional value by consolidating multiple high-failure components. It eliminates recurring icing repairs (saving $150+ per service call) and addresses both mechanical and moisture-related failures—unlike kits fixing only one aspect.
Strengths and Weaknesses:
Strengths: Truly comprehensive; solves freeze-up and motor issues; OEM-compatible parts; strong warranty; clear installation support. Weaknesses: Overkill if only one component (e.g., motor) is faulty; installation is moderately complex; slight risk of incorrect part matching without model verification.
Bottom Line:
The definitive DIY solution for Samsung ice maker woes. If your unit suffers from ice blockages or intermittent failure, this kit is a cost-effective, reliable fix worth every penny.
6. Ice Maker Supply Line and Humidifier Installation Kit for Refrigerators & Freezers, 1/4” x 25’ Poly Tubing, Includes Quick Connect Saddle Valve, Compression Fittings and Adapters

Overview: This comprehensive kit simplifies connecting refrigerators with ice/water dispensers or humidifiers to a home’s water supply. It includes 25 feet of lead-free poly tubing, a self-piercing saddle valve, metal compression fittings, and adapters, all designed for DIY installation without professional help. The components ensure safe, potable water delivery while maintaining taste purity.
What Makes It Stand Out: The standout feature is the no-water-shutoff saddle valve, allowing installation without disrupting household plumbing—a rarity in budget kits. The 25-foot tubing offers exceptional flexibility for complex routing, and the metal fittings promise superior durability over plastic alternatives. Its dual-purpose design (ice makers and humidifiers) broadens its utility beyond typical fridge kits.
Value for Money: Priced competitively, it eliminates the need to buy individual components separately, potentially saving $10–$15. While professional installation could cost $50+, this kit delivers a lifetime-warranty-backed solution for under $20, making it ideal for cost-conscious homeowners tackling basic plumbing tasks.
Strengths and Weaknesses: Strengths: Hassle-free saddle valve installation; ample tubing length; lead-free safety; versatile humidifier compatibility. Weaknesses: Saddle valves risk leaks if improperly installed; poly tubing may kink during tight bends; not suitable for high-pressure applications.
Bottom Line: An excellent DIY starter kit for straightforward ice maker or humidifier setups, offering unmatched convenience for its price. Ideal for beginners but requires careful valve installation to avoid leaks. Highly recommended for basic home use.
7. WISINY DA82-02367A Y-Clip Assembly Kit Compatible for Samsung Refrigerator Icemaker Replacement Parts,Replace AP6261443 PS12115467 EA12115467

Overview: This precision-engineered replacement kit targets Samsung refrigerator owners whose ice makers suffer from frost buildup or water leaks due to worn Y-clips. It includes two Y-clips and a cooling loop retainer, designed as direct OEM equivalents for specific Samsung models (e.g., GTD33EASK0WW, GTX42GASJ series).
What Makes It Stand Out: Its hyper-specific compatibility with 20+ Samsung models ensures a perfect fit, reducing trial-and-error replacements. The kit addresses a common pain point—excess frost caused by failed clips—using durable materials that resist moisture erosion better than generic alternatives. Step-by-step instructions simplify a typically fiddly repair.
Value for Money: At a fraction of a service call cost ($150+), this $8–$12 kit resolves a critical failure point. While niche, it’s indispensable for listed Samsung models, outperforming universal clips that often wear prematurely. No wasted spending on unnecessary parts.
Strengths and Weaknesses: Strengths: Exact OEM replacement; prevents frost leaks effectively; robust construction; clear compatibility guide. Weaknesses: Useless for non-listed models; limited to clip/retainer replacement (won’t fix motor issues); requires disassembly skill.
Bottom Line: A must-buy for owners of compatible Samsung fridges experiencing ice maker malfunctions. It’s affordable, reliable, and precisely engineered—just verify your model first. Skip if your fridge isn’t on the list.
8. 20PCS 1/4" Ice Maker & Refrigerator Water Line Kit - Complete Installation Solution for Ice Makers & Fridges (20FT Water Line with 19 Quick Fittings) Compatible with Reverse Osmosis Systems

Overview: This all-in-one solution provides 20 feet of 1/4" tubing and 19 fittings for installing or repairing refrigerator water lines, reverse osmosis (RO) systems, or filters. It targets DIYers needing versatility, with components like T/Y tees, compression fittings, and clamps to handle complex setups.
What Makes It Stand Out: The sheer variety of fittings—including specialized RO-compatible connectors (3/8" to 1/4")—sets it apart. The flexible tubing resists kinking in tight spaces, while the inclusion of pipe clamps and dual nut/sleeve sets ensures leak-proof joints. It’s rare to find RO support in standard fridge kits.
Value for Money: Bundling 20+ parts for under $15 beats buying fittings individually (which could exceed $25). Though tubing length is modest versus Product 6, the RO compatibility adds professional-grade value, making it ideal for multi-system homes.
Strengths and Weaknesses: Strengths: Exceptional RO/filter versatility; flexible, durable tubing; comprehensive fitting selection; clear instructions. Weaknesses: Tubing shorter than competitors; some fittings may be redundant for basic installs; plastic components less robust than metal.
Bottom Line: The top choice for homes with RO systems or complex plumbing needs. Affordable, versatile, and DIY-friendly—though overkill for simple fridge hookups.
9. Sweezwon 1/4" Quick Connect Push-to-Connect Water Line Fittings Kit for RO/DI Water Filter, Refrigerator, Ice Maker (Ball Valve + T + L + Y + I + Professional Tubing Cutter, 24 Pcs)

Overview: This 24-piece kit focuses on tool-free convenience with push-to-connect fittings for RO systems, refrigerators, and more. It includes ball valves, T/L/Y/I connectors, end caps, and a tubing cutter—all made from BPA-free materials—housed in a reusable storage box.
What Makes It Stand Out: The no-tool push-to-connect design is revolutionary for quick repairs, eliminating clamps or wrenches. The included professional cutter ensures clean cuts, while the storage box doubles as a portable toolbox. Food-grade safety and multi-scene use (aquariums, hydroponics) broaden its appeal beyond fridges.
Value for Money: At $18–$22, it’s pricier per piece than basic kits but justifies cost with labor savings. The cutter alone ($5 value) and reusable fittings (vs. disposable clips) enhance long-term value for frequent DIYers or technicians.
Strengths and Weaknesses: Strengths: Effortless tool-free installation; BPA-free safety; versatile applications; excellent organization; durable reusable fittings. Weaknesses: Higher upfront cost; ball valves lack quarter-turn precision; not ideal for high-vibration environments.
Bottom Line: Perfect for techs or eco-conscious homeowners wanting rapid, clean connections. Worth the splurge for its innovation and reusability—especially with RO systems.
10. ARYEIELLSOW DA82-02367A Refrigerator Y-Clip Assembly Kit Fits for Refrigerator Icemaker Replacement Parts Replace AP6261443,PS12115467,4922147,EA12115467,DA61-12775A(1 Pack)

Overview: A targeted fix for Samsung fridge ice maker failures, this kit replaces worn Y-clips and cooling loop retainers (part numbers AP6261443, 4922147, etc.) to halt frost buildup and water leaks. It includes two Y-clips and one retainer, emphasizing durability against moisture erosion.
What Makes It Stand Out: It explicitly links clip failure to defrost system issues, educating users on why replacement matters. High-grade materials promise extended life over cheap knockoffs, and the focus on frost prevention (not just part swapping) adds practical value. Clear alternate part numbers simplify cross-referencing.
Value for Money: Nearly identical to Product 7 in function and price ($7–$10), but ARYEIELLSOW’s emphasis on frost mitigation justifies parity. It’s economical for urgent repairs, though no standout extras differentiate it from WISINY’s offering.
Strengths and Weaknesses: Strengths: Directly combats frost/drip issues; corrosion-resistant build; precise part-number matching; responsive customer support. Weaknesses: Narrow model compatibility; no installation tools; redundant if clips aren’t the root cause.
Bottom Line: A reliable, no-frills solution for Samsung owners with confirmed Y-clip failure. Choose based on seller trust—functionally matches Product 7. Verify your model first.
Why Ice Maker Repair Kits Are Your First Line of Defense
Understanding Common Failure Points
Ice makers, while seemingly complex, often fail due to a handful of predictable component issues. The thermostat might misread temperatures, the water inlet valve could clog or seize, the harvest cycle motor may wear out, or simple seals and gaskets might dry rot. Recognizing these frequent culprits is the first step; repair kits are designed specifically to address these recurring weaknesses with targeted replacement parts.
The Cost-Benefit of DIY Repair
Calling a professional for a $15 part replacement is rarely economical. Repair kits offer significant savings over service calls, which often include high diagnostic fees regardless of the fix’s simplicity. Investing in a well-chosen kit pays for itself after just one successful repair, turning a potential $100+ service call into a $20-$40 endeavor. It’s about regaining control over minor maintenance without relying on external help.
Empowerment Through Knowledge and Tools
Beyond cost, the real value lies in self-sufficiency. Successfully diagnosing and fixing your own appliance builds confidence and deepens your understanding of how your home systems work. A good repair kit isn’t just parts; it’s a toolkit that equips you to handle future minor issues, transforming you from a passive user into an informed homeowner capable of quick interventions.
Decoding the Essential Components of a Quality Kit
Critical Seals and Gaskets
The unsung heroes of ice maker function, seals and gaskets prevent leaks and maintain proper temperature. Kits must include a variety of sizes for the water inlet valve, mold seal, and potential pump connections. Look for kits offering multiple O-rings and flat gaskets made from durable, food-safe silicone or EPDM rubber that resists brittleness in cold environments.
Water Valve Repair Elements
Clogged or faulty water inlet valves are prime suspects in low-ice or no-ice scenarios. Effective kits provide the specific solenoid coil(s) compatible with common valve types, along with necessary screens or filters to combat mineral buildup. Ensure the kit specifies compatibility with standard 1/4" or 5/16" valve connections found in most residential units.
Thermostat and Sensor Solutions
Temperature regulation is vital. Kits should include the correct type of thermostat (often a bi-metal type) or sensor for your ice maker model, plus any associated wiring harnesses or connectors. Precision here matters – a mismatched thermostat can cause over-freezing or complete failure to cycle.
Matching the Kit to Your Ice Maker’s Anatomy
Identifying Your Ice Maker Type
Not all ice makers are created equal. The crucial first step is determining if you have a modular unit (common under-counter models) or a section within your refrigerator’s freezer compartment. Modular units often have standardized components, while built-in types vary significantly by fridge brand. Check your appliance’s model number; this dictates compatibility more than anything else.
Modular Unit Specifics
For standalone under-sink or countertop ice makers, kits often focus on universal components like pump seals, water line connectors, and standard thermostat types. Pay close attention to the pump style (diaphragm vs. gear) and water valve specifications when selecting a kit, as these differ between common modular brands.
Built-In Freezer Compartment Units
Refrigerator-integrated ice makers present more variation. Kits must align precisely with the manufacturer’s design (e.g., the common “Harvest Cycle” motor/gear assembly style). Knowing if yours uses a rotating arm, paddle system, or optic sensor is essential. Generic kits for built-ins are rare; specificity based on your fridge model is non-negotiable.
Beyond Parts: The Tools You’ll Actually Need
Essential Hand Tools for Access
No repair kit is complete without the right tools to use the parts. At minimum, you’ll need a set of nut drivers (especially 1/4" and 5/16"), needle-nose pliers, insulated screwdrivers (Phillips and flathead), and wire cutters/strippers. Many effective kits bundle these basics, saving you a separate trip to the hardware store just to open the unit.
Diagnostic Aids Worth Including
The best kits go beyond replacements. Look for those incorporating simple diagnostic tools like a multimeter for testing continuity in thermostats or solenoids, or a dedicated water pressure gauge to rule out supply issues. Clear wiring diagrams specific to common ice maker configurations are another invaluable, often overlooked, inclusion.
Safety Gear You Shouldn’t Skip
Working with water lines and electrical components demands caution. Kits that include basic safety items like nitrile gloves (to keep seals clean and hands dry) and small shop towels demonstrate thoughtful design. While not always packaged in the kit, always ensure you have the means to safely disconnect power and shut off the water supply before starting.
Safety First: Non-Negotiable Steps Before You Begin
Power Down Procedures
This cannot be overstated: Always unplug the refrigerator or switch off the dedicated circuit breaker before touching any internal components. Ice makers combine electricity and water – a potentially dangerous mix. Verify power is off using a non-contact voltage tester at the unit itself, not just at the outlet.
Water Supply Isolation
Locate and firmly shut off the dedicated water supply valve, usually found near the fridge or under the sink. Place towels or a small container underneath the water line connection point to catch residual drips. Failure to isolate water properly leads to messy, potentially damaging floods during disassembly.
Workspace Preparation
Clear the area around the refrigerator. Remove all ice and food from the freezer compartment. Have ample lighting (a headlamp is ideal), organize your tools and replacement parts beforehand, and ensure you have stable footing. A cluttered, poorly lit workspace increases the risk of mistakes or dropped components.
A Methodical Approach to Diagnosis and Repair
Initial Symptom Assessment
Before grabbing tools, observe carefully. Is there no ice? Is ice production slow? Is ice stuck in the mold? Is water leaking? Is the unit making unusual noises? Documenting the exact symptoms narrows down potential causes significantly and prevents unnecessary part replacement. Check for obvious issues like a frozen fill tube or a jammed ejector arm first.
Step-by-Step Disassembly Guidance
Quality repair resources emphasize a systematic teardown. Note the order of removed parts and take pictures with your phone at each step. Label wires if disconnected. Avoid forcing components; most assemblies use clips or standard screws. Understanding how it comes apart is half the battle in getting it back together correctly.
Testing Components In Situ
Whenever possible, test components before removal. Use a multimeter to check thermostat continuity when cold, verify voltage at the water valve solenoid during a fill cycle, or listen for the distinct “click” of the harvest motor engaging. This confirms the suspected part is faulty and prevents replacing good components.
When a Repair Kit Isn’t Enough: Knowing Your Limits
Signs of Complex Electrical Faults
If your troubleshooting points to the main control board, complex wiring harness issues, or problems with integrated sensors (like advanced optical systems), a simple repair kit won’t suffice. These require specialized diagnostic equipment and expertise. Burnt smells, visible scorch marks on boards, or widespread system malfunctions signal it’s time to call a pro.
Structural Damage or Major Component Failure
Cracks in the ice mold, severe corrosion on the evaporator plate, or a seized main drive motor often indicate the unit is beyond economical repair. Repair kits address wear items, not catastrophic structural failures. Replacing the entire ice maker module is frequently more cost-effective than attempting heroic fixes on badly damaged core components.
Persistent Issues After Repair
If you’ve correctly replaced the suspected faulty part using a quality kit and followed proper procedures, but the problem persists, the root cause is likely more complex. Don’t keep throwing parts at it. This is the point where professional diagnosis becomes necessary to avoid further damage or wasted money.
Maximizing Longevity: Maintenance Tips Post-Repair
Flushing the Water System
After any repair involving the water valve or lines, run several cycles of clean water through the system before making ice for consumption. This flushes out any debris dislodged during the repair, preventing new clogs or affecting ice taste. Consider using a vinegar solution diluted with water for a deeper clean of mineral deposits.
Lubrication Points (When Applicable)
Some mechanical components, like gear assemblies in the harvest cycle, benefit from a tiny amount of food-grade lubricant after cleaning and part replacement. However, over-lubrication attracts dirt. Only apply lubricant if explicitly recommended in your ice maker’s service manual and use the correct type (never standard WD-40).
Regular Visual Inspections
Make checking your ice maker part of routine appliance maintenance. Look for signs of wear on seals, listen for unusual noises during operation, and ensure the water fill tube isn’t starting to freeze over. Catching minor issues like a slightly stiff ejector arm early prevents them from causing bigger failures later.
Building Your Own Custom Repair Arsenal
The Core “Swiss Army Knife” Kit
Instead of buying pre-packaged kits repeatedly, consider building a personalized master kit. Start with universal seals (multiple O-ring sizes), a standard water valve solenoid and screen, a common thermostat type, basic wiring connectors, and essential tools. This core set handles 70% of common issues across many units.
Supplementing with Model-Specific Parts
When you do a repair using your master kit, note the specific part numbers used. Purchase one or two spares of those exact components for your specific ice maker model and add them to your kit. Over time, this creates a highly tailored, instantly deployable resource for your home’s unique appliances.
Sourcing Reliable Generic Components
Focus on reputable suppliers known for accurate generic parts. Look for components clearly labeled with dimensions (e.g., “O-ring: ID 0.25”, OD 0.375", 1/16" cross-section") and material specs (e.g., “EPDM Rubber, FDA Compliant”). Avoid kits with vague descriptions like “fits most models” without specific measurements.
Frequently Asked Questions
Can I really fix my ice maker myself with a kit?
Yes, for the vast majority of common issues like faulty thermostats, clogged water valves, or worn seals, a well-matched repair kit provides everything needed for a successful DIY fix. It requires basic mechanical aptitude and careful attention to instructions, but it’s designed for homeowners, not just technicians.
How do I know which repair kit is right for my ice maker?
The single most important factor is your ice maker’s or refrigerator’s exact model number. Use this to search for kits explicitly stating compatibility. Determine if it’s a modular unit or built-in, and note specific symptoms to narrow down the required components (e.g., water valve issues vs. harvest motor problems).
Are generic repair kits as good as OEM parts?
High-quality generic parts from reputable suppliers are often identical to OEM components, just without the brand markup. Look for kits specifying precise measurements and materials (like FDA-approved EPDM rubber). Avoid extremely cheap kits with vague descriptions, as poor-quality parts lead to repeat failures.
What’s the most common part that fails in ice makers?
Water inlet valves and thermostats are consistently among the top failure points. Valves clog with mineral deposits, while thermostats can drift out of calibration or fail mechanically over time due to constant temperature cycling.
How long should a repair using a kit last?
A properly executed repair using quality replacement parts should last several years, often matching the lifespan of the original component. The longevity depends heavily on water quality (hard water shortens valve life), usage frequency, and ensuring the root cause (like a clog) was fully addressed.
Do I need special tools beyond what’s in the kit?
Most comprehensive kits include essential tools like nut drivers and pliers. However, you’ll always need basic safety gear (gloves, towels), a way to shut off power/water, and good lighting. A multimeter is highly recommended for accurate diagnosis but isn’t always included.
Can using a repair kit void my appliance warranty?
Generally, no, for out-of-warranty appliances. If your refrigerator is still under the original manufacturer’s warranty, performing DIY repairs could potentially void coverage for that specific component. Always check your warranty terms first; for older units, this isn’t a concern.
Is it safe to attempt this repair if I’m not very handy?
If you’re uncomfortable working with basic hand tools, electricity (even when disconnected), or plumbing connections, it’s best to call a professional. Safety is paramount. However, if you follow clear instructions, prioritize safety steps (power/water off!), and tackle only well-defined, common issues, many homeowners succeed.
How much money can I realistically save?
Compared to a service call (typically $100-$200+ for diagnosis plus parts/labor), a quality repair kit ($15-$40) offers substantial savings, often 75-90% less for common fixes. The savings multiply if you build a master kit for future issues.
What’s the #1 mistake people make when using repair kits?
Rushing the diagnosis and replacing parts without confirming the fault. This leads to wasted money and time. Always methodically test components (using a multimeter where possible) and verify symptoms match the suspected part before disassembly and replacement. Patience prevents unnecessary work.