That frustrating layer of ice creeping across your freezer floor isn’t just annoying to chip away—it’s a silent energy thief and a potential food-spoiler. When frost builds up excessively, your refrigerator works significantly harder, driving up electricity bills and shortening the appliance’s lifespan. While many blame the defrost system first, the humble refrigerator gasket is often the unseen culprit. These flexible seals around your fridge and freezer doors are the first line of defense against warm, humid room air sneaking in. When they fail, moisture enters, freezes, and creates that messy, inefficient frost buildup you dread. Ignoring a worn gasket is like leaving a window open in winter—it’s guaranteed to cause problems.
Understanding the critical role your refrigerator gaskets play transforms them from simple rubber strips into essential maintenance components. A perfect seal maintains the delicate internal climate, ensuring your compressor cycles efficiently and your food stays safely frozen or chilled. But with gaskets wearing out over time due to everyday use, temperature fluctuations, and accidental spills, knowing how to choose the right replacement—and how to ensure it works—is paramount. This guide cuts through the confusion, focusing not on specific brands, but on the universal features, materials, and practices that guarantee a frost-fighting seal for any refrigerator. Let’s dive into what truly matters for keeping your appliance running smoothly and frost-free.
Top 10 Refrigerator Gaskets
Detailed Product Reviews
1. Refrigeration Technologies RT201B Nylog Gasket/Thread Sealant, 30 ml (1 Pack)
Overview: The RT201B Nylog is a specialized refrigeration sealant designed for critical sealing tasks in HVAC and refrigeration systems. This non-toxic, synthetic lubricant and sealant ensures reliable performance in demanding environments without compromising system integrity.
What Makes It Stand Out: Its key differentiator is OEM manufacturer approval, guaranteeing compatibility and safety in sensitive refrigeration circuits. Unlike standard sealants, it prevents system contamination while effectively sealing flares and threaded connections, and uniquely lubricates O-rings and gaskets during installation to prevent damage and ensure airtight seals.
Value for Money: Priced modestly for a 30ml professional-grade solution, it offers exceptional value. A single tube lasts for numerous repairs, avoiding costly system failures or refrigerant leaks. It outperforms generic alternatives that risk contamination or require frequent reapplication, making it a cost-effective investment for technicians.
Strengths and Weaknesses: Strengths: OEM-approved, non-contaminating, versatile (seals threads/flares, lubricates gaskets), long shelf life. Weaknesses: Limited volume for large-scale commercial use; not a permanent structural adhesive; requires precise application to avoid overuse.
Bottom Line: Essential for professional refrigeration work, the RT201B delivers reliable, contamination-free sealing and lubrication. Its precision engineering justifies the price, making it a must-have for technicians prioritizing system longevity and compliance.
2. 2 Pack-W10830162 Refrigerator Door Gasket Replacement for Whirlpool, Kenmore, Kitchen-Aid Refrigerator Door Seal, 39.7"x16.9" Fridge Door Gasket Seal fit Model WRF535SMBM00, KBFS20EVMS13, IX6HHEXDSM00

Overview: This dual-pack offers direct replacements for specific Whirlpool, Kenmore, and KitchenAid refrigerator models (e.g., WRF535SMBM00), addressing door seal failures with upgraded EPDM rubber construction. It targets common issues like leaks, frost buildup, and poor insulation.
What Makes It Stand Out: The gaskets feature high-temperature welded seams (1600°F), thickened magnetic strips for superior suction, and cold-resistant EPDM rubber ensuring rapid shape recovery. The dual-pack provides immediate spare parts, while precise OEM sizing guarantees a perfect fit for verified models, outperforming some original seals in elasticity.
Value for Money: Buying two gaskets at once is economical for dual-door units or future repairs. The durable, long-lasting material (resisting tears and temperature extremes) justifies the cost compared to cheaper, short-lived alternatives that fail prematurely, saving potential food spoilage expenses.
Strengths and Weaknesses: Strengths: Dual-pack value, exceptional cold flexibility, strong magnetic seal, solves condensation/frost issues, OEM-compatible sizing. Weaknesses: Critical model-specific fit requires exact verification; installation may need warm-water softening; not universal (left/right door variations exist).
Bottom Line: A highly reliable, cost-effective solution for compatible models. Its upgraded durability and sealing performance make it a top choice for restoring fridge efficiency—just confirm your model number first.
3. E Shape Foam Rubber Seal Strip, EPDM Rubber Weather Stripping Gasket for Auto, Boat, Garage Door/Window, Refrigerator Door Replacement Gasket, Machinery, Home Application and More, Black(13Feet)

Overview: This 13-foot EPDM rubber strip offers versatile sealing for refrigerators, auto doors, windows, and machinery. Its distinctive E-shaped profile provides flexibility for uneven surfaces, targeting gaps that standard seals miss in diverse DIY or repair scenarios.
What Makes It Stand Out: The E-design uniquely seals edges and corners while reducing noise transmission. EPDM material ensures exceptional resistance to tearing, weathering, and extreme temperatures (-40°F to 248°F), outperforming cheaper PVC alternatives. Its adaptability across automotive, marine, and home applications sets it apart as a universal fix-all.
Value for Money: At a low per-foot cost, the 13-foot length offers extensive coverage for multiple projects. Though requiring adhesive for optimal hold (not included), its longevity and multi-surface efficacy provide superior ROI versus single-use tapes or brittle foam strips that degrade quickly.
Strengths and Weaknesses: Strengths: Highly versatile (refrigerators, cars, boats), noise-dampening, weather/UV resistant, easy to cut-to-size. Weaknesses: Lacks self-adhesion (needs extra glue/screws); E-shape may not suit all profiles; less magnetic grip than dedicated fridge gaskets.
Bottom Line: An affordable, durable all-rounder for sealing irregular gaps. Ideal for budget-conscious users needing adaptable weatherproofing—just factor in adhesive costs for secure installation.
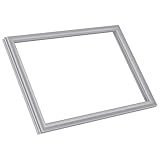
4. Supco SU2004 Refrigerator Door Gasket Kit, Includes Magnetic Insert Strip - Designed To Fit Most Brands - 36 x 84 Inches

Overview: This universal gasket kit fits most refrigerator brands with doors up to 36"x84", featuring refrigeration-grade virgin vinyl and a magnetic insert strip. Designed for DIYers and technicians, it replaces worn seals to restore cooling efficiency and prevent energy waste.
What Makes It Stand Out: Pre-welded L-shaped corners eliminate messy field joins, while the included magnetic insert ensures strong door adhesion—critical for consistent sealing. Its virgin vinyl construction resists cracking better than recycled-material alternatives, and the adjustable 5/8"-3/4" clearance fit accommodates various cabinet profiles.
Value for Money: The comprehensive kit (gasket + magnet) undercuts professional repair costs. Its durability reduces repeat purchases, and the customizable sizing maximizes material use. Though pricier than no-name strips, Supco’s technician-trusted reliability prevents leakage-related food spoilage.
Strengths and Weaknesses: Strengths: Magnetic insert included, factory-welded corners, universal sizing, virgin vinyl longevity, easy trimming. Weaknesses: Requires precise cutting for non-standard doors; not model-specific (may need trial fitting); less flexible than EPDM in extreme cold.
Bottom Line: A premium, hassle-free universal solution. The included magnet and robust build deliver professional results, making it worth the investment for reliable, long-term fridge performance.
5. Innconee 2 Pcs Refrigerator Door Gasket Compatible with True 810803 25-3/4" x 54-1/8" Freezer Door Seal Magnetic Refrigerator Replacement Parts Compatible with Gdm-49/t-49 Freezer Parts Accessories

Overview: Tailored for True GDM-49/T-49 commercial freezers, this dual-pack of PVC gaskets (25-3/4"x54-1/8") replaces part #810803. It targets energy loss in commercial units, featuring magnetic strips to maintain sub-zero temperatures and reduce operational costs.
What Makes It Stand Out: The precise OEM-matching dimensions ensure seamless installation without gaps, while the magnetic strip significantly cuts cold-air leakage—key for energy-intensive commercial freezers. The dual-pack offers a spare for sudden failures, and PVC material balances flexibility with durability in freezer environments.
Value for Money: Commercial-grade gaskets are costly, but buying two provides critical backup for 24/7 operations. The energy savings from reduced cold leakage quickly offset the price versus cheaper, ill-fitting seals that strain compressors and inflate electricity bills.
Strengths and Weaknesses: Strengths: Exact True compatibility, energy-efficient magnetic seal, dual-pack convenience, easy installation with oil lubrication tip. Weaknesses: Narrow application (True models only); PVC less cold-resistant than EPDM; may require hot-water reshaping post-shipment.
Bottom Line: A vital, cost-saving upgrade for True freezer operators. Its precise fit and magnetic efficiency protect inventory and slash energy costs—essential for commercial kitchens prioritizing uptime.
6. W0404520 Door Gasket for Atosa Gasket, 22" x 26-3/16" Refrigerator Door Gasket Replacement Fits MGF8402 MGF8404 MGF8406 MSF8302 and MSF8304

Overview: This precision-engineered replacement gasket (W0404520) serves Atosa commercial refrigeration units, specifically fitting models like MGF8402 and MSF8304. Measuring 22" W × 26-3/16" H, it’s crafted for seamless integration into designated doors to restore optimal sealing performance.
What Makes It Stand Out: Its standout feature is the durable, flexible material engineered to withstand extreme temperatures and constant use without hardening or warping. The exact dimensional match ensures an airtight seal upon installation, directly combating cold-air loss and energy inefficiency in high-demand commercial settings.
Value for Money: Priced competitively for commercial-grade parts, it eliminates costly downtime and frequent replacements. While generic alternatives may be cheaper upfront, this OEM-spec gasket’s longevity and precise fit justify its cost through sustained energy savings and reliability.
Strengths and Weaknesses: Strengths: Exceptional temperature resistance; tool-free installation; extensive model compatibility (11+ units). Weaknesses: Limited to specific Atosa models; no magnetic strip for enhanced sealing.
Bottom Line: An essential, cost-effective upgrade for Atosa owners seeking reliable, long-term performance—highly recommended for commercial kitchens prioritizing efficiency and minimal maintenance disruption.
7. Upgraded 5304501270 Freezer Door Gasket for Fri-gidaire Elec-trolux Refrigerator, 34.65" x 24.13" Freezer Door Seal Fit for Kenmore Part Replace 241778308 Refrigerator Freezer Door Seal
Overview: This upgraded freezer gasket (5304501270) replaces OEM parts for Fri-gidaire, Electrolux, and Kenmore units, measuring 34.65" x 24.13". It targets common issues like cold-air leakage and frost buildup in household freezers.
What Makes It Stand Out: The reinforced magnetic strip provides superior suction over stock gaskets, preventing air leaks and door “sweating.” Made with high-temperature-welded EPDM rubber, it offers exceptional elasticity and cold resistance (-122°F), ensuring a crisp, kink-free seal that outperforms original parts.
Value for Money: Though slightly pricier than basic replacements, its upgraded magnet and durable construction reduce energy waste and extend lifespan. It’s a smart investment compared to OEM equivalents, offering better sealing without professional installation costs.
Strengths and Weaknesses: Strengths: Stronger magnetic seal; premium EPDM material; wide compatibility (15+ models). Weaknesses: Requires warm-water prep to smooth creases; size verification is critical to avoid fit issues.
Bottom Line: A top-tier choice for homeowners needing a dependable freezer seal fix—prioritize accurate sizing, and this gasket delivers excellent value through enhanced freshness preservation and energy savings.
8. MEILIYA Custom Universal Refrigerator Door Gasket,Freezer Door Magnetic Gasket Rubber Seal Part Replaces,Black

Overview: MEILIYA’s custom gasket offers universal fitment by requiring users to submit precise measurements (length, width, groove photo) before production. This seamless, magnetic seal targets leaks in diverse refrigerator/freezer models, available in black, gray, or white.
What Makes It Stand Out: Its bespoke manufacturing eliminates compatibility guesswork—gaskets are cut-to-order for perfect alignment. The magnetic strip (activated after 24 hours) ensures a tight seal, while high-flexibility rubber resists warping and simplifies cleaning/reuse.
Value for Money: Ideal for rare or discontinued models where standard gaskets fail, justifying its premium via bespoke engineering. Savings come from avoiding energy spikes caused by poor seals, though lead time for custom builds is a trade-off.
Strengths and Weaknesses: Strengths: Truly universal fit; reusable design; prevents mold via airtight seal. Weaknesses: Requires manual measurement effort; magnetic polarity delay (24h); color not guaranteed.
Bottom Line: Highly recommended for unique or aging units needing a tailored solution—just confirm measurements meticulously for optimal, long-lasting performance and energy efficiency.
9. Vintage Refrigerator Door Replacement Seal e Shaped Door Seal gaskets for refrigerators(15feet)

Overview: This 15-foot silicone gasket serves vintage refrigerators with E-shaped profiles, targeting restorers of older units. Its flexible design accommodates retro models where modern seals fail, emphasizing low-temperature resilience.
What Makes It Stand Out: Engineered for heritage appliances, it withstands extreme cold (-122°F) without cracking—a rarity in vintage parts. The silicone material offers superior pliability over rigid rubber, ensuring conformability to aged door frames prone to warping.
Value for Money: Cost-effective for niche restoration projects, as alternatives are scarce or prohibitively expensive. The 15-foot length allows customization, though DIY trimming adds minor effort versus pre-cut models.
Strengths and Weaknesses: Strengths: Exceptional cold tolerance; adaptable length; ideal for obsolete models. Weaknesses: No magnetic strip; limited modern compatibility; requires precise sizing (user responsibility).
Bottom Line: A vital resource for vintage appliance enthusiasts—purchase only after confirming dimensions, as it fills a critical gap in preserving historical refrigeration units affordably.
10. 810803 Seal Door Gasket Refrigerator Door Gasket 25-3/4" x 54-1/8" Compatible with True GDM-49/T-49 Refrigerator Reach-in Freezer

Overview: Designed for True commercial coolers (GDM-49/T-49 pre-2010), this 25-3/4" x 54-1/8" gasket (810803) restores door integrity in reach-in units. It addresses critical sealing failures in food-service environments where temperature consistency is non-negotiable.
What Makes It Stand Out: Its tool-free installation—simply press into door channels—minimizes operational downtime. The gasket’s resilience ensures a consistent food-safe seal, directly cutting energy loss in high-traffic commercial settings without complex adjustments.
Value for Money: A budget-friendly fix for aging True units, avoiding costly OEM replacements. Its durability reduces recurring expenses, making it indispensable for restaurants prioritizing compliance and efficiency.
Strengths and Weaknesses: Strengths: Rapid installation; precise pre-2010 True compatibility; energy-saving seal. Weaknesses: Only suits specific legacy models; stiff material requires hot-water softening for fitting.
Bottom Line: A must-have for True cooler operators—install correctly (corners first!) to maintain safety standards and slash energy bills with minimal disruption.
Understanding the Frost-Gasket Connection
How Humidity Causes Frost Buildup
Warm, humid air entering your refrigerator or freezer is the primary source of frost. Every time you open the door, moisture-laden air rushes in. If the door seal (gasket) is compromised, this humid air seeps in constantly, even when the door is closed. Inside the cold chamber, this moisture rapidly condenses and freezes onto the evaporator coils and interior surfaces. Over time, this leads to significant ice accumulation, forcing the defrost system to work overtime and ultimately causing frost to spread throughout the compartment.
The Gasket’s Critical Sealing Role
The refrigerator gasket creates an airtight barrier between the interior cold space and the warmer external environment. Made from flexible, resilient materials, it compresses slightly when the door closes, conforming to the cabinet frame to prevent air exchange. A properly functioning gasket maintains the internal humidity level, drastically reducing the amount of new moisture introduced. This is fundamental to preventing the excessive frost formation that plagues units with worn or damaged seals.
Signs Your Gasket is Failing
Don’t wait for major frost problems to suspect gasket failure. Key warning signs include visible cracks, tears, or hardening (loss of flexibility) in the rubber, sections that feel stiff or brittle to the touch, the door not closing flush or requiring extra force, a noticeable draft near the door edges, excessive condensation forming on the outside of the cabinet, and of course, persistent frost buildup inside the freezer compartment that seems disproportionate to normal operation.
Essential Gasket Material Characteristics
Flexibility and Resilience Requirements
The ideal gasket material must maintain significant flexibility across a wide temperature range, from the warmth of your kitchen to the deep freeze of your freezer compartment. It needs to “bounce back” after compression—this resilience ensures it consistently reseals tightly every time the door is opened and closed. Materials that harden or become brittle over time lose this critical ability, creating gaps almost immediately after installation.
Temperature Resistance Range
Gasket materials must withstand extreme temperature cycling without degrading. This means resisting becoming stiff and inflexible in sub-zero freezer temperatures (often below 0°F / -18°C) while also enduring the warmer ambient temperatures near the fresh food compartment and external environment. Poor temperature resistance leads to premature cracking, shrinking, or warping, breaking the essential seal.
Durability Against Oils and Cleaners
Refrigerator gaskets face constant exposure to food oils, spills, and household cleaning products. The material must be resistant to common kitchen contaminants to prevent swelling, softening, or chemical breakdown. Using harsh cleaners on incompatible gaskets is a common cause of premature failure, so material compatibility with typical cleaning agents is a crucial, often overlooked, durability factor.
Getting the Perfect Fit: Measurement is Key
Why Generic Sizes Often Fail
While “universal” gaskets exist, they frequently lead to poor seals and frustration. Refrigerator models vary significantly in door frame depth, curvature, and the exact groove profile where the gasket sits. A gasket that’s slightly too long, too short, or the wrong cross-section won’t compress correctly, leaving gaps. Precision measurement specific to your appliance model is non-negotiable for a lasting, frost-preventing seal.
Step-by-Step Measurement Guide
Accurate measurement requires patience. First, carefully remove the old gasket if possible (note how it’s secured). Measure the total length of the groove it sits in for the entire door perimeter. Crucially, measure the cross-section: the width of the visible sealing lip and the depth/profile of the part that inserts into the door channel. Take multiple measurements around the door, as dimensions can vary slightly. Always compare these precise measurements to the replacement gasket’s specifications.
Interpreting Manufacturer Specifications
Replacement gasket listings often include critical details beyond just “fits model X.” Look for explicit dimensions: total length, lip width, channel depth/profile (sometimes called “T-section” or “D-section”), and material type. Don’t rely solely on model number compatibility; cross-reference the physical measurements. Reputable suppliers provide detailed diagrams or photos showing the exact cross-section profile to ensure it matches your door’s groove.
Installation Techniques for Maximum Seal Integrity
Preparing the Door and Frame
Thorough preparation is half the battle. Completely clean the door channel where the new gasket will seat using mild soap and water; remove all old adhesive residue, dirt, and grease with a plastic scraper if needed (avoid metal). Ensure the channel is perfectly dry before starting installation. A clean surface allows the gasket’s adhesive (if present) or its natural grip to hold securely, preventing slippage that causes gaps.
The Correct Seating Sequence
Installation order matters. Start at the top center of the door. Press the gasket’s mounting tab firmly into the channel, working your way down one side, across the bottom, and up the other side, finishing back at the top center. Avoid stretching the gasket excessively as you go; it should sit naturally in the channel without tension. Pay special attention to corners—gently fold or pleat the gasket material as needed to follow the curve without kinking, ensuring a continuous seal.
Ensuring Uniform Compression
After initial seating, close the door slowly and listen/feel for resistance. Open it and check the gasket’s position all around. It should sit evenly within the channel, not twisted or popped out. Close the door again and check for consistent compression—there should be no areas where the gasket bulges out significantly more than others or where you can easily slip a piece of paper through (the “dollar bill test”). Adjust as necessary before the gasket fully sets.
Post-Installation Verification
Don’t consider the job done immediately after installation. Perform the “dollar bill test” rigorously: close the door on a dollar bill (or similar thin paper) at various points around the seal. You should feel consistent, firm resistance when pulling the bill out. Any spot where it slides out easily indicates a leak. Also, visually inspect the seal in low light; a flashlight inside the closed fridge can reveal light leaks showing where the seal is incomplete.
Long-Term Maintenance for Frost Prevention
Cleaning Methods to Avoid Damage
Cleaning your gaskets regularly prevents grime buildup that can compromise the seal, but technique is vital. Use only mild dish soap, warm water, and a soft cloth or sponge. Avoid abrasive cleaners, scouring pads, bleach, or strong solvents, as these degrade rubber over time, causing cracking and hardening. Never use sharp objects to scrape ice or debris off the gasket itself. Dry thoroughly after cleaning.
Preventing Premature Wear and Tear
Minimize unnecessary stress on the gasket. Avoid slamming the door—close it gently and squarely. Don’t overload shelves or drawers in a way that causes the door to bind or not close fully. Wipe up spills inside the fridge promptly, especially sticky substances that can adhere to the gasket. Be mindful when placing large items; ensure they don’t protrude and prevent the door from closing completely, putting constant strain on the seal.
When Minor Repairs Are Possible
Small nicks or tears in an otherwise flexible gasket might be temporarily repairable using a specialized rubber adhesive sealant designed for appliance gaskets. Clean and dry the area thoroughly first. Apply a very thin bead of sealant over the damage, smoothing it gently. Allow ample curing time as per the product instructions before closing the door. However, this is a short-term fix; significant damage or widespread hardening requires full replacement for reliable frost prevention.
Troubleshooting Persistent Frost Issues
Verifying the Seal After Replacement
If frost persists after installing a new gasket, double-check the installation first. Re-perform the dollar bill test meticulously around the entire perimeter. Inspect for subtle twists, kinks, or sections not fully seated in the channel, especially in corners. Ensure the door is aligned correctly; a misaligned hinge can prevent even compression even with a perfect gasket. Sometimes, the door needs minor adjustment after gasket replacement.
Checking for Cabinet Warping or Damage
Over time, the refrigerator cabinet itself can warp slightly due to impacts, uneven floors, or aging, preventing the door from closing squarely against the gasket. Visually inspect the door frame and cabinet for obvious dents or bends. Use a straight edge to check alignment. Severe warping might require professional cabinet repair before any new gasket can seal effectively.
Ruling Out Other Frost Causes
A new gasket solves air infiltration frost, but other issues cause frost too. Verify the defrost system is functioning (heater, timer, thermostat). Ensure the interior air vents aren’t blocked by food, restricting proper airflow. Check that the refrigerator isn’t set too cold for the ambient room temperature. Persistent frost despite a perfect seal points to these other potential failures needing diagnosis.
Frequently Asked Questions
Frequently Asked Questions
How often should refrigerator gaskets be replaced?
There’s no fixed timeline, as lifespan depends heavily on usage, maintenance, and material quality. Inspect them every 6-12 months. Replace immediately if you notice cracks, tears, significant hardening, loss of flexibility, or if the dollar bill test reveals inconsistent sealing. Most last 5-10 years with proper care.
Can I just replace part of a damaged gasket?
Generally, no. Gaskets are designed as single, continuous loops. Splicing sections together rarely creates a reliable, airtight seal and often leads to immediate failure at the splice point. For effective frost prevention, always replace the entire door gasket.
Why is my new gasket stiff and not sealing well initially?
New gaskets, especially in cooler room temperatures, can be temporarily stiff. Gently work the material by hand around its entire length to increase flexibility. Close the door and leave it for 24-48 hours; the warmth inside the fridge will usually help the rubber soften and conform to the door frame for a better seal.
Does the gasket material color matter for performance?
No, color is purely cosmetic and varies by manufacturer. Performance depends entirely on the rubber compound’s quality, flexibility, temperature resistance, and correct sizing/profile for your specific model, not the color (black, gray, brown).
Can a bad gasket cause my refrigerator to run constantly?
Absolutely. A leaking gasket forces the compressor to run longer and more frequently to compensate for the warm air influx. This constant running is a major contributor to excessive frost buildup and significantly increases energy consumption and wear on the compressor.
Is it normal to see some frost in the freezer?
A very light dusting of frost, especially near the door or vents, is normal during regular operation. However, thick, accumulating ice buildup covering shelves, walls, or the evaporator coils is not normal and strongly indicates a problem, most commonly a failing door gasket allowing excessive moisture entry.
How tight should the door close feel with a new gasket?
You should feel distinct, even resistance when closing the door – a noticeable “thunk” or firm seal – but it shouldn’t require excessive force. If it’s extremely hard to close, the gasket might be the wrong size/profile, improperly installed (twisted/kinked), or the door hinges may need adjustment.
Can I lubricate a stiff gasket to make it seal better?
No. Avoid petroleum-based lubricants (like Vaseline) or oils, as they degrade rubber. Silicone-based appliance gasket conditioners exist but are often unnecessary. If a gasket is stiff, focus on warming it gently (with a hairdryer on low, held at a distance) and working it by hand. Lubricants usually attract dirt and cause more problems.
Why does frost build up only on one side of my freezer?
Uneven frost often points to a localized seal failure. Check the gasket meticulously on the side where frost is worst – look for a small tear, a section popped out of the channel, or a door alignment issue specific to that corner or edge preventing proper compression.
Will replacing the gasket stop all frost immediately?
It will stop the source of new moisture ingress. However, existing frost and ice buildup won’t magically disappear. After replacing the gasket, you’ll need to manually defrost the freezer (turn it off, remove food, let ice melt) for the appliance to return to optimal, frost-free operation. Prevention starts immediately, but cleanup is still required.