There’s a special kind of frustration that comes with crafting the perfect IPA or lager, only to realize your kitchen refrigerator simply can’t accommodate the keg you need for proper cold crashing and serving. As homebrewing evolves from a weekend hobby into a serious craft, the demand for specialized equipment has exploded—and few pieces are as crucial as reliable, keg-friendly refrigeration. Side-by-side refrigerators have emerged as the unsung heroes of the homebrewing community, offering a unique combination of vertical storage efficiency, temperature precision, and adaptability that traditional top-freezer or bottom-freezer models simply can’t match.
What makes these units particularly compelling for brewers isn’t just their spacious interiors, but their inherent design philosophy. The vertical split creates two distinct climate zones, allowing you to dedicate one side to fermentation temperature control while the other handles serving duties. But not all side-by-side models are created equal when it comes to keg storage. Understanding the nuanced features that separate a brewer’s dream from a disappointing purchase requires diving deep into specifications most consumers never consider. Let’s explore what transforms an ordinary refrigerator into a brewing powerhouse.
Top 10 Side-by-Side Refrigerators for Brewers
Detailed Product Reviews
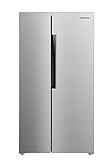
1. Kenmore 36" Side-by-Side Refrigerator with Freezer - Accela Chill, Water & Ice Dispenser, Adjustable Glass Shelves, ENERGY STAR Certified, 20 cu. ft. Capacity - Fingerprint Resistant Stainless Steel

Overview: The Kenmore 36-inch side-by-side refrigerator delivers premium kitchen performance in a space-saving counter-depth design. With 20 cubic feet of capacity, this ENERGY STAR certified appliance balances generous storage with a sleek profile that won’t overwhelm your kitchen layout. The fingerprint-resistant stainless steel finish maintains its sophisticated appearance even in busy households.
What Makes It Stand Out: The Accela Chill feature rapidly cools groceries to preserve freshness, while the multi-flow air system ensures consistent temperatures throughout every shelf. The external water and ice dispenser provides filtered cubed or crushed ice on demand, eliminating the need for separate ice trays. Edge-to-edge adjustable glass shelves offer modern aesthetics and practical spill-proof containment, accommodating everything from party platters to tall pitchers with ease.
Value for Money: At $1,593.89, this Kenmore positions itself in the mid-to-premium range. While not inexpensive, it undercuts many comparable luxury brands by $200-400 while delivering similar features. The ENERGY STAR certification promises long-term utility savings, and the included water filtration system eliminates the cost of aftermarket solutions. For families prioritizing performance and style, the investment yields measurable daily convenience.
Strengths and Weaknesses: Strengths include rapid cooling technology, even temperature distribution, quiet inverter compressor operation, and flexible storage configuration. The fingerprint-resistant finish genuinely reduces cleaning frequency. Weaknesses are typical of side-by-side designs: narrow freezer space limits bulky item storage, and the 20 cu. ft. capacity may feel constrained for larger families compared to French door models.
Bottom Line: This Kenmore refrigerator excels for style-conscious families wanting premium features without luxury-brand pricing. The Accela Chill and water dispenser deliver daily utility that justifies the cost. While side-by-side layouts have inherent space limitations, the thoughtful design and reliable performance make it a smart upgrade for most modern kitchens.
2. Hamilton Beach HBF1558 15.6 cu ft Counter Depth Full Size Refrigerator, Side Doors, Stainless
Overview: The Hamilton Beach HBF1558 offers a budget-conscious entry into the counter-depth refrigerator market at 15.6 cubic feet. This side-by-side model provides essential cooling functionality with a contemporary stainless steel facade that fits seamlessly into modern kitchens without the premium price tag of higher-end brands.
What Makes It Stand Out: The digital display control panel, mounted inside the refrigerator door, brings unexpected tech convenience to this value tier. Oversized door bins accommodate gallon-sized containers, maximizing storage efficiency in the compact footprint. The side-by-side design allows simultaneous access to fresh and frozen sections, while adjustable feet and interchangeable shelves enable personalized organization.
Value for Money: Priced at $1,096.90, this model significantly undercuts most counter-depth competitors by $500-800. While sacrificing some advanced features, it delivers core refrigeration functions reliably. For apartment dwellers, small families, or as a secondary fridge, the cost-to-capacity ratio proves compelling. The lack of a water dispenser reduces maintenance concerns and potential repair costs.
Strengths and Weaknesses: Strengths include accessible pricing, user-friendly digital controls, flexible shelving, and efficient space utilization through large door bins. The counter-depth profile maintains kitchen sightlines. Weaknesses include the smaller 15.6 cu. ft. capacity, absence of ice/water dispenser, potentially less precise temperature control compared to premium models, and unknown long-term durability given the brand’s limited refrigerator history.
Bottom Line: The Hamilton Beach HBF1558 serves budget-minded buyers seeking counter-depth styling without financial strain. It covers refrigeration fundamentals competently while offering surprising digital convenience. However, those wanting advanced features, larger capacity, or proven brand reliability should consider investing more. Ideal for small households or as a garage refrigerator where premium features aren’t critical.
3. Waterdrop MIWF6200 Replacement for Midea® MIWF6200 Twist-in, Sharp SJWF200, SJG2254FS, Zline® MIWFT2100, Midea® Side-by-side Refrigerator Water Filter, 1 Filter

Overview: This Waterdrop MIWF6200 replacement filter provides a cost-effective solution for maintaining water quality in compatible Midea, Sharp, Thor Kitchen, and Zline refrigerators. Designed as a direct aftermarket alternative to OEM filters, it uses advanced filtration technology to deliver clean, great-tasting water and ice for six months or 200 gallons.
What Makes It Stand Out: The filter employs Sri Lankan coconut shell carbon block technology, offering twice the surface area of conventional charcoal filters derived from coal or wood. This enhanced microporous structure effectively reduces chlorine, taste, and odor issues while preserving beneficial minerals. The broad compatibility across multiple brands and models—including Midea side-by-side and French door units—makes it a versatile choice for various refrigerator configurations.
Value for Money: At $22.99, this filter costs 40-60% less than original manufacturer replacements while maintaining third-party tested performance. The six-month lifespan translates to approximately $3.83 monthly cost for continuous filtered water, eliminating bottled water expenses. Complimentary month install stickers simplify tracking replacement schedules, preventing premature changes or overdue maintenance.
Strengths and Weaknesses: Strengths include significant cost savings, premium coconut carbon filtration, wide model compatibility, and helpful installation reminders. The twist-in design ensures tool-free replacement. Weaknesses involve the generic “filters off something” vague description in marketing materials, potential fit inconsistencies across all listed models, and absence of NSF certification mention, which some users require for peace of mind.
Bottom Line: For owners of compatible refrigerators, this Waterdrop filter delivers exceptional value without compromising water quality. The coconut carbon technology matches or exceeds OEM performance at a fraction of the price. While certification details could be more explicit, real-world filtration results satisfy most households. Purchase with confidence if your model is specifically listed and NSF certification isn’t mandatory for your needs.
4. Waterdrop MIWF6200 Replacement for Midea® MIWF6200 Twist-in, Sharp SJWF200, SJG2254FS, Zline® MIWFT2100, Midea® Side-by-side Refrigerator Water Filter, 2 Filters
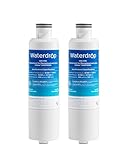
Overview: This two-pack of Waterdrop MIWF6200 filters offers the same advanced filtration technology as the single unit, providing a convenient backup for continuous clean water access. Compatible with numerous Midea, Sharp, Thor Kitchen, and Zline refrigerator models, these replacements ensure your household enjoys filtered water and ice for a full year without interruption.
What Makes It Stand Out: The twin-pack configuration reduces per-filter cost to $18.00, offering substantial savings over purchasing individually. Each filter utilizes Sri Lankan coconut shell carbon block with double the surface area of conventional charcoal alternatives, effectively removing chlorine, taste, and odor contaminants while retaining essential minerals. The included month install stickers for both units help maintain consistent replacement scheduling.
Value for Money: At $35.99 for two filters, the per-unit price drops 22% compared to the single filter, representing excellent bulk value. This package covers 12 months or 400 gallons of filtration for approximately $3 monthly—far cheaper than bottled water or OEM alternatives costing $40-50 each. The upfront investment pays dividends through uninterrupted filtration and reduced reordering hassle.
Strengths and Weaknesses: Strengths include bulk pricing advantage, extended supply security, premium coconut carbon technology, and model versatility. Having a spare eliminates emergency replacement runs. Weaknesses are the initial higher outlay, storage requirements for the second filter, and the same ambiguous marketing language about “filters off something.” Compatibility verification remains crucial before purchase.
Bottom Line: For households committed to their compatible refrigerator long-term, this two-pack delivers undeniable economic and practical benefits. The $18 per-filter price point is compelling, and the year-long coverage provides peace of mind. Ensure your specific model is confirmed compatible, then stock up on this cost-effective filtration solution that doesn’t compromise quality for savings.
5. KoolMore 47 in. Commercial Two Glass Door Back Bar Refrigerator Cooler for Beer Bottle & Can Storage with Side Condenser and Compressor, LED Lighting, 11 Cu. Ft. Capacity, ETL Listed in Black

Overview: The KoolMore 47-inch back bar cooler addresses commercial beverage storage needs with professional-grade construction. This 11 cubic foot unit accommodates up to 300 standard cans across two glass doors, making it ideal for bars, restaurants, and catering operations where visibility and access are paramount. The black finish and side-mounted compressor optimize space efficiency.
What Makes It Stand Out: Commercial durability defines this cooler, featuring an aluminum interior and precoated steel exterior built to withstand constant use. The side condenser design maximizes interior capacity while maintaining a narrow 24-inch depth, perfect for tight bar layouts. LED lighting enhances product visibility, and the wide temperature range (32°F-50°F) accommodates various beverage types from craft beer to white wine.
Value for Money: At $1,668.40, this commercial unit competes favorably with industry brands costing $2,000-3,000. The ETL certification ensures safety compliance without premium pricing. For business owners, the 300-can capacity generates revenue potential that quickly offsets the investment. The one-year parts and labor warranty provides commercial-use protection rarely included at this price point.
Strengths and Weaknesses: Strengths include robust construction, space-saving side compressor, impressive capacity-to-footprint ratio, ETL safety certification, and commercial warranty. The temperature range suits diverse beverage service needs. Weaknesses involve commercial aesthetics that may not suit residential kitchens, higher energy consumption than residential units, and noise levels typical of commercial compressors. The 11 cu. ft. capacity prioritizes can storage over versatile shelving.
Bottom Line: This KoolMore cooler excels for commercial beverage service where reliability and capacity drive profitability. The side compressor design and durable build quality justify the investment for bars and restaurants. Residential buyers should consider noise and energy implications. For its intended commercial application, it delivers professional performance at a value-conscious price point with warranty support.
6. CMS Magnetics Magnetic Tool Tray, 10.75’x4.5’x1.25’, Black w/Holding Magnets on Side for Cabinets, Tool Box or Kegerator Fridge | Keg Drip Tray | Beer Taps
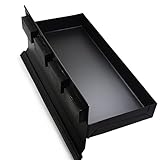
Overview: The CMS Magnetics Magnetic Tool Tray is a versatile 10.75-inch organizer that combines industrial utility with unexpected domestic applications. Designed primarily for workshops and garages, this black metal tray features powerful side-mounted magnets that securely attach to toolboxes, cabinets, or any ferrous surface. Its 1.25-inch depth provides ample space for storing hand tools, hardware, or accessories within easy reach.
What Makes It Stand Out: This tray’s dual-purpose design distinguishes it from conventional tool organizers. While mechanics will appreciate its sturdy magnetic grip on tool chests, homebrew enthusiasts can repurpose it as a keg drip tray for their kegerator. The side-mounted magnet configuration leaves the entire base free for storage, maximizing capacity. ISO 9001 certification ensures manufacturing consistency, while the Amazon return policy provides purchase protection.
Value for Money: At $23.99, this tray sits in the mid-range for magnetic organizers. Its multi-functionality justifies the cost—effectively providing two products in one. Comparable single-use drip trays or magnetic bins often cost $15-25 each, making this hybrid offering economically sensible for users who need both workshop organization and beverage service solutions.
Strengths and Weaknesses: Strengths include robust magnetic hold, versatile mounting options, durable steel construction, and workshop-to-home adaptability. The 10.75-inch length fits most standard tool chest drawers. Weaknesses: magnets may scratch painted surfaces if not careful, the black finish can show wear over time, and it’s unsuitable for non-magnetic surfaces without additional hardware.
Bottom Line: This magnetic tray excels for those seeking flexible storage solutions. It’s ideal for mechanics wanting mobile tool access and homebrewers needing a reliable drip tray. While not revolutionary, its clever dual-purpose design and solid construction deliver genuine utility worth the investment.
7. 64oz Glass Pitcher with Handle and Lid, 2 Quart Mason Jar Pitcher - Airtight & Leakproof Water Jug with Pour Spout Lid, Glass Containers for Fridge, Perfect for Juice, Cold Brew, Iced & Sun Tea

Overview: This 64-ounce mason jar-style pitcher combines vintage aesthetics with modern functionality for beverage storage. Measuring 10 inches tall and 4.3 inches wide, its space-efficient profile fits refrigerator doors while holding a half-gallon of liquid. The package includes five interchangeable lid colors (black, gray, pink, green, blue), allowing customization for different drinks or household members.
What Makes It Stand Out: The ergonomic handle design features elongated, thickened construction that prevents slipping even when full. Flip-top lids enable precise, drip-free pouring while blocking dust and contaminants. Volume markings on the side assist with portion control and recipe accuracy. The wide 3-inch mouth opening simplifies filling, cleaning, and adding fruit infusions or tea bags.
Value for Money: Priced at $16.99, this pitcher delivers exceptional value. Comparable glass pitchers with similar features typically retail for $20-30. The inclusion of five colored lids effectively provides multiple pitchers’ versatility at a fraction of the cost. Thick, premium glass construction suggests longevity that justifies the investment over cheaper plastic alternatives.
Strengths and Weaknesses: Strengths include airtight leakproof seal, dishwasher safety, versatile lid options, comfortable grip, and graduated markings. The thick glass withstands daily use while resisting odors and stains. Weaknesses: requires preheating before hot liquids to prevent thermal shock, glass construction makes it heavier than plastic, and the mason jar design may not suit formal dining settings.
Bottom Line: An excellent choice for health-conscious consumers seeking a versatile, chemical-free beverage container. Perfect for cold brew, sun tea, and infused waters. The multiple lids and thoughtful design details make it a practical, stylish addition to any kitchen at a competitive price point.
8. 64oz Glass Pitcher with Lid, 2 Quart Mason Jar Pitchers with Lid and Spout, Wide Mouth Breast Milk Pitcher Glass Jug Sun Tea Pitchers, Cold Brew Coffee pitcher, Fridge Container for Water, Juice, Tea

Overview: This 64-ounce mason jar pitcher emphasizes safety and aesthetic appeal for diverse household uses. Crafted from lead-free, BPA-free glass, it targets health-conscious families and nursing mothers needing reliable breast milk storage. The classic silhouette complements any kitchen decor while providing practical functionality for cold brew coffee, sun tea, and infused beverages.
What Makes It Stand Out: The uniquely engineered lid creates an airtight seal specifically designed to preserve beverage integrity, preventing oxidation and contamination. This makes it particularly suitable for storing breast milk, where freshness is paramount. The non-porous glass surface resists odor absorption and staining, maintaining purity across various contents from coffee to juice without flavor transfer.
Value for Money: At $13.99, this is one of the most affordable glass pitchers in its class. While cheaper than competitors, it doesn’t compromise on safety certifications or core functionality. For nursing mothers, it eliminates the need for specialized storage bottles, representing significant savings. The durability claims suggest it will outlast multiple plastic alternatives, offering long-term value.
Strengths and Weaknesses: Strengths include lead-free/BPA-free materials, versatile wide-mouth design, dishwasher safety, leak-proof lid, and elegant aesthetic. The reinforced glass construction provides durability for daily use. Weaknesses: lacks volume markings, single lid design limits color-coding options, and the mason jar style may feel less sophisticated for formal entertaining. Glass weight could be cumbersome for some users.
Bottom Line: A budget-friendly, safety-focused pitcher perfect for families with infants or those prioritizing chemical-free storage. Its versatility spans from breast milk to cold brew, making it a practical workhorse. While basic in features, its core performance and health-conscious design deliver reliable value.
9. 1 Gallon thickened Square Glass Pitcher with Lid, Classic Stripes Water Pitchers for Fridge, Borosilicate Glass Carafe for Hot/Cold Brew Drink, Extra Large Jug with Handle for Iced Tea, Coffee, Juice

Overview: This premium one-gallon square pitcher targets serious entertainers and beverage enthusiasts with its distinctive vertical stripe design and borosilicate glass construction. The geometric shape maximizes refrigerator space efficiency while serving as an elegant serving piece. Engineered to withstand extreme temperatures from -4°F to 302°F, it handles both hot and cold beverages without risk of cracking.
What Makes It Stand Out: The dual-pour stainless steel lid offers unprecedented versatility—rotate to the fine-mesh side to strain tea leaves and fruit pulp, or use the wide opening for rapid pouring. This 304-grade steel component resists corrosion and provides barista-level functionality. The handcrafted stripe pattern creates visual interest while improving grip, and the generous capacity serves 12-16 guests efficiently.
Value for Money: At $34.99, this represents a premium investment. However, borosilicate glass pitchers of this capacity typically command $40-60. The dual-function lid and artisanal design elements justify the price premium over basic models. For frequent entertainers or café owners, the commercial-grade durability and lifetime replacement guarantee eliminate replacement costs, delivering excellent long-term value.
Strengths and Weaknesses: Strengths include exceptional temperature resistance, elegant square design, versatile straining lid, large serving capacity, and lifetime warranty. The foam-lined gift packaging adds luxury appeal. Weaknesses: highest price point in its category, heavier than standard glass when full, and the square shape may not fit all refrigerator doors. Handcrafted elements could create slight variations.
Bottom Line: Ideal for those who regularly serve large gatherings or operate small beverage businesses. The combination of thermal durability, sophisticated design, and functional lid system makes it worth the premium. A worthwhile investment for serious hosts seeking a statement piece with professional performance.
10. Cold Brew Tea Pitcher, Cold Brew Coffee Maker – 37 Fl Oz BPA-Free PP Pitcher with Durable Mesh Filter, Leak-Proof Cap, Comfortable Handle – Perfect for Fridge Side Door Storage & Ice Drinks

Overview: This specialized 37-ounce cold brew pitcher prioritizes compact storage and extraction precision for coffee and tea enthusiasts with limited refrigerator space. Constructed from BPA-free polypropylene, its slim 2.9-3.6 inch width fits refrigerator side doors. The integrated 60-micron mesh filter prevents over-extraction by containing grounds while allowing optimal water flow, delivering smooth, sediment-free beverages.
What Makes It Stand Out: The removable filter system enables precise control over brew strength and simplifies cleaning. At just 0.75 pounds, it’s exceptionally lightweight and portable for picnics or office use. The dual-handle design—side grip and top handle—provides carrying flexibility. The 250-mesh filter density strikes an ideal balance between filtration efficiency and flow rate, a technical detail often overlooked in competitors.
Value for Money: Priced at $20.99, this pitcher occupies a middle ground between cheap plastic infusers and expensive glass systems. Its specialized design for fridge door storage adds practical value for apartment dwellers. The durable PP and ABS construction ensures longevity, while the precision filter eliminates the need for separate filtering equipment, justifying the cost over basic pitchers.
Strengths and Weaknesses: Strengths include space-saving slim profile, excellent filtration system, lightweight portability, leak-proof design, and dual-handle convenience. The 37-ounce capacity suits individuals or couples. Weaknesses: plastic construction may absorb odors over time, smaller capacity insufficient for families, and lacks aesthetic appeal of glass alternatives. Not suitable for hot liquids due to material limitations.
Bottom Line: Perfect for urban dwellers and cold brew aficionados prioritizing space efficiency and extraction quality. The specialized design excels at its intended purpose but lacks versatility for hot beverages or large batches. A smart purchase for those needing compact, dedicated cold brewing functionality.
Why Side-by-Side Refrigerators Are Ideal for Homebrewers
Temperature Control Precision
The dual-compartment nature of side-by-side refrigerators gives you independent temperature management that’s critical for brewing operations. Most models feature separate thermostats for each side, allowing you to maintain lagering temperatures around 35-40°F on one side while keeping fermentation temperatures stable at 65-68°F on the other. This separation prevents the temperature fluctuations that can ruin a batch during secondary fermentation or bottle conditioning.
Advanced models now incorporate digital thermostats with accuracy within ±1°F, a feature that should be non-negotiable for serious brewers. Look for units that display actual interior temperatures rather than just a numbered dial setting. Some high-end models even offer temperature logging capabilities through smart home integration, letting you track temperature stability over time—a crucial data point when diagnosing off-flavors in your finished product.
Space Optimization for Keg Storage
Unlike traditional refrigerators where horizontal shelves limit vertical clearance, side-by-side models offer floor-to-ceiling storage potential on each side. This vertical orientation perfectly accommodates the tall, cylindrical profile of standard kegs. The freezer side, when converted to refrigeration temperatures, often provides the most usable height since it typically lacks the bulky crispers and door storage compartments found on the refrigerator side.
The narrow width of each compartment—usually 14-16 inches—creates a natural keg corral that prevents dangerous rolling during door opening. This built-in stability means you can often store multiple kegs without custom bracing, provided the shelving system is properly configured. The vertical layout also allows you to stack smaller kegs or store CO2 tanks above or below your main kegs, maximizing every cubic inch of interior space.
Vertical Storage Advantages
Gravity becomes your ally with side-by-side refrigeration. When you need to transfer beer between kegs or perform closed-system transfers, the vertical orientation allows you to position source and destination kegs at different heights without complex racking systems. This natural height differential makes pressure transfers smoother and reduces oxidation risks.
The tall door compartments on side-by-side units also provide perfect storage for sanitizing solution buckets, tubing, and other brewing accessories that need to stay clean and organized. Unlike chest freezers where you must dig through layers of equipment, everything remains visible and accessible at eye level.
Key Features to Look for in a Keg-Friendly Refrigerator
Adjustable Shelving Systems
The foundation of keg compatibility lies in shelving flexibility. Glass shelves offer superior strength and hygiene compared to wire racks, but they must be completely removable without leaving permanent brackets or supports. Look for models with split shelves that can be removed in sections rather than as single large pieces—this allows you to create custom height configurations while retaining some shelving above or below your kegs for storage.
Pay attention to the shelf mounting system. Slot-and-tab designs are more robust than simple pin supports when bearing the 160+ pound load of a full half-barrel keg. Some premium models feature reinforced shelf mounts specifically designed for heavy items, though manufacturers rarely advertise this. Check user manuals for weight ratings, and don’t hesitate to contact manufacturers directly about load-bearing specifications.
Interior Dimensions and Clearance
The usable interior height between shelves is the most critical measurement—yet it’s rarely listed in standard specifications. You’ll need a minimum of 24 inches of vertical clearance for a standard Cornelius keg, and 28 inches for a half-barrel sankey keg. But clearance isn’t just about height; consider the diagonal space needed to angle a keg into position.
Door shelf depth significantly impacts usable interior space. Deep door bins can reduce your effective interior width by 3-4 inches, making the difference between a keg that slides in easily and one that won’t fit at all. Models with flat door panels or minimal door storage offer the most flexible interior dimensions. Measure the distance from the back wall to the inner door surface with the door closed—that’s your true usable depth.
Temperature Range and Stability
Brewing applications demand a broader temperature range than typical food storage. Your ideal unit should reliably maintain temperatures from 32°F up to 70°F, giving you flexibility for cold crashing, lagering, and fermentation control. More importantly, temperature stability matters more than absolute range.
Look for models with inverter compressors rather than traditional on/off compressors. Inverter technology runs continuously at variable speeds, eliminating the temperature swings that occur when compressors cycle on and off. This stability is crucial during sensitive fermentation phases where even 2-3 degree fluctuations can stress yeast and produce off-flavors. The compressor should also include a built-in delay feature that prevents short-cycling during power outages—a common issue in garage installations.
Door Storage and Clearance
While deep door bins might seem convenient, they become obstacles when maneuvering kegs. The best brewer-friendly models feature modular door storage that can be completely removed without tools. Some units even offer flat door panels as an optional configuration, essentially creating a clean slate for custom installations.
Consider the door hinge mechanism as well. Models with reversible doors give you installation flexibility, but more importantly, look for doors that open a full 180 degrees. Limited door swing can make keg installation frustrating and potentially dangerous. The door should also stay open at any angle without drifting closed—a feature that proves invaluable during cleaning and maintenance sessions.
Humidity Control and Moisture Management
Keg storage creates unique moisture challenges. Condensation forms on cold keg surfaces, especially during humid months, and this moisture needs somewhere to go. Quality side-by-side units include active dehumidification systems that prevent water accumulation. Look for models with dedicated moisture evaporation channels that direct condensation to the compressor area where it can evaporate naturally.
Avoid units with exposed cooling coils on the interior walls, as these can freeze condensation and create ice buildup around your kegs. Frost-free models are essential, but understand the difference between automatic defrost cycles and true frost-free operation. The latter uses fans to circulate dry air, preventing frost formation rather than just periodically melting it.
Understanding Keg Sizes and Compatibility
Standard Keg Dimensions
Before falling in love with any refrigerator, you must understand the keg dimensions you’re working with. A standard half-barrel keg measures 23.3 inches tall and 16.1 inches in diameter, weighing 161 pounds when full. Quarter-barrel kegs (pony kegs) are the same height but only 11.6 inches in diameter. Sixth-barrel kegs (often called sixtels) measure 23.3 inches tall and 9.25 inches in diameter.
Cornelius kegs, the homebrewer’s favorite, come in two main sizes: 5-gallon (25 inches tall, 8.5 inches diameter) and 3-gallon (19 inches tall, 8.5 inches diameter). These ball-lock or pin-lock kegs are lighter and more manageable but require different disconnect systems than commercial sankey kegs. Your refrigerator must accommodate not just the keg itself, but also the coupler, disconnects, and tubing that add 3-4 inches to the overall height requirement.
Mini Kegs and Cornelius Kegs
The rise of mini kegs and Cornelius kegs has revolutionized homebrewing, but these smaller formats present their own storage challenges. While easier to handle, they often lead to inefficient space usage if not planned properly. The narrow width of side-by-side compartments actually works in your favor here—you can often fit three 5-gallon Cornelius kegs across the width of a standard side-by-side unit.
Consider building a custom keg stacking system using food-grade plastic milk crates or purpose-built keg racks. These allow you to safely stack smaller kegs two high while maintaining stability and air circulation. The vertical nature of side-by-side units means you can dedicate different height zones to different keg sizes, with larger kegs on the bottom and smaller ones above.
Custom Keg Configurations
Creative brewers often modify kegs with shortened dip tubes or custom fittings that affect overall dimensions. If you plan to use custom configurations, build in extra clearance margins. A good rule of thumb is to add 2 inches to your maximum keg height measurement to account for fittings, hoses, and the slight height increase when a keg sits on rubber feet or a drip tray.
Some brewers install custom keg collars or use keg jackets for insulation, which can add another inch to the diameter. Always measure your actual equipment rather than relying on manufacturer specifications, and test-fit kegs with all accessories installed before committing to a permanent setup.
Temperature Requirements for Different Beer Styles
Lager Fermentation and Storage
Lagers demand precise temperature control throughout their extended fermentation and conditioning periods. The ideal side-by-side refrigerator for lager brewing needs to maintain 50-55°F during primary fermentation, then drop to near-freezing temperatures (32-35°F) for lagering. This requires a unit with excellent temperature recovery—when you open the door to take hydrometer readings, the temperature should return to setpoint within 15 minutes.
The freezer side of a side-by-side unit often makes the best lagering chamber because it’s designed to maintain colder temperatures and typically has better insulation. However, you’ll need to modify the thermostat or use an external temperature controller to raise the temperature from its native sub-freezing range. Look for models that can be easily adjusted to refrigerator temperatures without permanent modifications.
Ale Temperature Management
Ales are more forgiving than lagers but still benefit from precise temperature control, especially during the critical first 72 hours of fermentation when yeast produces most of its flavor compounds. The ideal ale fermentation range is 65-68°F for most styles, with some Belgian and farmhouse ales preferring temperatures up to 75°F.
Side-by-side refrigerators excel here because you can use the refrigerator side for active fermentation while the freezer side handles cold crashing and serving. This separation prevents the temperature fluctuations caused by frequently opening the serving keg from affecting your fermenting beer. The ability to maintain two distinct temperature zones simultaneously is perhaps the single greatest advantage of the side-by-side format for brewers.
Serving Temperature Optimization
Serving temperature dramatically impacts beer perception, and different styles shine at different temperatures. Stouts and porters taste best at 50-55°F, while light lagers need to be near freezing at 38-42°F. A side-by-side unit with precise temperature control lets you store different styles at their optimal serving temperatures simultaneously.
Consider installing a tower fan system to circulate air evenly throughout the serving compartment. Kegs stored at the bottom can be 5-8 degrees colder than those near the top in static-air refrigerators. A simple computer fan mounted to the interior wall, powered by a USB connection, can eliminate these temperature gradients and ensure consistent serving temperatures across all your taps.
Essential Modifications for Brewers
Converting Shelving for Keg Duty
Standard refrigerator shelving simply isn’t designed for keg weights. The first modification most brewers make is reinforcing or replacing the existing shelves. Heavy-duty wire shelving from restaurant supply companies offers an excellent alternative—it’s designed to hold hundreds of pounds and allows excellent air circulation around your kegs.
If you prefer to keep the original glass shelves, add support by placing 1-inch aluminum angle irons beneath them, running from front to back. These can be secured with silicone adhesive rated for cold temperatures, creating invisible reinforcement that doubles the load-bearing capacity. Always test the reinforced shelf with a keg full of water (which weighs slightly more than beer) before trusting it with your precious homebrew.
Adding a Draft Tower
Installing a draft tower transforms your side-by-side refrigerator from simple storage into a true kegerator. The most elegant solution is a through-the-door tower installation, but this requires careful planning. You’ll need to locate the door’s internal insulation and wiring before drilling, and use a hole saw specifically designed for refrigerator doors.
Consider a tower with multiple taps—even if you start with a single keg, you’ll likely expand. A three-tap tower gives you room to grow without drilling additional holes. The tower should be mounted high enough on the door that it clears the top of your tallest keg by at least 2 inches, allowing for easy keg changes without disconnecting the tower.
Installing a CO2 System
CO2 tank placement requires careful consideration of both safety and convenience. The freezer side’s floor area often provides the most stable location, but you must ensure the tank is secured against tipping. A 5-pound CO2 tank can become a dangerous projectile if it falls and breaks its valve. Install a tank bracket that bolts to the floor of the refrigerator, or use a heavy-duty strap system anchored to the wall.
Never store your CO2 tank inside the refrigerated compartment with your beer if you can avoid it. Temperature fluctuations affect CO2 pressure, and a tank stored at 38°F will deliver different carbonation results than one at room temperature. The ideal setup places the CO2 tank outside the refrigerator with the gas line entering through a small drilled hole sealed with grommets.
Energy Efficiency Considerations
Compressor Quality and Performance
The compressor is the heart of your brewing refrigerator, and cheap models can cost you more in electricity over time than the initial purchase price difference. Inverter compressors, while more expensive upfront, use 30-40% less energy than traditional compressors and provide the temperature stability that brewing demands. They’re also significantly quieter—a major consideration if your brewing setup is near living spaces.
Check the compressor’s duty cycle rating, which indicates how long it can run continuously without overheating. Brewing applications often require extended run times during initial temperature pull-down or when ambient temperatures are high. A compressor rated for 80% duty cycle or higher ensures your unit won’t shut down from thermal overload during critical brewing phases.
Insulation and Door Seals
Poor insulation forces your compressor to work harder and creates temperature fluctuations that harm beer quality. Test door seals by closing the door on a dollar bill—it should be difficult to pull out. If it slides out easily, the seal needs replacement. Quality refrigerators use multiple door seals and magnetic strips that maintain contact even when the door is slightly ajar.
The insulation thickness in the walls matters more than the manufacturer’s energy rating. Side-by-side units with 2-3 inches of foam insulation in the walls maintain temperatures more stable during power outages and recover faster after door openings. You can sometimes identify well-insulated models by their weight—heavier units typically contain more insulation.
Smart Energy Monitoring
Modern smart refrigerators offer energy monitoring that can be surprisingly useful for brewers. By tracking compressor run times and energy consumption, you can identify when your refrigerator is working harder than normal—perhaps due to a failing door seal or low refrigerant levels. This data helps you maintain optimal performance and catch problems before they ruin a batch.
Some units allow you to set energy-saving modes that reduce compressor cycling during peak electricity rate hours. While you shouldn’t compromise temperature stability for cost savings, these features can be programmed to temporarily reduce cooling during planned maintenance periods when you’re not accessing the kegs.
Noise Levels and Placement Strategy
Decibel Ratings Explained
Refrigerator noise becomes a critical factor when you’re running a compressor 24/7 in a garage, basement, or home brewery. Standard refrigerators operate at 40-45 decibels, about the level of a quiet conversation. However, brewing applications often require the compressor to run more frequently, making that constant hum more noticeable.
Look for models specifically marketed as “quiet operation” or “garage-ready.” These typically feature sound-dampening mounts for the compressor, additional insulation around the compressor compartment, and smoother-running fans. The difference between a 38 dB and a 45 dB unit is significant—it’s the difference between a barely noticeable background hum and an obvious mechanical presence.
Garage vs. Indoor Installation
Garage installation presents unique challenges, primarily ambient temperature extremes. In unheated garages, winter temperatures can drop below the refrigerator’s operating range, causing the compressor oil to thicken and potentially damaging the unit. Summer heat forces the compressor to work overtime. Garage-ready models include compressor heaters and more robust components designed for temperature fluctuations between 38°F and 110°F.
Indoor installation requires careful consideration of ventilation. Side-by-side refrigerators need 2-3 inches of clearance on all sides for proper air circulation. Building your unit into cabinetry without adequate ventilation will shorten compressor life and create temperature hot spots. Always follow the manufacturer’s clearance specifications, and consider adding a small exhaust fan if you’re installing in an enclosed space.
Ventilation Requirements
The compressor and condenser coils generate significant heat that must be dissipated. Side-by-side models typically vent from the bottom front, but some vent from the rear. Bottom-venting units offer more placement flexibility since you can position them closer to walls, but they require regular cleaning of the front grille to prevent dust buildup.
Create a maintenance schedule for cleaning the condenser coils every three months. In brewing environments, these coils collect dust, yeast particles, and hop debris that reduce efficiency by up to 30%. A soft brush attachment on your vacuum cleaner works well, but consider investing in a coil cleaning brush that reaches deep into the condenser assembly.
Maintenance and Cleaning Best Practices
Interior Sanitation Protocols
Your brewing refrigerator should be cleaned more frequently and thoroughly than a standard kitchen unit. Establish a monthly deep-cleaning routine using a no-rinse sanitizer solution rather than harsh chemical cleaners that can leave residues affecting beer flavor. Remove all kegs and shelving, then wipe down every surface with a soft cloth dampened with sanitizer.
Pay special attention to door seals, which can harbor mold and bacteria. Remove the seals if possible and soak them in sanitizer solution, using a soft brush to clean the grooves. Dry them thoroughly before reinstallation. Consider installing a small USB-powered UV-C light that runs for 30 minutes daily to inhibit microbial growth—just ensure it’s positioned away from beer to prevent UV damage.
Coil Cleaning Schedule
Dirty condenser coils are the number one cause of refrigerator failure and temperature instability. In a brewing environment, you should clean coils monthly rather than the typical annual recommendation for kitchen use. The combination of dust, yeast in the air, and frequent door openings creates a perfect environment for coil fouling.
Mark your calendar for the first of each month, and spend 15 minutes with a coil brush and vacuum. This simple routine can extend compressor life by years and maintain the temperature stability your beer requires. Don’t forget to clean the evaporator fan blades as well—they accumulate dust that can throw off the fan balance and create noise.
Drip Pan Management
The drip pan collects condensation and defrost water, creating a potential breeding ground for bacteria and mold. In brewing applications, where you’re frequently opening doors and introducing moisture, this pan fills faster than normal. Check it monthly and clean it with a diluted bleach solution to prevent odors and microbial growth.
Some brewers install a small aquarium pump in the drip pan connected to a drain line, automatically evacuating water to a floor drain or bucket. This modification is particularly valuable in humid climates where the pan can overflow, or if you’re using the refrigerator for fermentation where temperature changes create extra condensation.
Budget Planning and Cost Analysis
Initial Investment vs. Long-Term Value
A basic side-by-side refrigerator suitable for brewing starts around $800, while premium models with the features brewers need can exceed $2,500. However, the initial purchase price tells only part of the story. A cheap unit that fails after three years costs more per year than a quality model lasting ten years. Factor in the cost of ruined beer batches due to temperature fluctuations, and the value proposition of premium models becomes clear.
Calculate the total cost of ownership by estimating annual energy consumption (found on the EnergyGuide label) multiplied by your electricity rate, then add expected maintenance costs. A unit costing $200 more upfront but using $50 less electricity per year pays for itself in four years while providing better temperature stability. Don’t forget to factor in the cost of modifications, which can add $200-500 to your total investment.
Hidden Costs of Modifications
The brewing community often underestimates modification costs. A draft tower installation requires not just the tower itself ($150-300), but also shanks, faucets, tubing, clamps, and potentially a professional drill bit for stainless steel doors. External temperature controllers, essential for precise fermentation control, run $80-150 for quality units with dual-stage control.
CO2 systems represent another significant expense. A complete setup including tank, regulator, distribution manifold, and safety equipment typically costs $250-400. If you’re not comfortable drilling holes and running gas lines, professional installation can add another $200-300. Budget for these modifications from the beginning rather than discovering costs piecemeal.
Warranty Implications
Here’s a critical point most brewers miss: modifying your refrigerator almost always voids the manufacturer’s warranty. Drilling holes for taps, removing shelves, or installing external temperature controllers can leave you without coverage if the compressor fails. Some manufacturers offer extended warranties specifically for garage use, but these typically exclude commercial or modified applications.
Consider purchasing a refurbished commercial refrigerator instead of a new residential unit. These often come with shorter warranties (typically 90 days) but are built to withstand modifications and heavy use. Commercial units also feature more robust compressors and simpler designs that are easier to repair yourself. The money saved on purchase price can be allocated to modifications without the stress of voiding a warranty.
Safety and Compliance Factors
Electrical Requirements
Most side-by-side refrigerators run on standard 120V household circuits, but brewing additions can push electrical demands higher. A draft tower with LED lighting, interior circulation fans, and an external temperature controller might add 2-3 amps to the baseline draw. If your brewing setup shares a circuit with other equipment like pumps or heating elements, you risk tripping breakers.
Dedicated circuits are ideal but not always practical. At minimum, use a surge protector rated for 15 amps and avoid using extension cords. If you must use an extension cord, choose a 12-gauge cord no longer than 10 feet—standard 16-gauge cords create voltage drop that can damage compressor motors over time. Consider having an electrician install a GFCI outlet if your refrigerator is in a garage or basement where moisture is present.
Food Safety Standards
If you’re brewing beer for personal consumption, food safety regulations don’t apply. However, if you plan to serve beer at events or potentially sell it, your refrigerator may need to meet commercial food safety standards. This includes NSF certification, which ensures materials are food-safe and the design prevents contamination.
Even for personal use, adopt commercial sanitation standards. Use only food-grade lubricants on door seals, avoid copper tubing that can react with beer acids, and never store chemicals or non-food items in the same compartment as beer. Install a carbon monoxide detector in any enclosed brewing space, as CO2 leaks, while not toxic in small amounts, can displace oxygen in poorly ventilated areas.
Carbon Dioxide Safety
CO2 is odorless and can be dangerous in confined spaces. A full 5-pound CO2 tank contains enough gas to displace all the oxygen in a standard 8x10 foot room. Always store CO2 tanks upright and secured, never lying on their side. Install a CO2 monitor in your brewing area that alarms at 5,000 ppm, well below dangerous levels but high enough to indicate a leak.
When running gas lines through refrigerator walls, use barrier tubing specifically designed for CO2, not standard vinyl tubing which is permeable. All connections should be checked weekly with soapy water for leaks. Keep a written log of when tanks were filled and inspected—CO2 tanks require hydrostatic testing every five years, and using an expired tank is both dangerous and illegal.
Troubleshooting Common Issues
Temperature Fluctuations
If your refrigerator can’t maintain stable temperatures, start by checking the door seals with the dollar bill test. Next, verify that the unit isn’t overpacked—kegs need air circulation around them. A common mistake is stacking kegs too tightly, blocking airflow from the evaporator fan.
External temperature controllers can sometimes conflict with the refrigerator’s built-in thermostat, causing cycling issues. If using an external controller, set the refrigerator’s internal thermostat to its coldest setting and let the external unit handle all temperature regulation. This prevents the two controllers from fighting each other. Also check that your temperature probe is positioned in the middle of the compartment, not touching a keg wall, which gives false readings.
Frost Buildup Prevention
Frost buildup indicates a humidity problem or a defrost system failure. In brewing applications, frequent door openings introduce moist air that can overwhelm standard defrost systems. Ensure your door seals are perfect, and consider adding a small dehumidifier to your brewing space to reduce ambient moisture.
If frost accumulates on the evaporator coils, the defrost timer or heater may have failed. These are inexpensive parts ($20-40) that you can replace yourself with basic tools. However, if frost forms on the interior walls around your kegs, you’re dealing with an air leak or insulation failure. Check for cracks in the interior liner, particularly around shelf mounting points where stress can cause plastic fatigue.
Door Seal Problems
Door seals lose magnetism and flexibility over time, especially in the temperature extremes common in garage installations. Test seal integrity by sliding paper around the closed door perimeter. Anywhere the paper moves freely indicates a seal failure. Replacement seals typically cost $50-100 and can be installed with just a putty knife and patience.
Sometimes seals appear fine but still leak due to door alignment issues. Side-by-side doors are heavy, and the hinges can sag over time, particularly when loaded with full kegs. Most models have adjustable hinges that can raise or lower the door to restore proper seal compression. A quarter-turn of the adjustment screw can make the difference between perfect temperature control and constant cycling.
Frequently Asked Questions
How many kegs can I realistically fit in a standard side-by-side refrigerator?
Most 25 cubic foot side-by-side units can accommodate two half-barrel kegs on one side, or up to four 5-gallon Cornelius kegs with creative stacking. The other side remains available for fermentation or additional storage. However, capacity depends heavily on interior dimensions, so always measure your specific kegs against the refrigerator’s usable space rather than relying on manufacturer claims.
Will modifying my refrigerator void the warranty?
Yes, virtually any modification—including drilling holes for taps, removing shelves, or installing external temperature controllers—voids the manufacturer’s warranty. Consider purchasing a refurbished commercial unit that doesn’t carry a restrictive warranty, or accept that you’re building a custom piece of equipment and budget for potential repairs. Some third-party warranty companies offer coverage for modified appliances, but read the fine print carefully.
Can I use the freezer side for fermentation at ale temperatures?
Absolutely, and this is one of the side-by-side’s greatest strengths. You’ll need an external temperature controller to override the freezer’s native sub-freezing operation. Set the freezer’s internal thermostat to maximum cold, then use the external controller to maintain your desired fermentation temperature. The freezer’s more powerful compressor and better insulation actually make it superior for fermentation control compared to the refrigerator side.
How do I prevent hop and yeast particles from clogging my draft lines?
Install a secondary in-line filter between the keg and the tap, and always cold-crash your beer for 48 hours before transferring to the serving keg. Cut your dip tube half an inch shorter than standard to leave sediment behind. Use floating dip tubes that draw from the top of the keg rather than the bottom. Most importantly, clean your lines every two weeks with a proper line cleaning solution, not just hot water.
What’s the ideal temperature for serving different beer styles from the same refrigerator?
This is where side-by-side units truly shine. Store your kegs at 38-40°F for maximum shelf life, then use a tower cooling fan and insulated tap lines to serve at appropriate temperatures. Alternatively, install a beer line chiller that allows you to serve each tap at a different temperature. For simpler setups, store at 45°F as a compromise—cool enough for lagers but warm enough that stouts and porters aren’t overly chilled.
How often should I clean my keg refrigerator compared to a regular kitchen fridge?
Brewing refrigerators need cleaning every 2-4 weeks, not the 3-6 months recommended for kitchen units. The combination of frequent door openings, moisture from kegs, and yeast/hop particles in the air creates a perfect environment for mold and bacteria. Establish a routine: weekly quick wipes of door seals and handles, monthly deep cleaning of all surfaces, and quarterly removal and sanitization of all shelving components.
Can I store my CO2 tank inside the refrigerator?
While possible, it’s not recommended. Cold CO2 tanks deliver inconsistent pressure readings, and temperature fluctuations cause pressure swings that affect carbonation levels. The tank also takes up valuable keg space. If you must store it inside, keep it on the floor of the freezer side where temperature is most stable, and insulate it with a simple foam wrap to minimize temperature-related pressure changes.
What’s the difference between a kegerator and a converted side-by-side refrigerator?
Commercial kegerators are purpose-built with reinforced floors, built-in taps, and precise temperature control for beer serving. A converted side-by-side offers more flexibility—you can use it for fermentation, lagering, and serving simultaneously—but requires more setup and modification. Kegerators typically hold one or two kegs; a side-by-side can hold more and offers better temperature zoning, but lacks the turnkey convenience and warranty coverage of a dedicated unit.
How do I handle power outages to protect my beer?
Install a battery backup UPS (uninterruptible power supply) rated for at least 500 watts to keep the temperature controller and interior fans running during short outages. For extended outages, avoid opening the doors—a well-insulated side-by-side can maintain safe temperatures for 24-48 hours if unopened. Consider adding a wireless temperature alarm that alerts your phone if interior temperatures rise above 50°F, giving you time to move kegs to a backup cooling source.
Is it worth buying a smart refrigerator for brewing applications?
Smart features offer mixed value for brewers. Temperature monitoring and alerts are genuinely useful, but most smart refrigerators lack the granular control brewers need. You’re better off with a basic, reliable unit paired with a dedicated brewing temperature controller that offers precise setpoints, temperature logging, and alarm functions. Save the smart features for your fermentation chamber, where data logging provides real brewing insights rather than just convenience.