That frustrating moment when you open your refrigerator door and feel a blast of warm air instead of that crisp chill? It’s not just annoying—it’s literally money evaporating from your wallet. Many homeowners are shocked to discover that a silent culprit behind skyrocketing energy bills isn’t their ancient fridge compressor, but something far simpler and cheaper to fix: the humble refrigerator gasket. Often overlooked, these flexible rubber seals are the unsung heroes guarding your appliance’s efficiency. When they fail, your fridge works relentlessly hard to maintain temperature, guzzling electricity you didn’t sign up for. The good news? Replacing a worn gasket is one of the most cost-effective energy-saving upgrades you can make, often paying for itself in reduced bills within months.
Think of your refrigerator gasket as the critical barrier between the carefully controlled cold environment inside and the warm, humid air outside. Every time that seal weakens—developing cracks, losing its magnetic grip, or simply becoming loose—it creates an invisible leak. Your appliance’s cooling system then kicks into overdrive, running longer and more frequently to compensate for the constant influx of warm air. This isn’t just a minor inconvenience; studies show a poorly sealed refrigerator can increase energy consumption by a staggering 15-20%, turning what should be a reliable kitchen workhorse into a hidden energy vampire. The solution isn’t necessarily a costly new appliance; it’s often as straightforward as restoring this vital seal. Understanding how gaskets function, recognizing when they’ve failed, and knowing how to choose and install the right replacement are key steps toward reclaiming control over your energy costs and keeping your food fresh efficiently.
Top 10 Refrigerator Gaskets
Detailed Product Reviews
1. Refrigeration Technologies RT201B Nylog Gasket/Thread Sealant, 30 ml (1 Pack)
Overview:
This specialized sealant is engineered for refrigeration and HVAC systems, designed to create reliable, contamination-free seals on flares, threaded connections, and O-rings. Its formulation prioritizes system integrity, making it essential for technicians handling sensitive cooling components.
What Makes It Stand Out:
OEM manufacturer approval is its strongest credential, guaranteeing compatibility without risking system contamination—a critical concern where impurities cause costly failures. It uniquely combines sealing and lubrication in one product, streamlining installations while ensuring smooth movement of gaskets during assembly.
Value for Money:
Priced moderately for a 30ml professional-grade solution, it outperforms generic sealants that risk system damage. While smaller in volume than hardware-store alternatives, its precision application and reliability reduce long-term repair costs, justifying the investment for frequent users.
Strengths and Weaknesses:
Strengths: Prevents contamination, lubricates during installation, OEM-approved, versatile for threads/flares/O-rings.
Weaknesses: Limited volume for large-scale projects; overkill for basic household plumbing tasks.
Bottom Line:
A must-have for HVAC professionals prioritizing system safety and efficiency; DIYers with complex refrigeration repairs will also find it invaluable despite the niche focus.
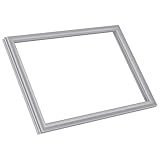
2. 2 Pack-W10830162 Refrigerator Door Gasket Replacement for Whirlpool, Kenmore, Kitchen-Aid Refrigerator Door Seal, 39.7"x16.9" Fridge Door Gasket Seal fit Model WRF535SMBM00, KBFS20EVMS13, IX6HHEXDSM00

Overview:
This dual-pack replacement gasket targets specific Whirlpool-family refrigerator models, addressing common issues like poor sealing, frost buildup, and damaged door seals. Made from reinforced EPDM rubber, it promises durability and precise fitment for select high-end units.
What Makes It Stand Out:
The 1,600°F welded seams and thickened magnetic strips deliver superior cold retention and elasticity over OEM parts, reportedly reducing energy loss. The inclusion of two gaskets offers immediate spare readiness—a rarity for model-specific replacements.
Value for Money:
Competitively priced for two premium gaskets, it avoids costly service calls. While verifying size compatibility (39.7"x16.9") is crucial, its longevity and energy savings offset the upfront cost better than cheaper, non-magnetic alternatives.
Strengths and Weaknesses:
Strengths: Exceptional magnetic seal, high-temperature welded durability, solves condensation/frost issues, includes spare gasket.
Weaknesses: Complex sizing requires meticulous measurement; not universal (left/right door variations confuse buyers).
Bottom Line:
Highly recommended for compatible Whirlpool-family models needing robust, long-lasting seals—just triple-check your dimensions before ordering.
3. E Shape Foam Rubber Seal Strip, EPDM Rubber Weather Stripping Gasket for Auto, Boat, Garage Door/Window, Refrigerator Door Replacement Gasket, Machinery, Home Application and More, Black(13Feet)

Overview:
This versatile 13-foot EPDM rubber strip serves as a universal weatherproofing solution for doors, windows, and appliances. Its E-shaped profile targets gaps in vehicles, garages, and refrigeration units, emphasizing adaptability across diverse sealing scenarios.
What Makes It Stand Out:
The E-design uniquely seals both edges and surfaces simultaneously, while EPDM’s extreme temperature resistance (-40°F to 248°F) and noise-dampening properties outperform basic foam tapes. The no-adhesive approach allows flexible installation via screws or supplemental glue.
Value for Money:
At ~$0.50/foot, it’s economical for large projects. Though requiring DIY cutting and extra fasteners, it surpasses single-use gaskets in cost-efficiency for multiple applications, especially where durability against UV/weather is key.
Strengths and Weaknesses:
Strengths: Multi-surface compatibility, tear/aging-resistant, noise-reducing, customizable length.
Weaknesses: Lacks adhesive (needs separate mounting); E-shape may not suit all groove types; less precise for appliance-specific gaps.
Bottom Line:
Ideal for budget-conscious users tackling varied sealing jobs—but verify groove compatibility first, as it’s not a plug-and-play fridge gasket replacement.
4. Supco SU2004 Refrigerator Door Gasket Kit, Includes Magnetic Insert Strip - Designed To Fit Most Brands - 36 x 84 Inches

Overview:
This universal gasket kit targets DIYers and technicians needing a customizable seal for standard-sized refrigerators (up to 36"x84"). Featuring factory-welded corners and a magnetic strip, it simplifies replacements across multiple brands without model-specific constraints.
What Makes It Stand Out:
Pre-welded L-shaped corners eliminate tricky on-site corner cutting, a major pain point with generic strips. The included magnetic insert ensures consistent door adhesion, while refrigeration-grade virgin vinyl guarantees flexibility and cold retention rivaling OEM parts.
Value for Money:
Priced slightly above basic strips but undercutting model-specific gaskets, it delivers professional results at retail cost. The time saved on installation and broad compatibility make it a smart investment for frequent repairs.
Strengths and Weaknesses:
Strengths: Factory-welded corners, strong magnetism, easy trimming, brand-agnostic fit, durable vinyl.
Weaknesses: Requires precise measurement for non-standard doors; magnetic strip may weaken over years.
Bottom Line:
The top choice for versatile, hassle-free fridge gasket replacements—especially valuable for technicians servicing multiple brands.
5. Innconee 2 Pcs Refrigerator Door Gasket Compatible with True 810803 25-3/4" x 54-1/8" Freezer Door Seal Magnetic Refrigerator Replacement Parts Compatible with Gdm-49/t-49 Freezer Parts Accessories

Overview:
Designed exclusively for True commercial freezers (GDM-49/T-49 models), this dual-pack PVC gasket ensures airtight seals for units where energy efficiency and temperature consistency are critical for food safety and operational costs.
What Makes It Stand Out:
Its precise 25-3/4"x54-1/8" sizing eliminates guesswork for True units, while the reinforced magnetic strip significantly reduces cold leakage—directly lowering energy bills. The inclusion of two gaskets ensures immediate spares for businesses minimizing downtime.
Value for Money:
Cost-effective for commercial users given the energy savings from optimal sealing. Though pricier than generic strips, its model-specific accuracy prevents wasted purchases and maintains freezer efficiency better than ill-fitting alternatives.
Strengths and Weaknesses:
Strengths: Model-specific fit, strong energy savings, includes spare gasket, easy hot-water reshaping.
Weaknesses: Zero versatility (True-only); PVC may stiffen faster than EPDM in extreme cold.
Bottom Line:
Essential for True freezer owners seeking reliable, energy-efficient seals—order confidently if your model matches, but verify dimensions first.
6. W0404520 Door Gasket for Atosa Gasket, 22" x 26-3/16" Refrigerator Door Gasket Replacement Fits MGF8402 MGF8404 MGF8406 MSF8302 and MSF8304

Overview:
This replacement gasket (W0404520) is engineered specifically for select Atosa commercial refrigeration units, including MGF and MSF series models. Measuring 22" W × 26-3/16" H, it ensures compatibility with units like MGF8402, MSF8304, and others, targeting food service professionals needing reliable component replacements.
What Makes It Stand Out:
Its standout feature is the premium EPDM rubber construction, designed for extreme temperature resilience and flexibility. The gasket maintains a consistent seal to prevent cold-air leakage, reducing energy waste and temperature fluctuations. The precise sizing eliminates complex adjustments during installation, minimizing operational downtime for critical commercial equipment.
Value for Money:
Priced competitively for commercial-grade parts, it offers long-term savings by resisting hardening or warping—unlike cheaper alternatives requiring frequent replacement. Its durability directly translates to lower maintenance costs and sustained energy efficiency, justifying the investment for businesses prioritizing uptime.
Strengths and Weaknesses:
Strengths: Exact model compatibility; robust material withstands heavy use; tool-free installation; prevents energy loss. Weaknesses: Limited to specific Atosa models (no universal fit); requires precise measurement verification before purchase to avoid mismatches.
Bottom Line:
An essential, cost-effective upgrade for Atosa refrigeration owners seeking reliable performance and reduced operational disruptions. Highly recommended for commercial kitchens needing a durable, OEM-matched seal.
7. Upgraded 5304501270 Freezer Door Gasket for Fri-gidaire Elec-trolux Refrigerator, 34.65" x 24.13" Freezer Door Seal Fit for Kenmore Part Replace 241778308 Refrigerator Freezer Door Seal
Overview:
This upgraded freezer gasket (5304501270) replaces OEM parts for Fri-gidaire, Electrolux, and Kenmore units, sized at 34.65" x 24.13". It targets homeowners with compatible models requiring enhanced sealing performance without overspending on proprietary parts.
What Makes It Stand Out:
The reinforced magnetic strip delivers superior suction versus OEM versions, preventing cold-air leaks and door sweating. Crafted from high-temperature-welded EPDM rubber, it offers exceptional flexibility, cold resistance, and kink-free edges, ensuring airtight insulation for optimal food preservation.
Value for Money:
It outperforms stock gaskets at a fraction of OEM prices while covering numerous part numbers (e.g., 241778308, PS11704172). The energy savings from reduced compressor strain quickly offset its cost, making it ideal for budget-conscious users seeking longevity.
Strengths and Weaknesses:
Strengths: Stronger magnetic seal; wide compatibility across brands; durable EPDM material; easy warm-water installation. Weaknesses: Sizing discrepancies possible if original gasket isn’t measured first; slight delay in magnet activation post-installation.
Bottom Line:
A top-tier, affordable upgrade that significantly improves freezer efficiency and freshness retention. Recommended for compatible residential units needing a reliable, long-lasting seal.
8. MEILIYA Custom Universal Refrigerator Door Gasket,Freezer Door Magnetic Gasket Rubber Seal Part Replaces,Black

Overview:
MEILIYA’s custom gasket offers a universal solution requiring user-provided measurements (length/width) and groove details. Tailored for unique or discontinued models, it supports black, gray, or white color options based on original seal specifications.
What Makes It Stand Out:
Its seamless, made-to-order design eliminates sizing guesswork, while the magnetic strip ensures tight sealing to prevent energy waste and mold growth. The flexibility allows reuse after cleaning—uncommon in standard replacements—and adapts to irregular vintage or specialty units.
Value for Money:
Though pricier than generic kits, its custom fit avoids costly mismatches. The magnetic efficiency reduces long-term energy bills, and reusability extends lifespan, offering solid ROI for hard-to-fit appliances where OEM parts are unavailable.
Strengths and Weaknesses:
Strengths: True custom sizing; color-matching; reusable; prevents energy loss. Weaknesses: Dependent on accurate customer measurements; 24-hour magnet activation delay; color randomness may not match originals.
Bottom Line:
An excellent niche solution for obsolete or non-standard refrigerators. Ideal if you meticulously document your seal dimensions—otherwise, risk improper fit.
9. Vintage Refrigerator Door Replacement Seal e Shaped Door Seal gaskets for refrigerators(15feet)

Overview:
This 15-foot silicone gasket caters exclusively to vintage refrigerators, featuring an “e-shaped” profile for older units. Designed for DIY retrofits, it withstands extreme cold (-122°F) but lacks model-specific sizing guidance.
What Makes It Stand Out:
Its high-grade silicone construction provides exceptional low-temperature flexibility and durability compared to brittle vintage rubber seals. The universal 15-foot length allows customization for rare models, while the e-shape mimics original designs for authentic restorations.
Value for Money:
Affordable for collectors, but the “measure before purchase” caveat adds risk. Energy savings from restored sealing justify the cost for functional antiques, though labor-intensive installation may offset savings for non-experts.
Strengths and Weaknesses:
Strengths: Superior cold resistance; versatile length for vintage builds; silicone longevity. Weaknesses: No size/model specificity; requires precise cutting/sizing skills; vague installation guidance.
Bottom Line:
A practical choice for vintage appliance restorers with measurement expertise, but avoid if unsure about sizing—potential waste outweighs the low price.
10. 810803 Seal Door Gasket Refrigerator Door Gasket 25-3/4" x 54-1/8" Compatible with True GDM-49/T-49 Refrigerator Reach-in Freezer

Overview:
This gasket (810803) fits pre-2010 True commercial refrigerators/freezers (GDM-49/T-49 series), sized at 25-3/4" x 54-1/8". It addresses sealing failures in high-traffic foodservice environments where temperature consistency is critical.
What Makes It Stand Out:
Engineered for rugged commercial use, it maintains food-safe temperatures by eliminating cold-air leaks. The no-tools installation—soak in hot water for flexibility—and corner-first fitting process minimizes downtime, crucial for restaurants prioritizing operational continuity.
Value for Money:
Priced accessibly for commercial parts, it prevents costly spoilage and energy spikes from poor seals. Compatibility limited to pre-2010 True models ensures reliability, offering strong ROI through sustained efficiency and compliance.
Strengths and Weaknesses:
Strengths: Rapid tool-free replacement; pre-2010 True compatibility; energy/waste reduction; responsive support. Weaknesses: Excludes post-2010 True units; requires powering off during install; stiffness may challenge novice users.
Bottom Line:
A must-have for True refrigerator owners with older units needing a dependable, efficient seal upgrade. Highly recommended for commercial kitchens focused on safety and cost control.
Understanding the Critical Role of Your Refrigerator Gasket
How Gaskets Maintain Temperature Integrity
Your refrigerator gasket, the flexible rubber strip lining the door edges, is fundamentally a thermal barrier. Its primary job is to create an airtight seal when the door closes, preventing warm ambient air from entering the chilled compartment and cold air from escaping. This seal is crucial because the compressor—the heart of the cooling system—only needs to activate periodically to maintain the set temperature when the seal is intact. A compromised gasket forces the compressor into near-constant operation, significantly increasing energy draw and wear on the entire system.
The Direct Link to Energy Consumption
Every minute warm air infiltrates your refrigerator due to a faulty seal, the internal temperature rises. The thermostat detects this increase and triggers the compressor to run longer and more frequently to bring the temperature back down. This constant cycling is incredibly inefficient. Energy experts consistently identify poor door seals as a top contributor to excessive refrigerator energy use, directly translating to higher kilowatt-hours consumed and, consequently, higher electricity bills. A well-sealed unit operates smoothly and intermittently, maximizing efficiency.
Beyond Energy: Additional Impacts of a Failing Seal
While energy waste is the most immediate financial consequence, a degraded gasket causes other problems. Humidity from outside air entering the fridge leads to excessive frost and ice buildup in the freezer compartment, further straining the cooling system. Inside the fresh food section, temperature fluctuations can cause premature food spoilage, leading to wasted groceries and potential food safety risks. You might also notice condensation forming on the exterior of the fridge or around the door, indicating significant seal failure.
Recognizing the Signs of Gasket Failure
Visible Damage and Physical Degradation
Start with a close visual inspection. Look for obvious cracks, tears, or splits in the rubber material, especially at corners or bends where stress is highest. Check for sections that appear brittle, hardened, or crumbling—common signs of aging due to exposure to light, heat, and cleaning chemicals. Sunken or flattened areas where the rubber has lost its plumpness indicate it can no longer form a proper seal. Pay special attention to the magnetic strip embedded within the gasket; if the rubber is separating, the magnet may be exposed or damaged.
The Dollar Bill Test: A Simple Leak Check
This classic test is remarkably effective. Close the refrigerator door firmly on a single dollar bill (or any similar thin paper) placed between the gasket and the cabinet frame. Try to pull the bill out. If it slides out with little to no resistance at any point around the door perimeter, that section of the gasket is not sealing properly. Repeat this test at multiple points—top, bottom, sides, and corners—to map out exactly where the seal is failing. Significant resistance means a good seal in that spot.
Unexplained Temperature Fluctuations and Frost
If your refrigerator feels warmer than usual, or if your freezer is developing excessive frost or ice buildup much faster than normal, a failing gasket is a prime suspect. Warm, humid air entering the appliance causes moisture to condense and freeze rapidly inside the freezer. You might also notice condensation forming on the outside of the refrigerator cabinet, particularly near the door edges, which is a clear sign of warm air infiltration meeting the cold interior walls.
Key Factors When Selecting a Replacement Gasket
Material Matters: Rubber Types and Durability
Most modern refrigerator gaskets are made from flexible thermoplastic elastomers (TPE) or ethylene propylene diene monomer (EPDM) rubber. EPDM is highly valued for its superior resistance to ozone, weathering, extreme temperatures (both hot and cold), and repeated flexing, making it the most durable and long-lasting option. Avoid cheaper, generic rubber that may harden or crack prematurely. Look for gaskets specifically formulated for refrigerator use, ensuring they maintain flexibility in cold environments.
Precision Measurement: Ensuring a Perfect Fit
Accurate measurement is non-negotiable. Measure the entire length of the existing gasket channel around the door, not just the visible rubber. Note the shape of the channel (usually a “U” or “P” shape where the gasket snaps in) and the width of the gasket flange that sits inside it. Measure the thickness of the old gasket’s main body. Crucially, measure the location and size of any mounting holes or tabs. Providing these precise dimensions to your supplier is essential for finding the correct match; a gasket that’s even slightly off can prevent a proper seal.
Compatibility: Matching Your Specific Appliance
Refrigerator gaskets are highly model-specific. The shape of the door, the location of hinges, the contour of the cabinet frame, and the design of the gasket channel all vary significantly between brands and models. Never assume a gasket for one model will fit another, even from the same manufacturer. Always use your appliance’s exact model number (found on a sticker inside the fridge or on the back) when searching for a replacement. Reputable parts suppliers rely on this number to ensure compatibility.
Mastering the Gasket Replacement Process
Essential Tools and Preparation
Gather the necessary tools before starting: a flat-head screwdriver (often for prying out retaining clips), needle-nose pliers (for stubborn clips), a putty knife or plastic scraper (to gently lift old gasket), rubbing alcohol and a clean cloth (for cleaning the channel), and possibly a hairdryer (to gently warm and soften the new gasket for easier installation). Clear the door of all contents and shelves. Having a second pair of hands can be immensely helpful, especially for larger refrigerator doors.
Step-by-Step Removal of the Old Gasket
Begin by carefully prying out any plastic retaining clips or screws holding the old gasket in place using the flat-head screwdriver and pliers. Work slowly around the door perimeter, starting at the bottom hinge area. Once clips are removed, gently pull the old gasket out of its channel. It may be stuck with old adhesive; use the putty knife to carefully scrape it free without damaging the channel. Thoroughly clean the entire channel with rubbing alcohol to remove all dirt, grease, and old adhesive residue. Allow it to dry completely before installing the new gasket.
Installing the New Seal for Maximum Effectiveness
Start installing the new gasket at the bottom center of the door. Warm the gasket slightly with a hairdryer on low heat to make it more pliable (avoid excessive heat). Press the inner flange of the gasket firmly into the clean channel, working your way up one side, across the top, and down the other side. Ensure the gasket sits evenly within the channel without twisting. Reinsert all retaining clips or screws securely, but don’t overtighten. Pay extra attention to corners, stretching the gasket gently to fit snugly without kinking. Close the door slowly to check initial alignment.
Post-Installation Checks and Adjustments
After installation, perform the dollar bill test again at multiple points around the door. The bill should offer noticeable resistance when pulled. Check that the door closes smoothly and evenly without binding. Listen for any unusual gaps where air might whistle. If the seal feels uneven or the door doesn’t close flush, minor adjustments to clip placement or gentle re-seating of the gasket in the channel may be needed. Allow 24-48 hours for the new gasket to fully settle into position before conducting a final, thorough seal check.
Maximizing Longevity of Your New Refrigerator Gasket
Routine Cleaning Practices
Dirt, grime, and food residue buildup are enemies of a good seal. Wipe down the gasket and the cabinet sealing surface weekly with a soft cloth dampened with a mild soap solution or a 50/50 vinegar-water mix. Rinse with a clean damp cloth and dry thoroughly. Avoid harsh chemicals, abrasive cleaners, or degreasers, as these can dry out and crack the rubber over time. Pay special attention to cleaning the magnetic strip area, as grease can significantly reduce its holding power.
Preventing Physical Damage and Stress
Be mindful of how you load the refrigerator door. Avoid overfilling door bins, as the weight can strain the gasket and hinges, pulling the door out of alignment. Never slam the refrigerator door shut; close it gently to avoid jarring the seal. Keep the area around the door clear to prevent accidental bumps that could misalign the door or damage the gasket. Be careful when placing large items inside that might prevent the door from closing fully when shut.
Environmental Factors to Consider
Exposure to direct sunlight can accelerate the aging and drying of rubber gaskets. If your refrigerator is positioned where sunlight hits the door frequently, consider using window film or adjusting blinds. Similarly, avoid placing the fridge near heat sources like ovens, dishwashers, or heating vents, as excessive ambient heat can degrade the gasket material faster. Maintaining a stable, moderate ambient temperature in the kitchen helps prolong gasket life.
When to Consider Professional Help
Diagnosing Complex Seal Failures
Sometimes, the problem isn’t the gasket itself but underlying issues preventing a proper seal. If a new gasket still leaks significantly, the door might be warped, the hinges could be worn or misaligned, or the cabinet frame might be bent. These issues require specialized tools and knowledge to diagnose and repair correctly. A technician can assess whether the door needs realignment, hinge replacement, or even cabinet adjustment.
Challenges with Integrated or Complex Door Designs
High-end refrigerators, French door models, or units with through-the-door ice and water dispensers often have more complex gasket systems with multiple interlocking seals or integrated components. Replacing these can be significantly trickier than a standard top-freezer model. If the gasket involves multiple pieces, intricate channels, or connects to dispenser mechanisms, professional installation is often the safest and most effective route to ensure a perfect, lasting seal.
Warranty and Safety Considerations
If your refrigerator is still under warranty, attempting a DIY gasket replacement might inadvertently void coverage, especially if damage occurs during the process. Furthermore, working with electrical components near the door (like dispenser wiring) carries risks. Professionals have the training and tools to handle these situations safely and correctly, providing peace of mind that the job is done right the first time.
The Significant Payoff of a Well-Sealed Refrigerator
Calculating Your Potential Energy Savings
Replacing a severely compromised gasket can yield substantial energy savings. While exact figures depend on your local electricity rates and the extent of the original leak, reducing a fridge’s runtime by even 10-15% translates to noticeable bill reductions. Consider this: if your refrigerator normally consumes 500 kWh annually, a 15% reduction saves 75 kWh. At the U.S. average of about 15 cents per kWh, that’s over $11 saved per year, potentially recouping the gasket cost within a year or two, with savings continuing for the gasket’s lifespan.
Enhanced Food Preservation and Safety
A consistently cold, stable internal temperature isn’t just good for your wallet; it’s essential for food safety and quality. Proper sealing prevents warm air from entering, which slows bacterial growth and reduces moisture loss in perishables. You’ll notice crispier vegetables, longer-lasting dairy, and meats that stay fresher. Reduced frost buildup in the freezer also means clearer visibility and easier access to frozen items, minimizing the time the door stays open.
Extending the Overall Lifespan of Your Appliance
By reducing the strain on the compressor and cooling system, a well-maintained gasket contributes significantly to your refrigerator’s longevity. When the compressor doesn’t have to run constantly to overcome air leaks, it experiences less wear and tear, lowering the risk of premature and costly failures. Investing in a simple gasket replacement is a proactive step that protects your larger investment in the appliance itself, potentially adding years to its reliable service life.
Frequently Asked Questions
How much does a refrigerator gasket typically cost?
Replacement gaskets generally range from $30 to $80+, depending heavily on the refrigerator brand, model, and door size. French door models or units with complex seals often cost more than standard top-freezer gaskets. Always factor in the cost of potential professional installation if needed.
Can I replace a refrigerator gasket myself?
Yes, replacing a gasket is often a manageable DIY project for those comfortable with basic hand tools. It requires patience, attention to detail, and careful adherence to removal and installation steps. However, complex models or if you encounter significant resistance, professional help might be advisable.
How long do refrigerator gaskets usually last?
A quality gasket installed correctly typically lasts 7 to 12 years. Lifespan is influenced by usage frequency, exposure to heat/sunlight, cleaning methods, and the original material quality. Regular inspection helps catch wear before it causes major energy loss.
Will a new gasket immediately lower my energy bill?
You should see a reduction in your refrigerator’s energy consumption almost immediately after a successful installation, as the compressor won’t need to run as frequently. However, the impact on your monthly bill might take one or two billing cycles to become clearly noticeable, depending on other household energy use.
Why does my new gasket feel stiff and not seal perfectly right away?
New rubber gaskets are often stiff from packaging. They need time (usually 24-72 hours) to fully relax and conform to the shape of your refrigerator door. Gently warming it with a hairdryer during installation can help, but avoid excessive heat. The seal usually improves significantly within a few days.
How can I tell if the problem is the gasket or something else?
Perform the dollar bill test thoroughly. If it pulls out easily in multiple spots, the gasket is the likely culprit. If the seal feels good but the fridge is still warm or running constantly, the issue could be with the condenser coils, evaporator fan, thermostat, or compressor – requiring professional diagnosis.
Can I repair a small tear in my gasket instead of replacing it?
Temporary fixes like rubber cement or adhesive-backed rubber patches exist, but they are rarely effective long-term solutions. The patch material often doesn’t bond well to aged rubber, fails under cold temperatures, or creates an uneven surface that prevents a proper seal. Replacement is nearly always the most reliable and cost-effective fix.
Does the color of the replacement gasket matter?
Functionally, no. Gaskets are primarily black because carbon black pigment significantly enhances the rubber’s durability and UV resistance. While some white or beige options exist for specific vintage models, black is standard and offers the best longevity for modern appliances.
How often should I check my refrigerator gasket?
Perform a quick visual inspection and the dollar bill test at least twice a year—common times are when you change clocks for daylight saving time. Also check it immediately if you notice condensation on the fridge exterior, excessive frost, or suspect your energy bills are unusually high for no other reason.
Can a bad gasket cause my refrigerator to stop cooling entirely?
While a failing gasket dramatically increases energy use and causes temperature fluctuations, it typically won’t cause a complete cooling failure on its own. However, the constant overwork it forces on the compressor can eventually lead to compressor burnout, which would cause a total loss of cooling. Replacing a bad gasket proactively helps prevent this cascade failure.