There’s something uniquely satisfying about seamlessly integrating a compact built-in refrigerator into your kitchen cabinetry. The clean lines, the space-saving design, the way it disappears into your culinary landscape—it’s the hallmark of a well-thought-out modern kitchen. But before you slide that sleek unit into its custom enclosure, there’s a critical behind-the-scenes element that can make or break your entire installation: the electrical wiring.
Getting the wiring right isn’t just about making the compressor hum. It’s about safety, code compliance, protecting your investment, and ensuring years of trouble-free operation. As a DIY electrician, you’ve probably tackled outlets and light fixtures, but appliance circuits—especially for refrigeration—come with their own set of nuanced requirements that can trip up even experienced hobbyists. This guide walks you through everything from load calculations to GFCI protection, turning what seems like a simple plug-and-play task into a professional-grade installation you’ll be proud of.
Top 10 Compact Built-In Refrigerators Wiring
Detailed Product Reviews
1. Frigidaire 5.0 CU FT./142L capacity built in under counter fridge. Frost free, Staineless Steel

Overview: The Frigidaire 5.0 cubic foot under-counter refrigerator delivers premium built-in beverage storage for discerning homeowners. With 142-liter capacity, this stainless steel unit accommodates wine bottles, beer cans, and soda in a sleek, integrated design that fits seamlessly beneath countertops, making it ideal for home bars, kitchens, or entertainment spaces.
What Makes It Stand Out: The frost-free venting system sets this unit apart, eliminating manual defrosting while optimizing efficiency. The lockable door with included key provides security for valuable wine collections or keeps children away from adult beverages. Its specialized beverage-focused design prioritizes convenient access and organization for mixed drink storage unlike standard compact fridges.
Value for Money: At $549.99, this Frigidaire commands a premium price but justifies it through built-in readiness, frost-free operation, and specialized beverage storage. Comparable under-counter models often exceed $600, making this competitively priced for its category. The lock feature and dedicated beverage configuration add value that generic mini-fridges lack.
Strengths and Weaknesses: Strengths include true built-in design, frost-free convenience, secure locking mechanism, and generous capacity for mixed beverages. The stainless steel finish resists fingerprints and maintains a professional appearance. Weaknesses include the premium price point, limited freezer space (none mentioned), and potential noise levels typical of compressor cooling. The beverage-specific shelving may not suit those needing general food storage.
Bottom Line: Perfect for entertainment enthusiasts seeking integrated beverage storage, this Frigidaire delivers premium features and security. Worth the investment if you prioritize frost-free operation and built-in aesthetics, though overkill for basic dorm or office needs.
2. Kalamera Mini Fridge Beverage and Wine Cooler Built-in or Freestanding - 118 Cans & 16 Bottles Capacity Wine Refrigerator Cooler

Overview: The Kalamera dual-zone cooler elegantly combines beverage and wine storage in a single 23.4-inch wide unit. Holding 118 cans plus 16 wine bottles, this versatile refrigerator adapts to both built-in and freestanding installations. The wooden frame construction and blue LED lighting create a premium aesthetic for home bars and entertaining spaces.
What Makes It Stand Out: The eco-friendly FSC-certified wooden frame reduces vibration and protects wine integrity while demonstrating environmental responsibility. The temperature memory function automatically restores settings after power outages, preventing spoilage. Its dual-purpose design eliminates the need for separate wine and beverage coolers, maximizing space efficiency.
Value for Money: Priced at $493.99, this unit offers exceptional value by merging two appliances into one. Purchasing separate wine and beverage coolers would cost $700+. The advanced compressor system runs quietly with fewer cycles, reducing energy consumption and wear. Premium materials and thoughtful features justify the mid-premium price point.
Strengths and Weaknesses: Strengths include versatile storage configuration, eco-conscious construction, temperature memory, quiet operation, and dual installation options. The wooden shelving cradles wine safely while accommodating various bottle shapes. Weaknesses include single-zone temperature limitation (all items share one temperature), premium pricing for budget buyers, and the 16-bottle capacity may insufficient for serious collectors.
Bottom Line: An excellent hybrid solution for casual wine enthusiasts who entertain frequently. The Kalamera delivers premium features and eco-friendly design at a reasonable price, though dedicated oenophiles may need larger wine-specific storage.
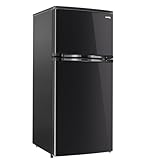
3. Frigidaire Compact Fridge, 4.5 Cubic Feet, Stainless Steel

Overview: Frigidaire’s 4.5 cubic foot compact refrigerator balances versatility and value in a space-saving design. This stainless steel unit features a dedicated freezer compartment, can dispenser, and adjustable tempered glass shelves, making it suitable for dorms, offices, or small apartments where both refrigeration and freezing capabilities are essential.
What Makes It Stand Out: The integrated can dispenser offers convenient beverage access rarely found in compact fridges. The reversible door installation provides flexibility for tight spaces, while the flush-back design maximizes floor space efficiency. The inclusion of a true freezer compartment with ice tray distinguishes it from beverage-only coolers.
Value for Money: At $229.00, this model hits the sweet spot for budget-conscious buyers needing full refrigeration functionality. It undercuts many competitors with similar capacity by $50-100 while including desirable features like glass shelves and a can dispenser. The reputable Frigidaire brand adds reliability assurance.
Strengths and Weaknesses: Strengths include freezer compartment, can dispenser, reversible door, adjustable thermostat, and tempered glass shelves. The flush-back design fits snugly against walls. Weaknesses include manual defrost requirement, smaller capacity than dedicated beverage coolers, and basic compressor noise levels. The freezer section is compact and may struggle with heavy freezing demands.
Bottom Line: A practical workhorse for general food and beverage storage. Ideal for students or office workers needing basic freezing capability without premium pricing. Skip if you require frost-free operation or specialized wine storage.
4. Antarctic Star 2.56 Cu.Ft. Mini Fridge with Freezer, Small Refrigerators with Adjustable Thermostat, Low Noise, Energy Saving, Compact Refrigerators for College Dorm, Office, Bedroom, Stainless Steel

Overview: The Antarctic Star 2.56 cubic foot mini fridge targets ultra-compact spaces with its 25-inch height and 19-inch depth. Designed for dorm rooms and bedrooms, this unit includes a small freezer compartment and 7-speed temperature control ranging from 32-50°F, providing precise cooling flexibility in a whisper-quiet package operating at just 43 decibels.
What Makes It Stand Out: The 7-speed temperature control offers granular adjustment uncommon in budget mini-fridges. The ultra-quiet 43dB operation rivals library noise levels, making it ideal for sleeping areas. The dual-zone configuration separates freezing and refrigeration in a tiny footprint, while the reversible door adapts to any room layout.
Value for Money: At $159.99, this represents exceptional value for noise-sensitive environments. Comparable quiet models cost $200+. The precise temperature control and dual-zone design deliver features typically found in pricier units. Energy-saving design reduces long-term operational costs.
Strengths and Weaknesses: Strengths include ultra-quiet operation, precise temperature control, compact footprint, reversible door, and dual-zone functionality. The glass shelves are easy to clean and adjustable. Weaknesses include limited 2.56 cu ft capacity, small freezer section unsuitable for bulk storage, basic build quality, and manual defrost requirement. The brand lacks Frigidaire’s long-term track record.
Bottom Line: Perfect for dorm dwellers or bedroom users prioritizing quiet operation. The Antarctic Star delivers surprising features at a budget price, though capacity constraints limit its suitability for shared spaces or serious food storage.
5. Avanti Mini Fridge Compact Refrigerator for Home Office or Dorm, Features Compressor Cooling Single Door Removable Shelves Automatic Defrost and Adjustable Temp Control, 1.7-Cu.Ft, Stainless Steel

Overview: Avanti’s 1.7 cubic foot mini fridge offers essential refrigeration in an ultra-compact footprint perfect for tight spaces. This ENERGY STAR certified unit serves offices, dorms, and bedrooms with reliable compressor cooling, automatic defrost, and adjustable temperature control. The reversible door and recessed handle maximize placement flexibility.
What Makes It Stand Out: The ENERGY STAR certification ensures cost-effective operation, rare in this price tier. Automatic defrost eliminates manual maintenance hassles common in budget models. The removable shelves allow custom configuration for snacks and beverages, while the 1-year manufacturer warranty provides peace of mind.
Value for Money: At $129.97, this is the entry-level champion for basic cooling needs. It undercuts most competitors by $30-50 while offering superior efficiency and automatic defrost. The ENERGY STAR rating saves approximately $20-30 annually on electricity compared to non-certified models, quickly offsetting the purchase price.
Strengths and Weaknesses: Strengths include excellent energy efficiency, automatic defrost, compact size, reversible door, and brand warranty. The compressor cooling maintains consistent temperatures. Weaknesses include minimal 1.7 cu ft capacity, no freezer compartment, basic plastic interior, and limited temperature range. Not suitable for storing frozen items or large quantities.
Bottom Line: The smart choice for office workers or students needing basic beverage and snack storage. The Avanti combines efficiency and reliability at an unbeatable price, though its tiny capacity and lack of freezer limit versatility.
6. roomwell E-Star 3.3 Cu Ft Mini Fridge without Freezer - AUTO DEFROST, Reversible Single Door, Glass Shelf Refrigerator - A Space-Saving Marvel for Your Bedroom, Dorm, and Office

Overview:
The roomwell E-Star 3.3 Cu Ft Mini Fridge targets users seeking freezerless convenience in compact living spaces. This single-door unit combines automatic defrost technology with Energy Star efficiency, making it a maintenance-minimal option for bedrooms, dorms, and offices. The reversible door and flat-back design maximize placement flexibility in tight quarters, while three glass shelves and multi-tier door storage accommodate diverse items efficiently.
What Makes It Stand Out:
Automatic defrost eliminates manual chipping away at ice buildup—a rare feature in this size class. The eco-friendly R600a refrigerant sips just 1 kWh daily, cutting energy costs nearly in half compared to older models. The two-year replacement warranty demonstrates manufacturer confidence uncommon in mini-fridges. Adjustable leveling legs and can dispenser storage add practical touches that enhance daily use.
Value for Money:
At $284.99, this fridge commands a premium over basic mini-fridges. However, the auto-defrost system, superior warranty, and 50% energy savings justify the investment for those prioritizing convenience and long-term operating costs. Comparable manual-defrost models may cost less upfront but require more maintenance and higher electricity consumption over time.
Strengths and Weaknesses:
Pros include maintenance-free operation, excellent energy efficiency, flexible storage configuration, reversible door, and exceptional warranty coverage. Cons center on the absence of a freezer compartment—limiting frozen food options—and a price point that exceeds simpler alternatives. The temperature range (32-50°F) may prove too narrow for users needing colder storage.
Bottom Line:
Ideal for consumers who value set-it-and-forget-it convenience over freezer capacity. The roomwell E-Star excels in spaces where automatic defrost and energy savings outweigh the need for frozen storage, making it a smart long-term investment for dedicated refrigeration needs.
7. Upstreman 1.7 Cu.ft Mini Fridge with Freezer, Dorm Essentials, Adjustable Thermostat, Energy Saving, Low Noise, Single Door Compact Refrigerator for Dorm, Office, Bedroom, Stainless- FR17

Overview:
The Upstreman 1.7 Cu.ft Mini Fridge delivers essential cooling in an ultra-compact package perfect for dorm rooms and personal offices. This budget-friendly unit includes a small freezer compartment for ice cubes and short-term frozen storage, operating at a whisper-quiet 38dB that won’t disturb sleep or work. Its diminutive footprint fits under desks or on countertops where space is premium.
What Makes It Stand Out:
Remarkable energy efficiency consuming only 0.5 kWh daily keeps operating costs negligible. The five-stage temperature control (33.8-46.4°F) offers precise cooling adjustment, while the R600a refrigerant ensures eco-conscious performance. At just 19.3 inches tall, this unit maximizes vertical space efficiency better than most competitors in its class.
Value for Money:
At $119.97, this represents exceptional value—among the most affordable mini-fridges with a freezer. The low purchase price combined with minimal energy costs creates an unbeatable total cost of ownership for budget-conscious students or office workers. Few alternatives deliver this feature set under $150.
Strengths and Weaknesses:
Pros include ultra-low noise operation, stellar energy efficiency, compact dimensions, and freezer inclusion at a bargain price. The one-year service guarantee provides basic protection. Cons involve limited 1.7 cu ft capacity, a freezer unsuitable for ice cream or long-term storage, and basic mechanical controls lacking digital precision. The small size may prove insufficient for multiple users.
Bottom Line:
A no-brainer for those needing basic refrigeration on a strict budget. The Upstreman sacrifices capacity and advanced features for affordability and efficiency, making it perfect for dorm essentials or secondary office use where quiet operation and low utility bills matter most.
8. BLACK+DECKER 2.5 Cu. Ft. Compact Refrigerator, ENERGY STAR Certified, Single Door Mini Fridge with Chiller Compartment, Personal Fridge for Home or Dorm Room, R600a Refrigerant, BCRK25V,Stainless Look

Overview:
BLACK+DECKER’s 2.5 Cu. Ft. Compact Refrigerator balances recognizable brand reliability with practical design for small-space living. This Energy Star certified unit features a chiller compartment—colder than a fridge but not a true freezer—making it versatile for beverages, leftovers, and lightly frozen items. The sleek stainless-look finish suits modern dorm rooms and offices.
What Makes It Stand Out:
The trusted BLACK+DECKER name ensures parts availability and service network access uncommon with generic brands. Two removable glass shelves and full/half-width door bins accommodate 2-liter bottles and cans efficiently. The reversible door and adjustable leveling legs provide installation flexibility that budget competitors often lack.
Value for Money:
Priced at $169.99, this fridge occupies the sweet spot between budget generics and premium models. The brand pedigree, Energy Star efficiency, and flexible storage justify the modest premium over bottom-tier alternatives while remaining accessible. You’re paying for reliability without luxury markup.
Strengths and Weaknesses:
Pros include reputable manufacturer support, efficient R600a refrigerant, reversible door, adjustable leveling legs, and chiller compartment versatility. The compact footprint suits dorm rooms and offices. Cons feature the chiller’s limited freezing capability—insufficient for ice cream—and modest 2.5 cu ft capacity that may prove cramped for multiple users. Finish options beyond stainless-look may not match all décors.
Bottom Line:
A sensible choice for buyers prioritizing brand trustworthiness and balanced features. The BLACK+DECKER BCRK25V offers reliable performance without premium pricing, ideal for single users needing moderate storage with occasional light freezing in residential or academic settings.
9. Kalamera Wine Fridge 18 Bottle - 12 inch Mini Cooler Refrigerator, Built-in or Freestanding, with Stainless Steel & Double-Layer Tempered Glass Door, and Temperature Memory Function

Overview:
The Kalamera Wine Fridge serves discerning oenophiles with specialized 18-bottle capacity in a slim 12-inch profile. This dual-purpose unit functions as built-in or freestanding, featuring a temperature range of 40-66°F specifically engineered for wine preservation rather than general food storage. The stainless steel and double-layer tempered glass construction creates an elegant showcase.
What Makes It Stand Out:
Wine-specific design elements include FSC-certified wooden racks that minimize vibration and bottle friction, a carbon filter preventing odor contamination, and temperature memory that restores settings after power outages—critical for valuable collections. The 12-inch width fits where standard fridges cannot, and low-vibration compressor technology protects wine sediments.
Value for Money:
At $329.99, this wine fridge competes favorably with specialty brands offering fewer features. The premium materials, precise temperature control, and flexible installation deliver strong value for wine enthusiasts seeking professional-grade storage without built-in appliance costs. Comparable units often exceed $400.
Strengths and Weaknesses:
Pros encompass vibration-reducing compressor, elegant showcase design, eco-friendly wood sourcing, odor protection, and installation versatility. The single-zone cooling suits most collectors. Cons limit versatility—unsuitable for food storage—and capacity may prove insufficient for expanding collections. The narrow 12-inch width restricts larger bottle formats like Champagne.
Bottom Line:
Perfect for serious wine collectors needing dedicated, reliable storage. The Kalamera prioritizes wine preservation over multi-purpose functionality, making it an excellent investment for protecting and displaying medium-sized collections in apartments or kitchens where space and aesthetics matter equally.
10. RecPro 4.4 Cu Ft 12V RV Refrigerator with Freezer | Frost-Free, Black Finish | Adjustable Shelves, Reversible Door, Built-In Lock | Off-Grid Camper Fridge | 19.5”W x 23.5”D x 43.5”H
Overview:
The RecPro 4.4 Cu Ft 12V RV Refrigerator addresses mobile living needs with robust off-grid capability. Designed specifically for recreational vehicles, this frost-free unit operates on 12V power, eliminating inverter losses and generator dependency while providing full fridge-freezer functionality. The black finish and compact dimensions suit RV aesthetics and space constraints.
What Makes It Stand Out:
Dedicated 12V operation sets this apart from residential mini-fridges requiring AC power. The frost-free design prevents ice accumulation without manual defrosting—crucial for mobile lifestyles. A built-in lock secures contents during travel, while adjustable shelves accommodate varied provisions. Multiple size options (1.7 to 10 cu ft) ensure fitment across RV classes.
Value for Money:
At $689.95, this fridge commands premium pricing justified by RV-specific engineering. Standard residential units cannot match the power efficiency or vibration resistance required for mobile use. For off-grid enthusiasts, the elimination of inverter costs and energy waste offsets the higher initial investment through reduced electrical system demands.
Strengths and Weaknesses:
Pros include purpose-built 12V efficiency, frost-free convenience, travel-ready locking mechanism, adjustable storage, and size versatility. The 4.4 cu ft capacity serves couples or small families. Cons involve high cost, requirement for 12V electrical system, and dimensions that may prove large for some RV installations. It’s overkill for stationary home use.
Bottom Line:
An essential upgrade for RV owners and off-grid dwellers. The RecPro delivers mobile-specific features that standard fridges cannot, making it worth every penny for those living life on the road where power efficiency, durability, and travel-ready design are non-negotiable requirements.
Understanding Compact Built-In Refrigerator Electrical Requirements
Compact built-in refrigerators might look small, but their electrical demands tell a different story. Most units draw between 3 to 6 amps during normal operation, but that number skyrockets during compressor startup—sometimes hitting 15-20 amps for a brief moment. This inrush current is what separates refrigerator circuits from your typical small appliance branch circuit.
The continuous running wattage usually falls in the 150-400 watt range, but you must size your circuit for the locked-rotor amperage (LRA) listed on the nameplate, not the running amps. That metal tag inside your refrigerator door is your bible here. It’ll specify voltage, frequency, full-load amperage (FLA), and LRA. Pro tip: photograph this nameplate before the unit is installed—you’ll need these numbers during inspection and for future troubleshooting.
Safety First: Essential Precautions Before You Start
Let’s get something straight: working with electricity around water lines and finished cabinetry demands a different mindset than wiring a garage outlet. Start by shutting off power at the main breaker, not just the branch circuit you’re working on. Use a non-contact voltage tester to confirm dead wires, and lock out the panel if you’re working alone.
Remove jewelry, wear insulated shoes, and keep a Class C fire extinguisher nearby—refrigerator compressors can leak flammable refrigerant. Never assume the cabinet space is dry; moisture from plumbing rough-ins can create conductive paths. And here’s the non-negotiable: if your installation requires drilling through structural members or you encounter aluminum wiring, stop and call a licensed electrician. Some lines shouldn’t be crossed.
Decoding Electrical Codes and Regulations
The National Electrical Code (NEC) Article 422 covers appliances, but it’s Article 210’s branch circuit requirements that’ll govern your installation. For permanently connected equipment like hardwired refrigerators, NEC 422.10 requires the branch circuit to be sized at 125% of the marked rating. That means a 12-amp unit needs a 15-amp circuit minimum, but you’ll likely need 20 amps for that startup surge.
Local amendments can be stricter than NEC. Some jurisdictions now require arc-fault circuit interrupter (AFCI) protection for all kitchen circuits, while others exempt dedicated appliance circuits. Your permit office is your friend here—visit them before buying materials. They’ll tell you if your area requires tamper-resistant receptacles in kitchens or has specific conduit requirements for cabinet runs. Ignoring local codes means ripping out finished work later.
Tools and Materials You’ll Need
A professional installation starts with professional tools. Beyond your standard wire strippers and multimeter, you’ll need a clamp meter to measure inrush current during testing. Pick up a fish tape with a non-conductive leader for pulling wire through cabinet cavities, and invest in a quality stud finder that detects AC wiring.
Material-wise, don’t skimp on wire. Use 12 AWG copper for 20-amp circuits, even if you think 14 AWG would suffice. For runs longer than 50 feet, bump up to 10 AWG to combat voltage drop. Armored cable (BX) often works better than NM Romex in cabinet installations where nails from countertop installation could pierce the cable. And always use spec-grade receptacles—the $3 difference buys you better terminal clamps and longer life.
Circuit Sizing: Getting It Right the First Time
Here’s where DIYers most often go wrong. You can’t just add up the running amps and call it a day. The NEC requires you to size for the nameplate’s maximum current draw, plus that 125% safety margin for continuous loads. For a typical 6-amp compact refrigerator, you’re looking at a 15-amp circuit minimum. But—and this is crucial—that doesn’t account for the defrost heater.
Many modern compact units have hidden defrost mechanisms that pull an additional 3-5 amps. Check the specifications for “defrost amps” or “auxiliary heater load.” If present, add this to your calculation. A unit with 6 amps running + 4 amps defrost = 10 amps total. Multiply by 125% gives you 12.5 amps, which technically fits a 15-amp circuit, but you’re flirting with nuisance tripping. The smart money installs a 20-amp circuit every time.
Dedicated Circuits: Why They Matter
NEC doesn’t explicitly require refrigerators to be on dedicated circuits, but practical experience screams that they should be. Sharing a circuit with your garbage disposal or microwave creates a perfect storm for tripped breakers and spoiled food. More importantly, when that breaker trips, you might not notice until it’s too late.
A dedicated circuit also simplifies troubleshooting. When the refrigerator is the only load, any voltage drop or current spike points directly to the appliance or its wiring. Plus, dedicated circuits protect sensitive electronics. Modern refrigerators have control boards that hate voltage fluctuations caused by other appliances cycling on. Run a separate 20-amp circuit from your panel directly to the refrigerator location. Future you will thank present you.
Voltage Requirements: 110V vs 220V Systems
Most compact built-in refrigerators sold in North America run on 120V, but European-style units and some high-performance models require 240V. The nameplate is your definitive guide—never guess based on plug type. A 240V unit will have a different receptacle configuration (usually NEMA 6-15R) and requires a double-pole breaker.
If you’re installing a 240V unit, you must use a dedicated 3-wire cable with ground (hot-hot-ground). The neutral wire isn’t used, but running it anyway future-proofs the circuit. Voltage drop becomes more critical at 240V—a 10% drop at 240V is 24 volts, which can cause compressor starting issues. Keep runs under 75 feet for 240V units, and always verify voltage at the receptacle under load before finalizing the installation.
Grounding: The Unsung Hero of Appliance Safety
Grounding a refrigerator isn’t just about meeting code—it’s about saving lives. The metal chassis must have a low-resistance path back to the panel. Use the grounding screw inside the appliance junction box, not just the cord’s ground pin. For hardwired installations, run a separate equipment grounding conductor sized per NEC Table 250.122 (12 AWG for 20-amp circuits).
Test your ground with a receptacle tester, but don’t stop there. Use your multimeter to check resistance between the ground pin and a known ground—anything over 1 ohm indicates a problem. In older homes with metallic water pipes, you might be tempted to bond to the plumbing. Don’t. The NEC prohibits using water pipes as the sole grounding path. Install a proper equipment ground and sleep better at night.
Outlet Placement Strategies for Seamless Integration
The location of your receptacle determines how seamlessly your refrigerator fits. Most manufacturers specify a recessed outlet box to prevent the plug from pushing the unit away from the wall. Install the box 48-52 inches from the floor, aligned with the refrigerator’s cord entry point. This height keeps the cord away from floor moisture and makes unplugging easier.
For frameless cabinet installations, mount the box in the adjacent cabinet, not behind the refrigerator. Drill a 1-inch hole through the cabinet side panel and use a cord grommet for protection. Never run the power cord through the same hole as water lines—maintain at least 2 inches separation. If your unit requires a water line, position the outlet on the opposite side of the cabinet cavity to prevent cross-connection hazards.
Hardwired vs Plug-In: Making the Right Choice
Hardwiring offers a cleaner look and eliminates a potential failure point (the plug connection), but it comes with trade-offs. Once hardwired, the refrigerator becomes a permanent fixture—removing it requires disconnecting wires in a junction box. For rental properties or if you upgrade appliances frequently, a receptacle makes more sense.
If you choose hardwired, install a disconnect switch within sight of the appliance. This satisfies NEC 422.31 and gives you a way to kill power without crawling behind the unit. Use a metal junction box with a proper cover plate, and secure the cable within 12 inches of the box. For plug-in installations, use a spec-grade receptacle with side-wire terminals, not the cheap push-in type. The extra clamping force prevents loose connections that cause voltage drop and heat buildup.
Running Cable Through Cabinets Safely
Cabinet interiors aren’t designed for electrical runs, so you must protect the cable. Never run NM cable loose through cabinet cavities—it’s vulnerable to screws and nails during countertop installation. Use flexible metal conduit (FMC) or armored cable for exposed runs. Secure it with straps every 4.5 feet and within 12 inches of every box.
When drilling through cabinet backs or sides, drill in the middle of the panel thickness to avoid blowout. Use a 1-inch spade bit and install plastic bushings on both sides of the hole. If you must run cable behind drawers, install a metal guard plate to prevent the drawer slides from piercing the cable. And never, ever notch cabinet structural members to accommodate cable—route around them or use surface-mounted raceway.
GFCI and AFCI Protection: When and Where Required
This is the most misunderstood aspect of refrigerator wiring. NEC 210.8(A) requires GFCI protection for all 125V, 15- and 20-amp kitchen receptacles serving countertops. However, the 2020 NEC clarified that receptacles behind appliances are exempt if they’re not readily accessible. Your built-in refrigerator receptacle likely qualifies for this exemption.
That said, some local inspectors interpret “readily accessible” differently. The safe approach? Install a GFCI breaker at the panel rather than a GFCI receptacle. This protects the entire circuit without putting the reset button behind a 200-pound appliance. For AFCI protection, NEC 210.12 requires it for most residential circuits, but some jurisdictions exempt dedicated appliance circuits. Check locally, and if required, use a dual-function AFCI/GFCI breaker to cover all bases.
Troubleshooting Common Wiring Issues
You’ve wired everything perfectly, but the refrigerator won’t start. First, check voltage at the receptacle under load. A reading above 125V or below 108V indicates a supply problem. Use your clamp meter to measure inrush current—if it exceeds the breaker rating momentarily, that’s normal. If it stays high, you have a compressor problem.
Frequent tripping usually points to a ground fault or overload. Disconnect the refrigerator and test the circuit with a load bank. If the breaker holds, the appliance is at fault. If it trips, you’ve got a wiring issue. Check for neutral-to-ground shorts with your multimeter—this is the most common cause of mysterious breaker trips. And always wiggle-test your connections; a loose wire nut can pass initial testing but fail under vibration.
Post-Installation Testing Procedures
Don’t just plug it in and walk away. Perform a voltage drop test: measure voltage at the panel, then at the receptacle with the refrigerator running. The difference should be less than 3%. Check polarity with a receptacle tester—reversed hot and neutral won’t prevent operation but creates a shock hazard. Test the ground fault function by momentarily connecting a 15kΩ resistor between hot and ground; the GFCI should trip within 25 milliseconds.
Document everything. Take photos of the nameplate, your wire connections, and the panel labeling. Use a thermal camera (or borrow one) to check for hot spots after 24 hours of operation. Any connection warmer than 10°F above ambient needs tightening. Finally, label the circuit “Kitchen Refrigerator – Dedicated” at both the panel and receptacle. Future homeowners and electricians will thank you.
Maintenance Tips for Long-Term Performance
Your wiring job isn’t finished when the refrigerator is cold. Every six months, check the receptacle tension by plugging in a test cord—it should grip firmly. Loose receptacles create arcing that damages plugs and creates fire hazards. Tighten terminal screws annually; they loosen from thermal cycling. If you used a GFCI breaker, test its function monthly using the test button.
Keep the circuit documentation in a plastic bag inside the electrical panel door. Note the wire route, any hidden junction boxes, and the date of installation. When the refrigerator eventually needs replacement, you’ll know exactly what you’re working with. And inspect the cord where it enters the refrigerator chassis—vibration can wear through insulation. A simple grommet or strain relief prevents expensive problems.
When to Call a Professional Electrician
Know your limits. If your panel is full and you’re considering tandem breakers, consult a pro. Load calculations for panel upgrades involve more than just adding amps. Similarly, if your home has aluminum wiring, the special connections and oxidation inhibitors required are not DIY-friendly. Any work in the main service panel beyond installing a branch circuit breaker warrants professional eyes.
Structural modifications to accommodate wiring also raise red flags. Cutting joists or drilling through engineered beams requires an engineer’s approval. And if your installation requires three-way switches or complex control circuits (like integrated panel-ready units with cabinet lighting), the time you’ll spend troubleshooting exceeds the cost of hiring an expert. Remember: a good DIYer knows when to DIY, and when to dial a pro.
Energy Efficiency Considerations in Your Wiring Plan
Proper wiring directly impacts energy consumption. Undersized wire causes voltage drop, forcing the compressor to work harder and run longer. Over a year, a 5% voltage drop can increase energy use by 8-10%. That’s $20-30 wasted annually on a $3 difference in wire cost. Use the proper gauge, keep runs short, and minimize connections.
Consider future-proofing with a 20-amp circuit even if your current unit only needs 15 amps. The next refrigerator might have smart features, Wi-Fi, or interior lighting that adds to the load. Install a receptacle with USB charging ports in the adjacent cabinet—it costs $15 more and gives you a convenient phone charging spot without stealing power from the refrigerator circuit. And always use copper wire; aluminum’s higher resistance makes it a poor choice for sensitive appliance circuits.
Frequently Asked Questions
Can I use an extension cord for my built-in refrigerator temporarily?
Absolutely not. Extension cords are prohibited for permanent appliance installations by NEC 422.16 and create significant fire hazards. The voltage drop across even a heavy-duty cord can cause compressor damage, and the connection points are prone to overheating. If your built-in location lacks a receptacle, install one properly using permanent wiring methods.
What gauge wire should I use for a 20-amp refrigerator circuit?
Use 12 AWG copper wire for all 20-amp circuits. While 14 AWG is rated for 15 amps, the NEC prohibits its use on 20-amp breakers. For runs exceeding 100 feet, upgrade to 10 AWG to compensate for voltage drop. Always check the appliance nameplate for specific requirements—some high-efficiency units specify minimum wire size to maintain warranty coverage.
Can I share the refrigerator circuit with other kitchen outlets?
You can, but you shouldn’t. While NEC allows shared circuits for non-dedicated appliances, the startup surge can trip breakers when other loads are present. More importantly, a tripped breaker means spoiled food. Professional installations always use dedicated circuits for refrigeration. The cost difference is minimal compared to the risk of losing a week’s worth of groceries.
Do I need GFCI protection behind my built-in refrigerator?
Probably not, but check local codes. The 2020 NEC exempts receptacles behind appliances from GFCI requirements if they’re not readily accessible. However, some jurisdictions enforce GFCI protection regardless of location. When in doubt, install a GFCI breaker at the panel rather than a receptacle behind the appliance. This satisfies code without putting the reset button in an inaccessible location.
Is hardwiring better than using a plug and receptacle?
It depends on your situation. Hardwiring provides a cleaner installation and eliminates a potential failure point, but makes future replacement difficult. Use hardwired connections for permanent installations where the appliance matches the cabinetry. Choose a receptacle if you rent, plan to upgrade appliances, or want the flexibility to easily disconnect power for service.
How far can my refrigerator be from the electrical panel?
There’s no code maximum, but voltage drop becomes an issue beyond 75 feet for 120V circuits, or 150 feet for 240V circuits. Keep the total voltage drop under 3% for optimal performance. For a 20-amp, 120V circuit at 100 feet, use 10 AWG wire instead of 12 AWG. Always calculate voltage drop using the actual running current, not the breaker rating.
What type of receptacle should I install?
Use a spec-grade, commercial duplex receptacle with side-wire terminals. Avoid the cheap residential-grade receptacles with push-in connections—they loosen over time and create resistance. For 20-amp circuits, install a NEMA 5-20R receptacle (it has a T-shaped neutral slot). Even if your current appliance has a 5-15P plug, the 5-20R provides better contact pressure and future-proofs the installation.
Will my refrigerator need AFCI protection?
Most likely, yes. NEC 210.12 requires AFCI protection for most residential branch circuits, including kitchen circuits. However, some jurisdictions exempt dedicated appliance circuits. The practical solution is a dual-function AFCI/GFCI breaker, which satisfies both requirements. If nuisance tripping occurs, the problem is usually a loose connection or damaged cable, not the breaker being overly sensitive.
How much should a DIY refrigerator circuit installation cost?
Material costs typically run $75-150 for a 20-amp circuit up to 50 feet from the panel. This includes wire, breaker, receptacle, box, and conduit. Permits add $50-100 depending on your jurisdiction. If you need to open drywall or run conduit through finished spaces, factor in another $50 for repair materials. Professional installation would cost $300-600, so DIY saves significant money if done correctly.
Why does my new refrigerator trip the breaker immediately?
First, verify the circuit isn’t shared with other loads. Then check for a short circuit using a multimeter—disconnect the refrigerator and test resistance between hot and neutral; it should read infinite ohms. If the circuit tests fine, the refrigerator likely has a manufacturing defect or shipping damage. Don’t keep resetting the breaker—this can damage the compressor. Contact the manufacturer or retailer for a warranty service call.